

SCIM provisioning requires an existing Microsoft Entra ID SAML integration. Complete the SSO setup first.
Prerequisites
You need the SCIM credentials from your Team Management page in Tuple. If you don’t see them, contact support@tuple.app to enable SCIM for your team.Setup
1
Open provisioning settings
In the Microsoft Entra admin center, navigate to your Tuple enterprise application.Select Provisioning in the left sidebar.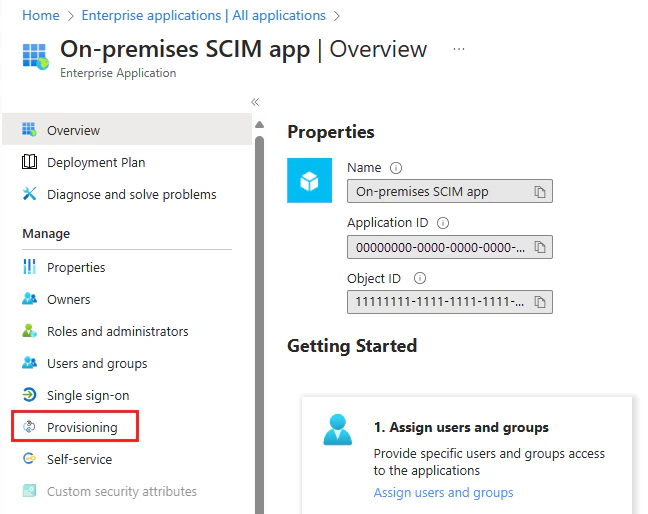
2
Set provisioning mode
Click Get started, then set Provisioning Mode to Automatic.
3
Enter admin credentials
Under Admin Credentials, fill in the following fields:Tenant URLSecret Token — your SCIM username and SCIM password from the Tuple Team Management page, joined with a colon:For example, if your SCIM username is
acme and your SCIM password is abc123, enter acme:abc123. The password alone is not a valid token.Click Test Connection to verify Entra ID can reach Tuple’s SCIM endpoint. A success message confirms the credentials are valid.4
Configure attribute mappings
Under Mappings, disable Provision Microsoft Entra ID Groups. Tuple supports user provisioning only. If group provisioning remains enabled, Entra ID requests the unsupported
/Groups endpoint and may quarantine the initial sync with an HTTP 404 error.Expand Mappings and select Provision Microsoft Entra ID Users.Ensure the following attributes are mapped:Click Save.
5
Turn on provisioning
Return to the Provisioning overview. Set Provisioning Status to On and click Save.Entra ID runs an initial sync cycle, then syncs changes approximately every 40 minutes.