~/.tuple/triggers directory. We recommend placing each trigger you create in its own subdirectory in that location.
Let’s create a new trigger that announces out loud the name of the person who is calling you:
- Created a new subdirectory for the trigger.
- Created a file with the name of the event we want to trigger on—in this case, the
call-incomingevent, which fires whenever you receive a call. - Made that file executable. This is important: Tuple will only run scripts you’ve marked as executable.
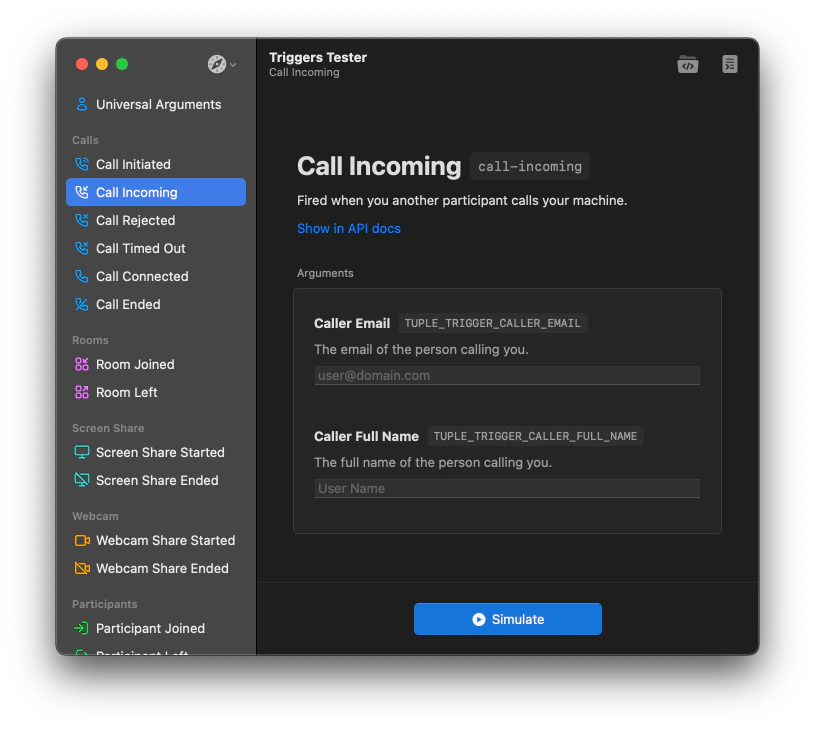
TUPLE_TRIGGER_CALLER_FULL_NAME variable in this script. When Tuple calls your trigger, it will sometimes pass in useful information in the form of environment variables. You can see which variables are passed in (and their definitions) for every event in the API reference.
That’s it! Tuple will now trigger this code at a key lifecycle event. Whenever you receive an incoming call, your computer will kindly let you know who is giving you a ring.
Well, almost.
For triggers to work, they need to be enabled. You can enable triggers by going to Tuple Preferences ⌘ , → Triggers and clicking on the Enable button. Or, if you’re on macOS, simply click here.
Testing the trigger
Asking your coworker to call you over and over while you get your trigger logic right would be a drag. Instead, let’s use Tuple’s built-in tooling to ensure our trigger functions as expected. Open Tuple Preferences → Triggers and open the Simulator by clicking on Test Triggers.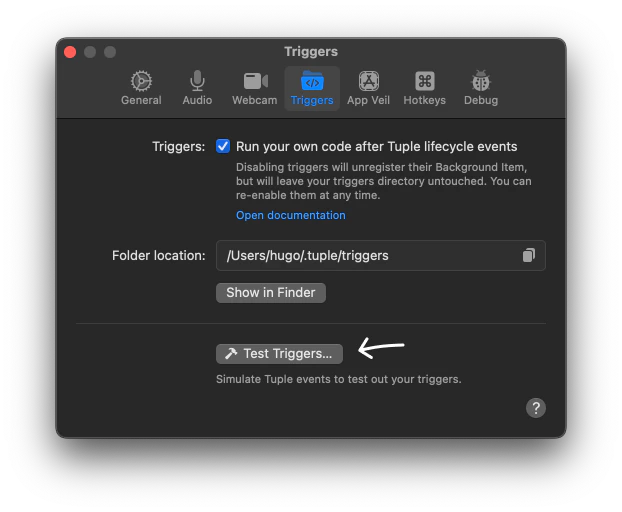
call-incoming), select it, and click Simulate.
Key takeaways
1. Location matters
All of your trigger code needs to live in~/.tuple/triggers.
We recommend you nest your code in subdirectories in order to keep scripts logically organized.
That might look like this:
2. Triggers must be named correctly
Every trigger filename you want executed needs to be prefixed with one of the available lifecycle event names. Here is a non-exhaustive list of some of the most common triggers:call-connected— triggered when a call connectsroom-joined— triggered when a participant joins a roomscreen-share-started— triggered when any participant shares their screen
call-connected— bare name of the triggerroom-joined.notify-slack— everything afterroom-joinedis ignoredroom-joined.pause-spotify— everything afterroom-joinedis ignored
spotify.call-connected— trigger name being used as a postfix and not a prefixcallconnected— incorrect trigger name (should becall-connected)
3. Files must be executable
Trigger files need to be executable and not publicly writable. We recommend usingchmod 0755 or chmod +x to accomplish this.