Email addresses in and Tuple must match exactly. For example,
dev+tuple@company.com does not match dev@company.com. Verify your team’s email addresses before enabling SSO.1
Add a custom SAML app
Sign in to your Google Workspace Admin console. Navigate to Apps > Web and mobile apps > Add app > Add custom SAML app.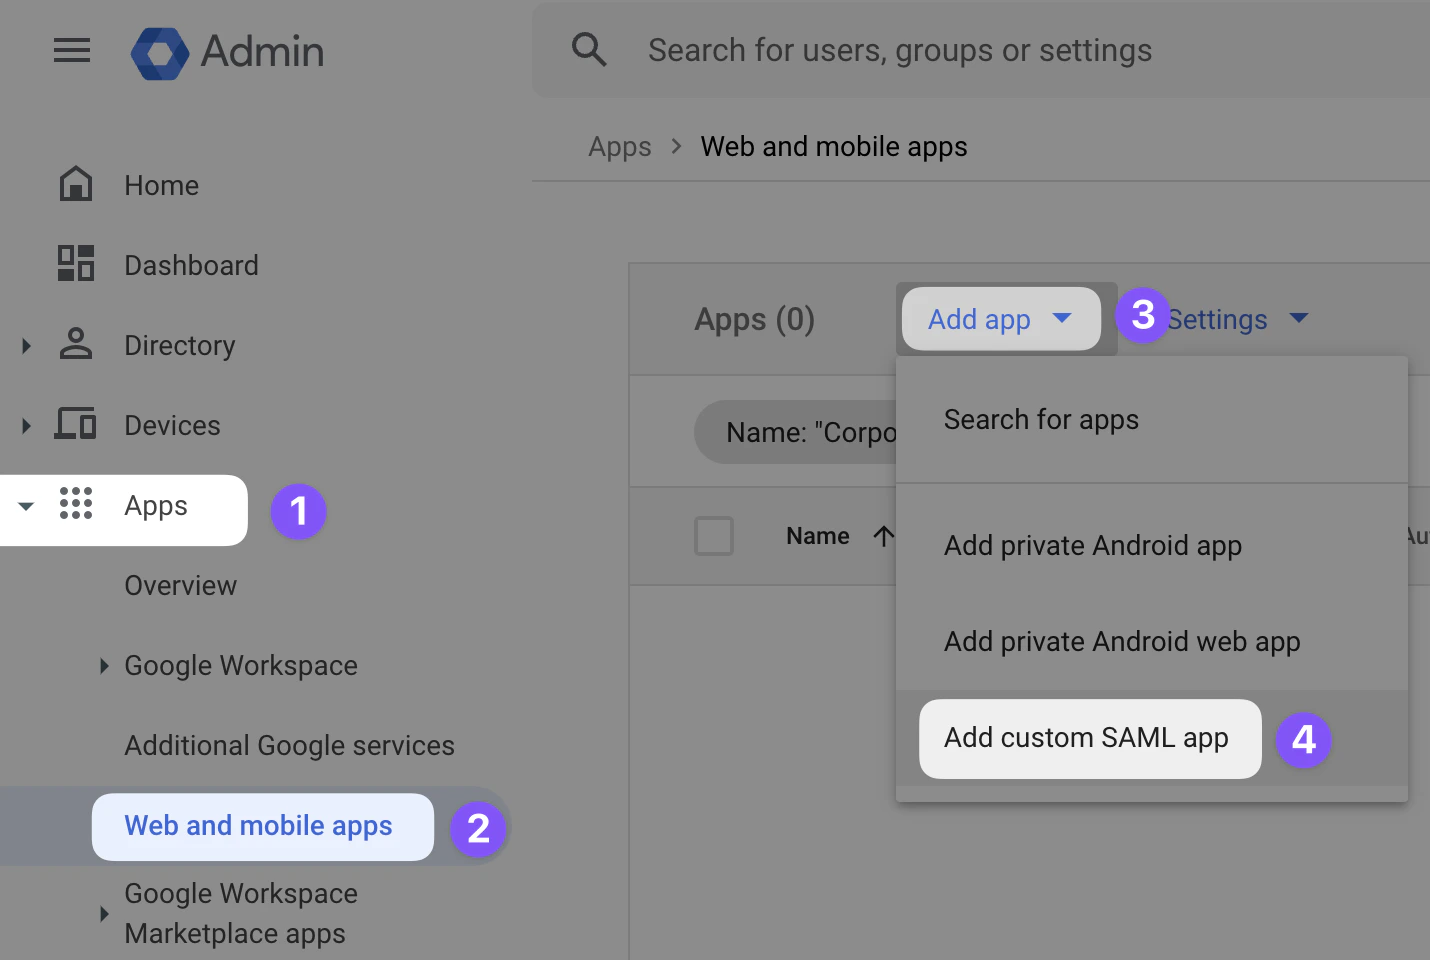
2
Create the app
Name the app “Tuple” and optionally upload an icon, which you can download here.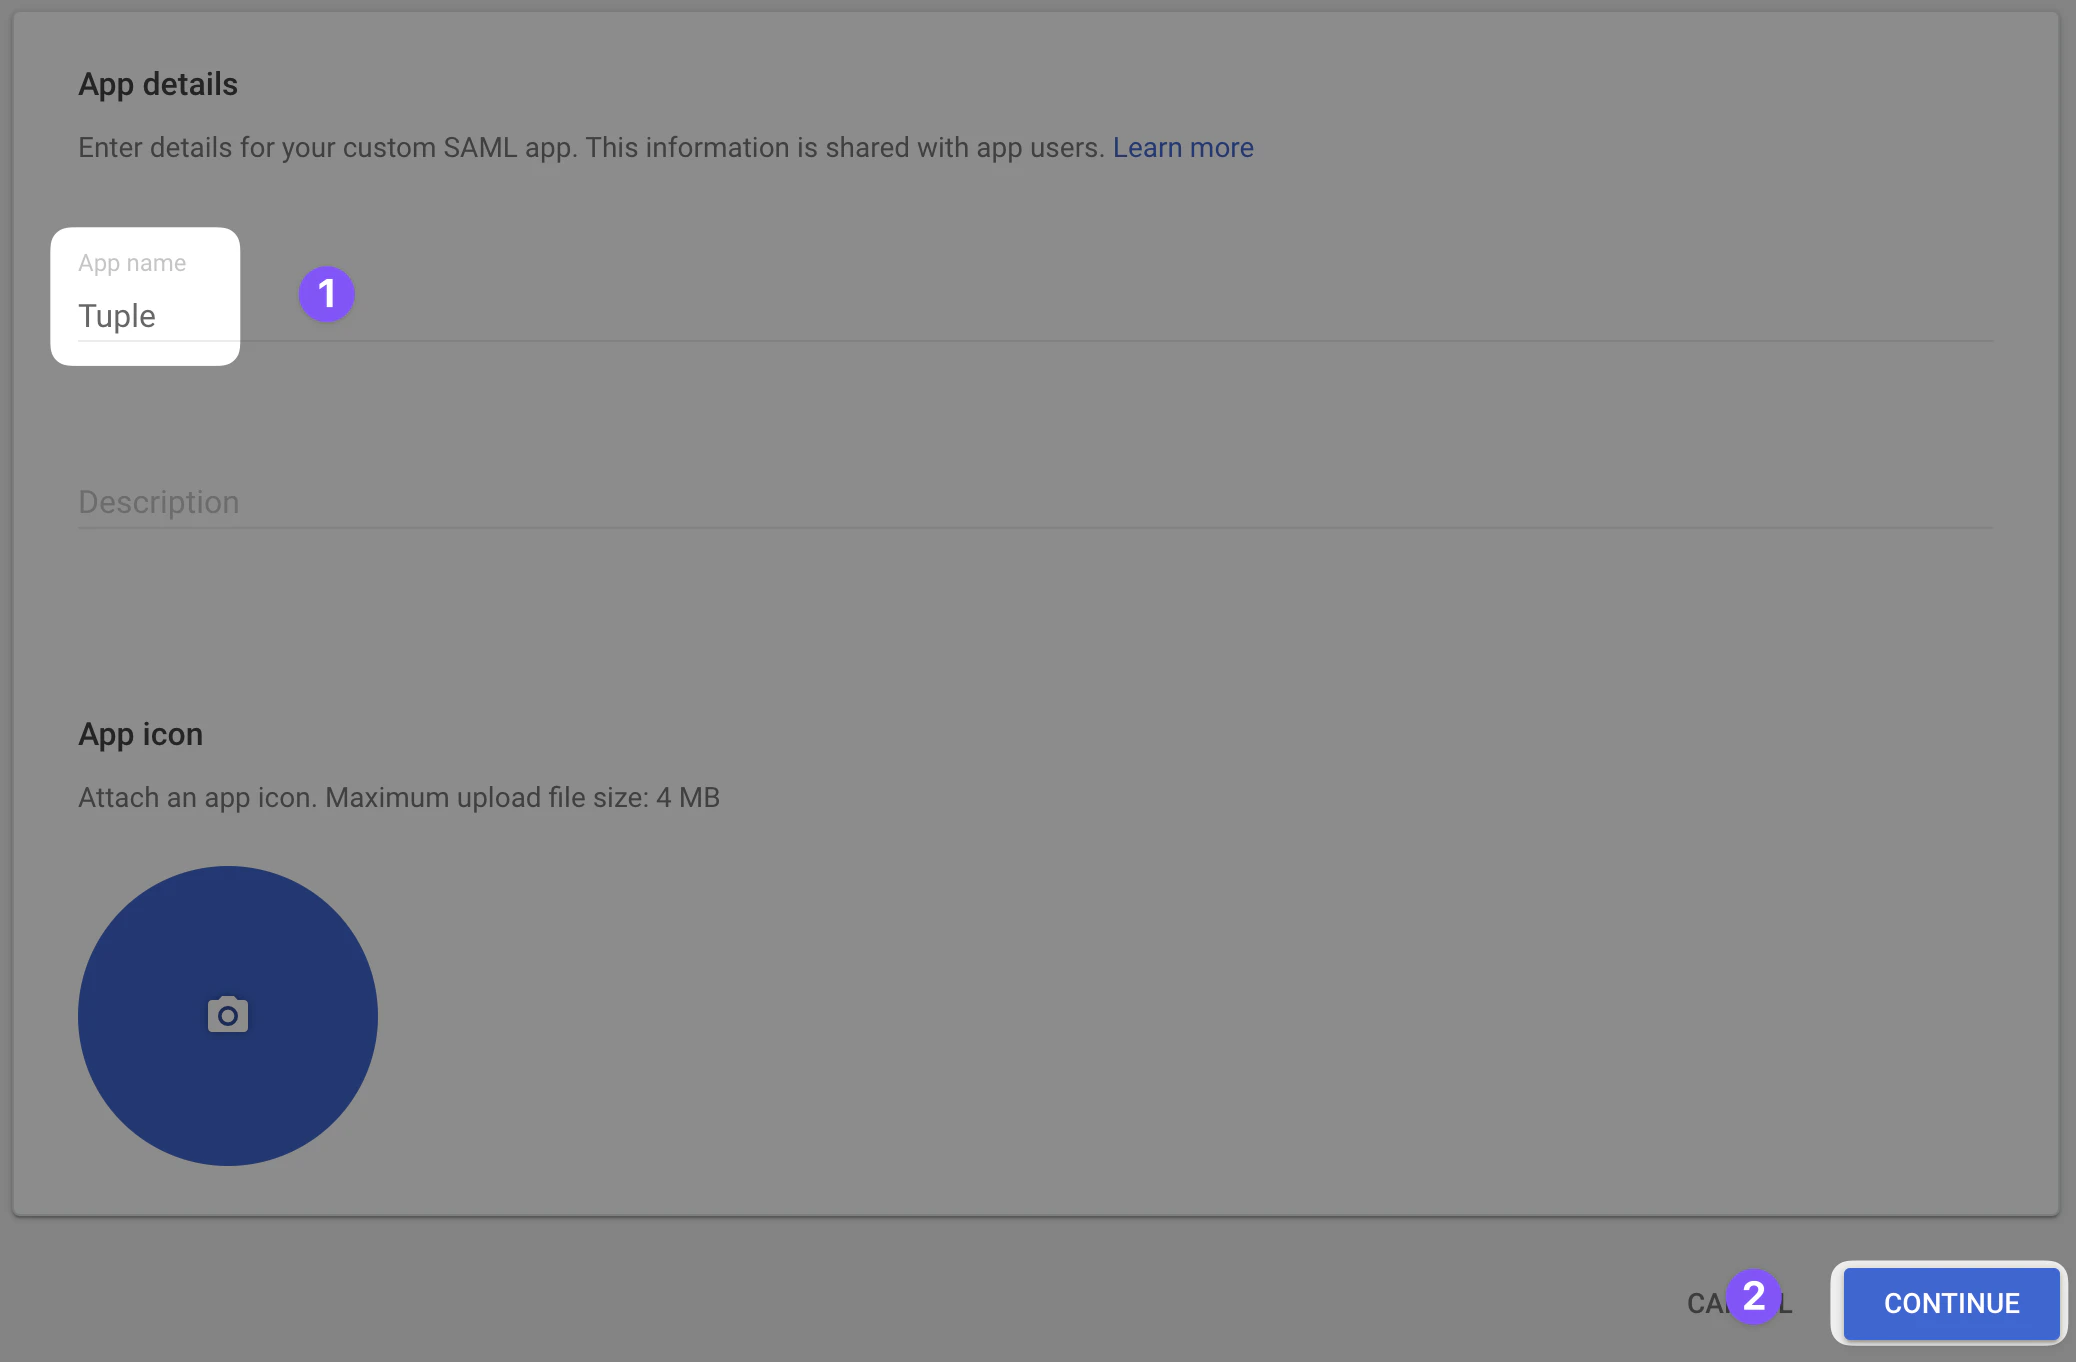
3
Configure your Tuple account
You are shown the Google Identity Provider details. Copy the values from this screen: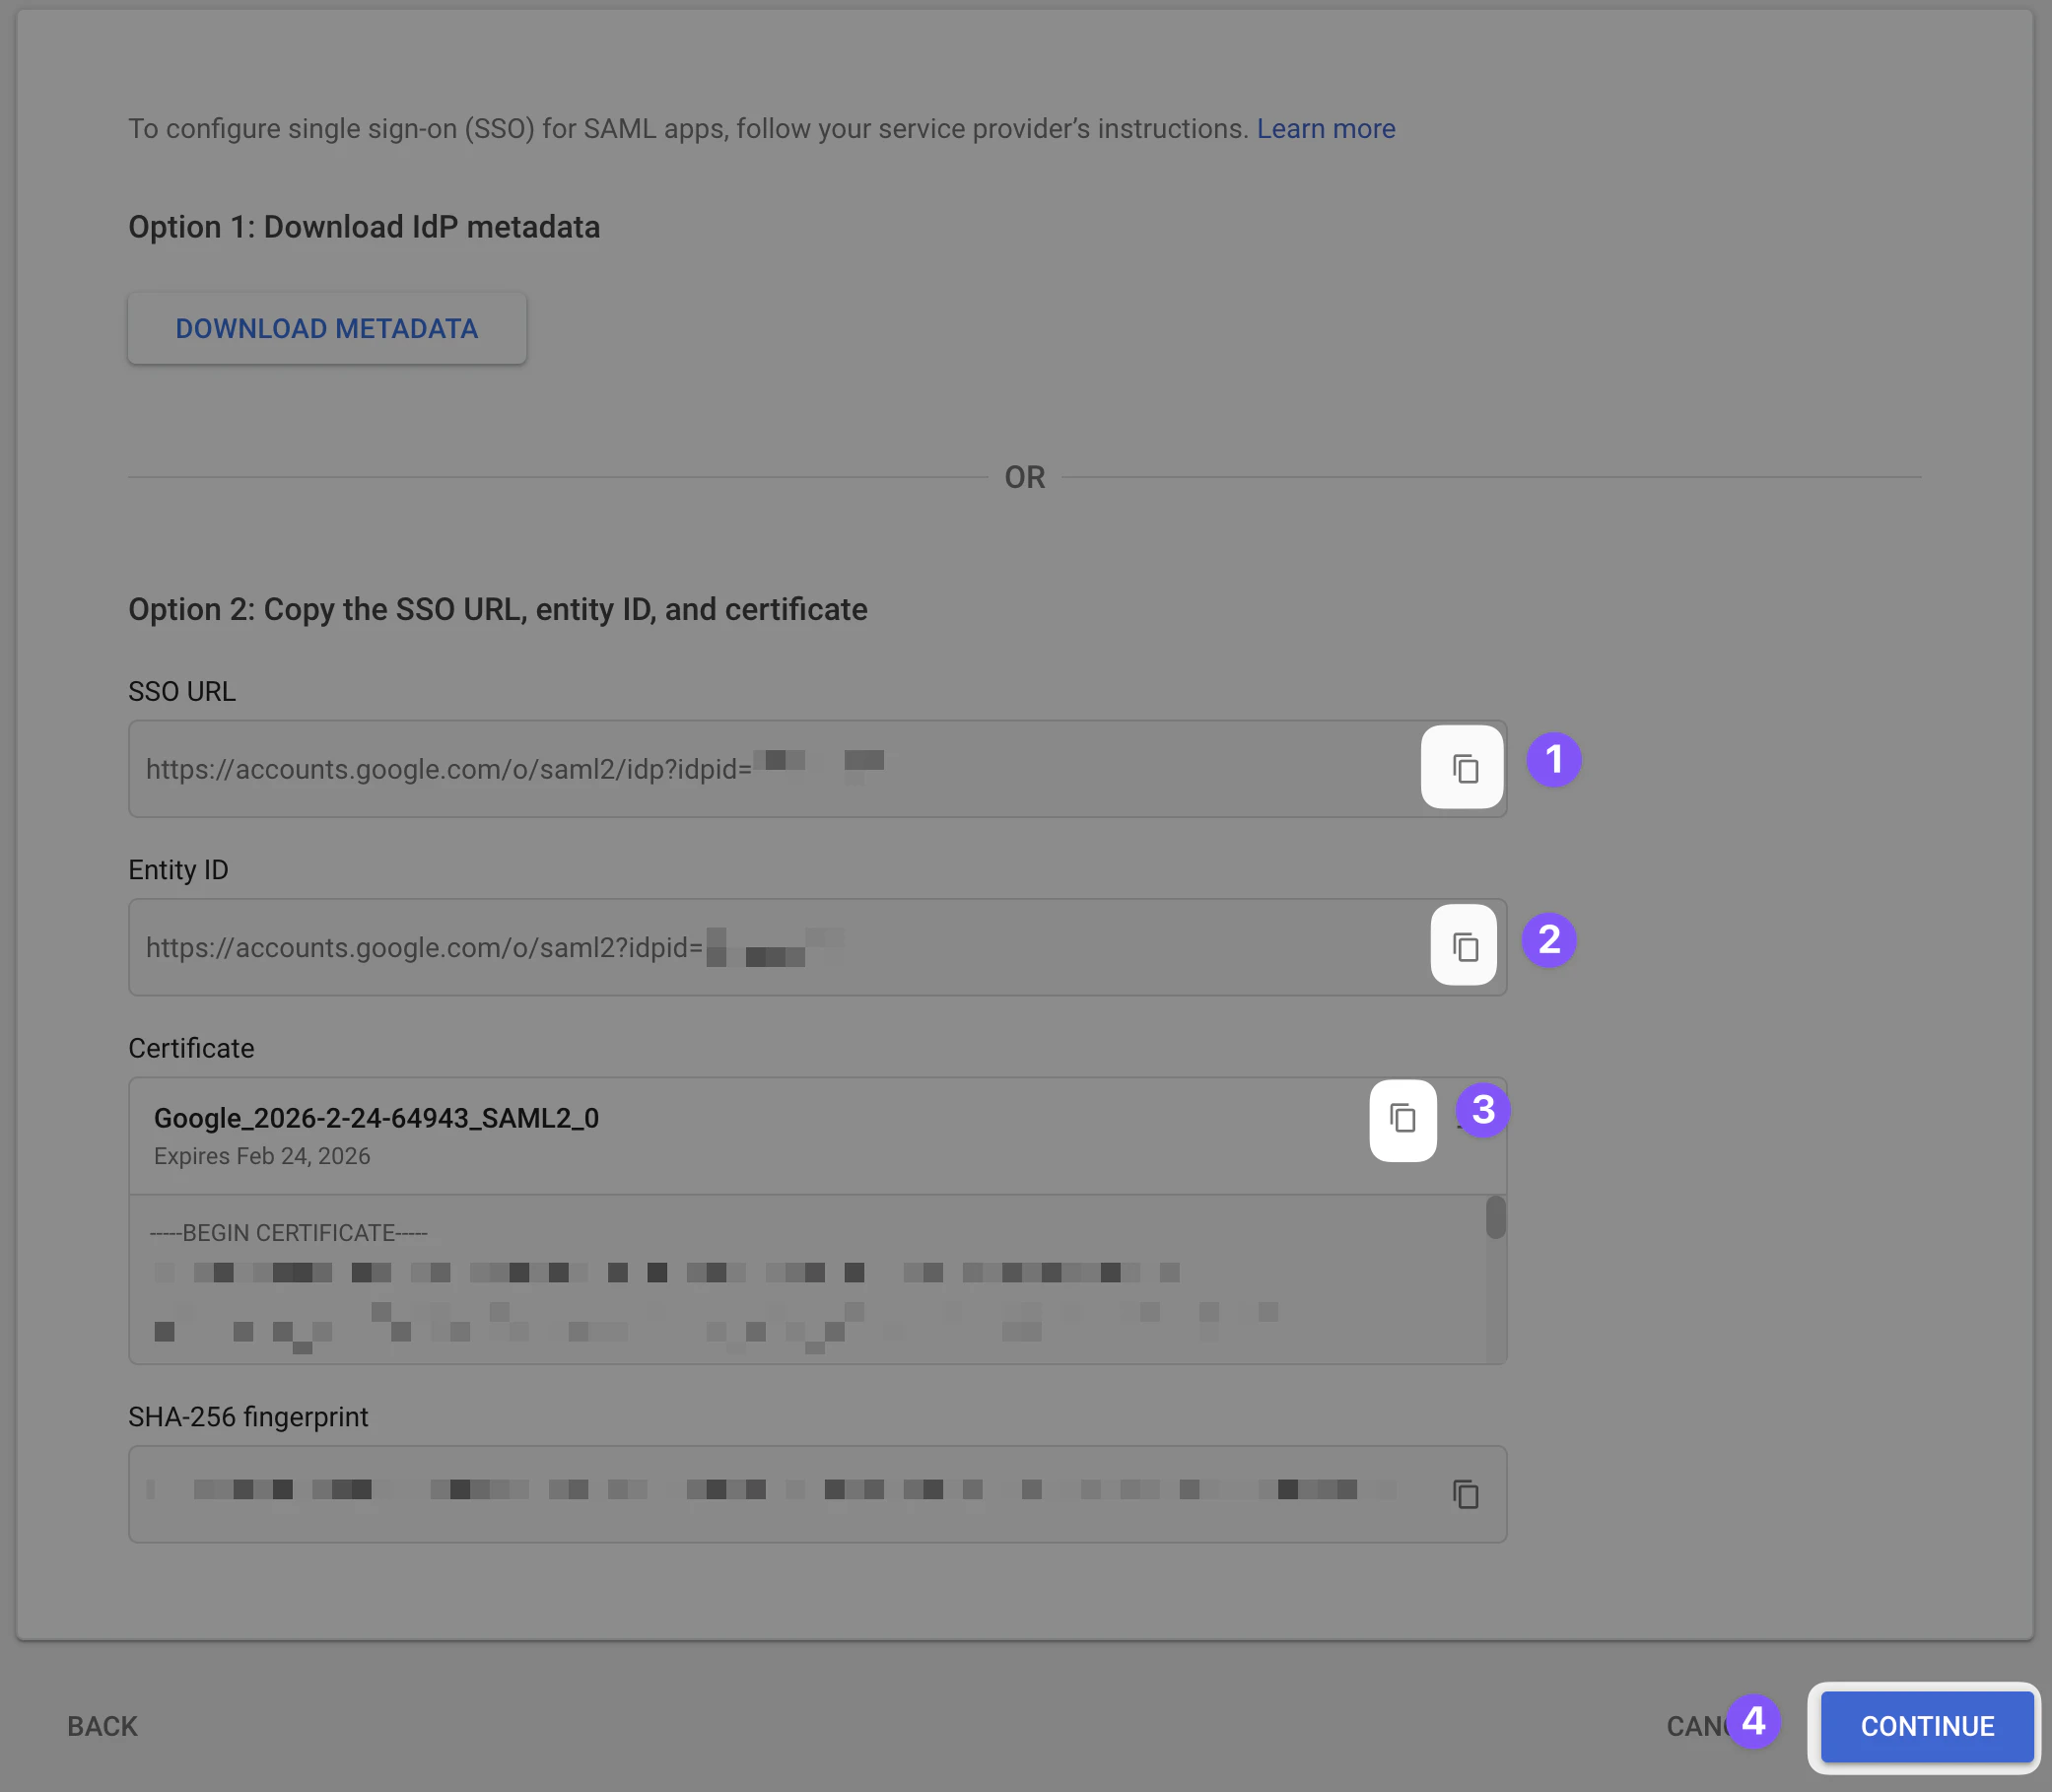
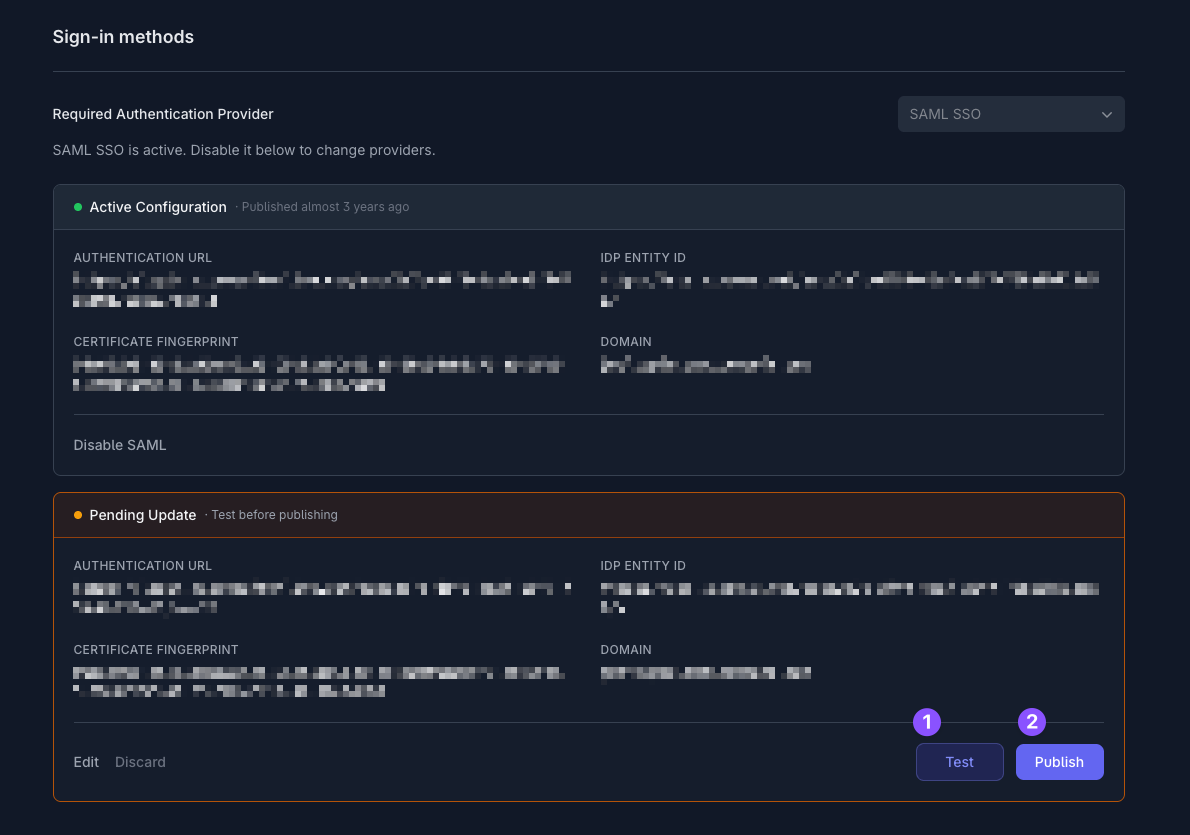
Only team owners can enable SAML. To find out who your team owner is, check your profile.
4
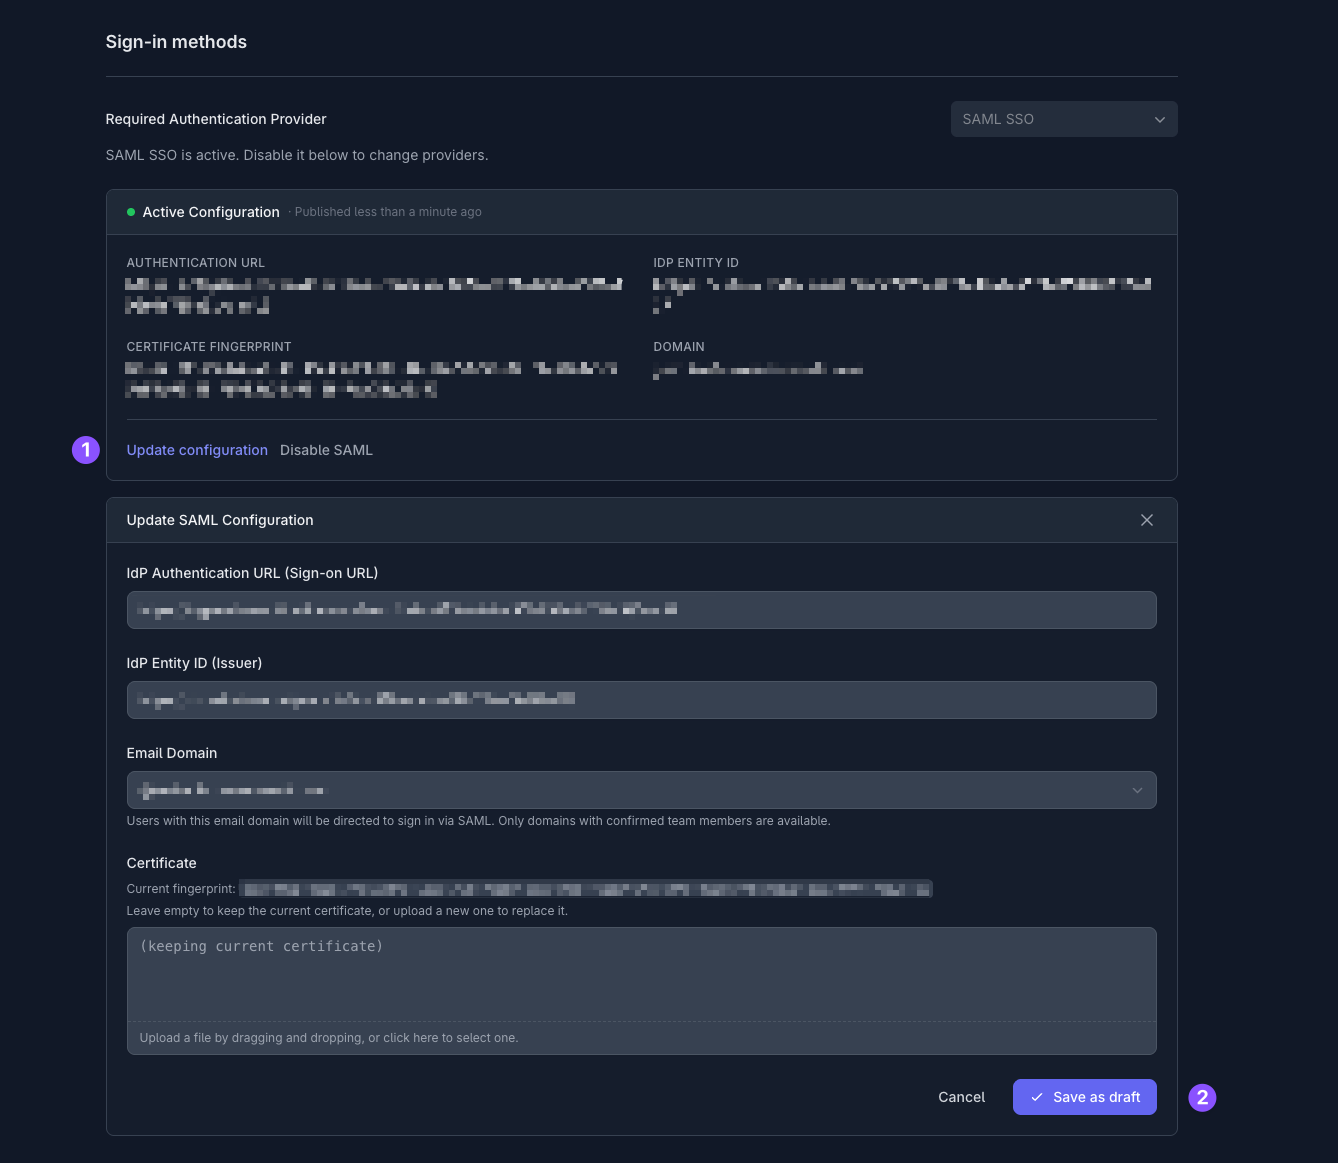
Service provider details
Return to the Google Workspace Admin console and fill in the following fields:
5
Attribute mapping
Tuple requires two additional attributes: 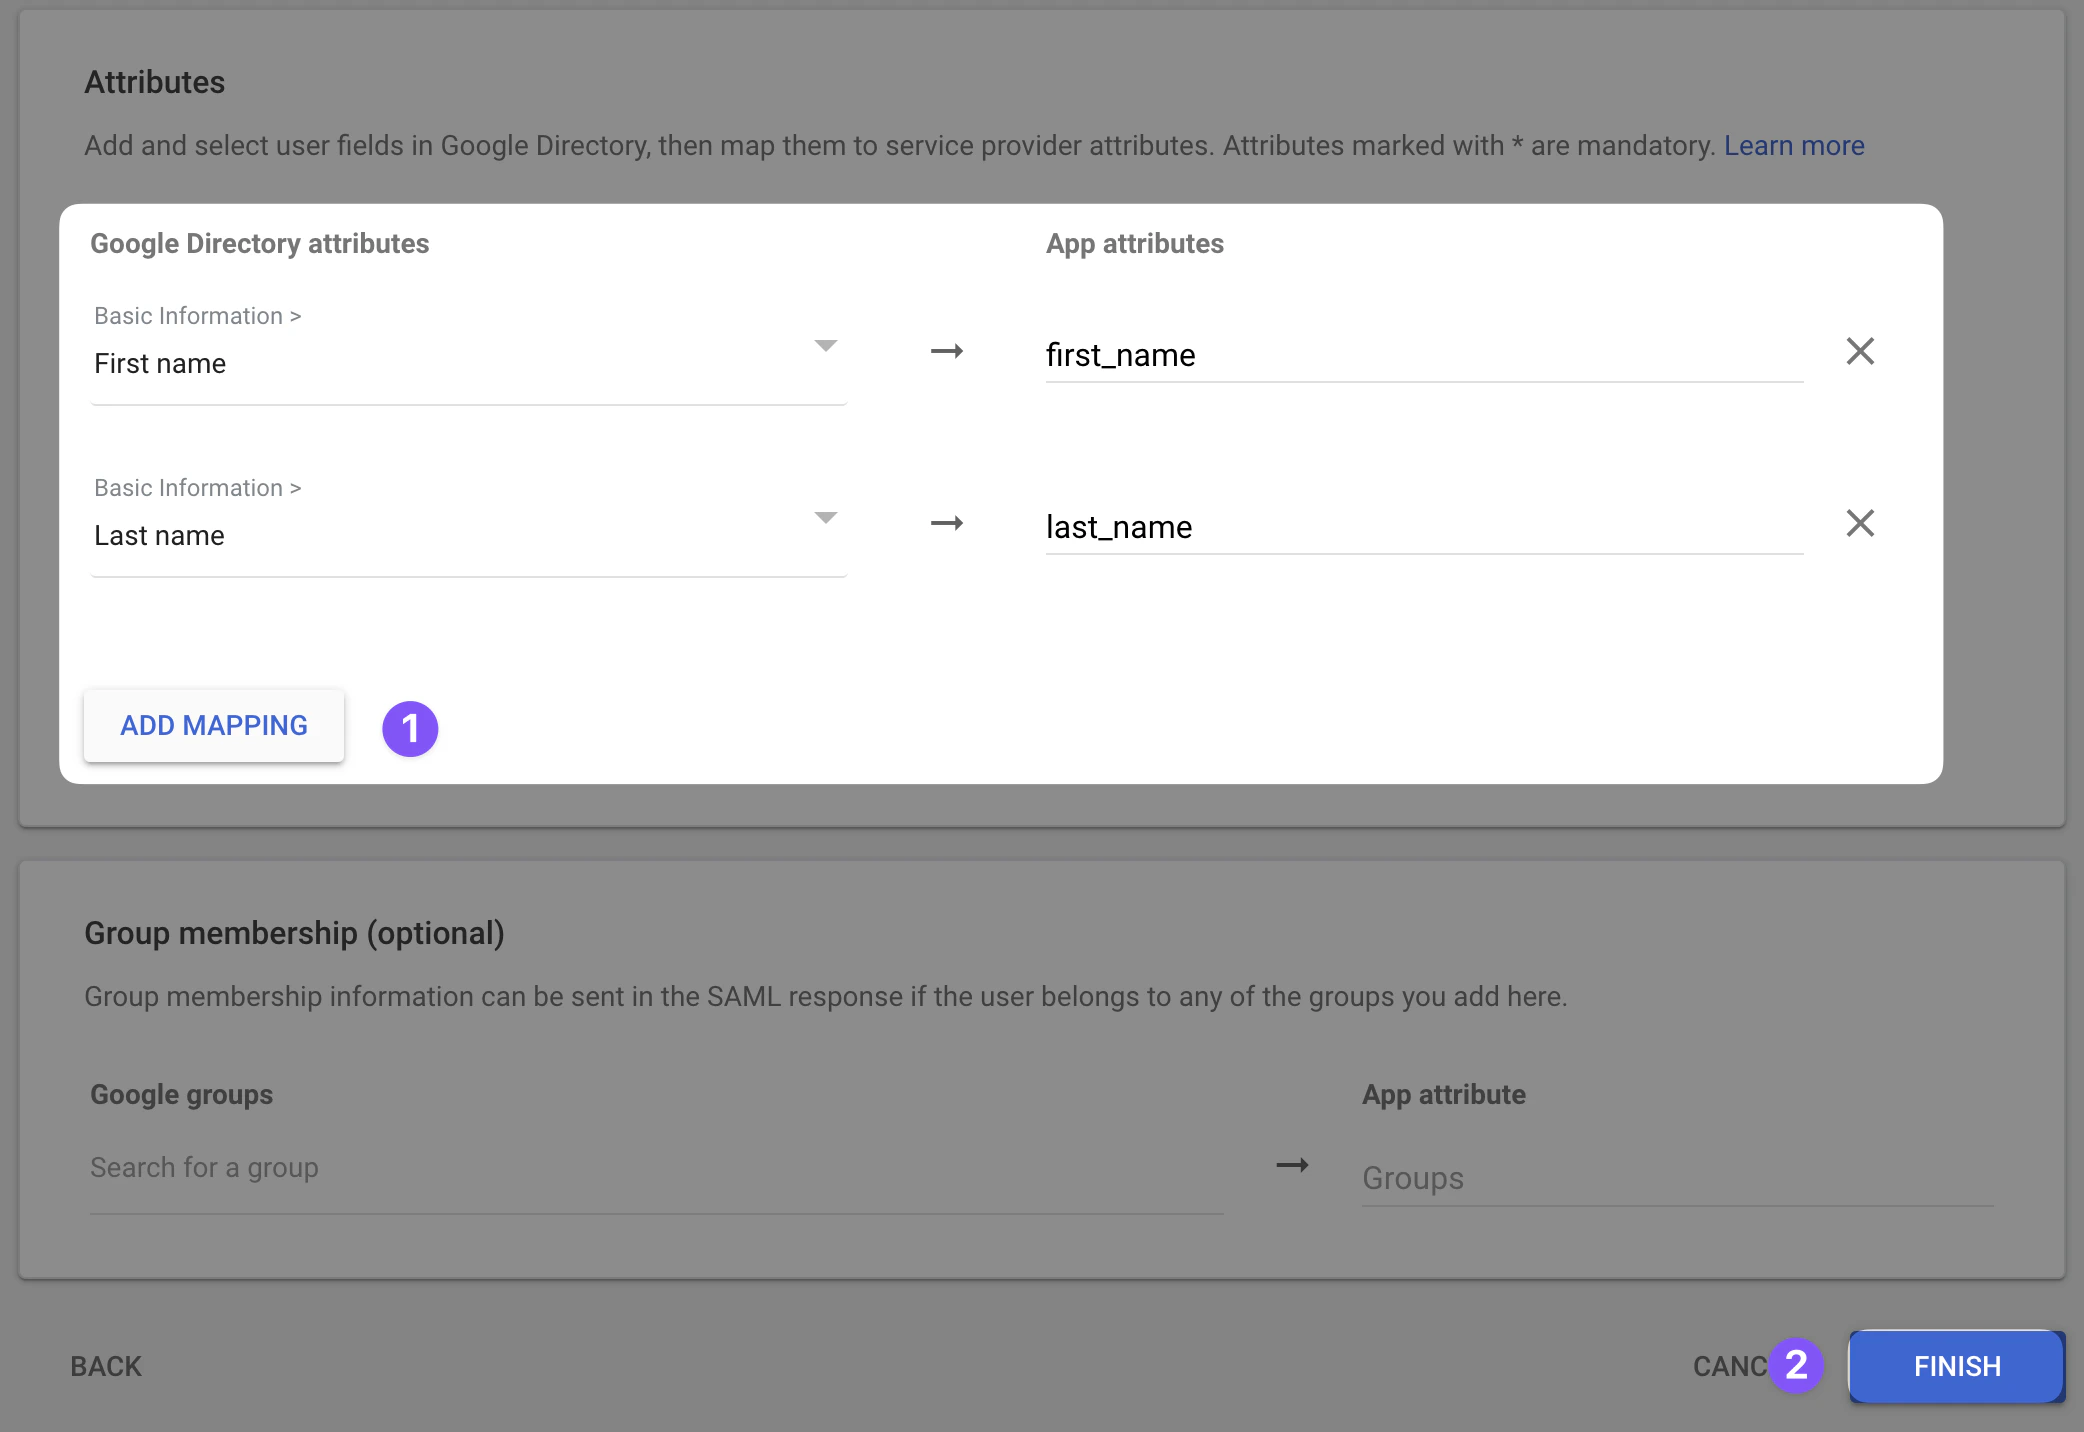
first_name and last_name.