# App Veil
Source: https://docs.tuple.app/application-preferences/macos-preferences-app-veil
App Veil hides windows from your pair while you're sharing your screen. It can also hide all system notifications while you're pairing with the "Hide all notifications" setting.

Hidden windows have a dashed orange border around them to remind you they're not shared:

You can configure this feature in Tuple's Settings. By default, we hide Messages, and Keychain Access. We also hide Telegram, and 1Password if you have those apps installed.
# Reveal veiled windows
To show a veiled window to your pairing partner, click on the dropdown menu at the bottom right of the window. Select "Reveal This Window" and the veiled window will become visible.

When the window is revealed, the label at the bottom right will say "Visible" and the outline of the window will be purple.

# Audio
Source: https://docs.tuple.app/application-preferences/macos-preferences-audio
To open your preferences, click your avatar at the bottom left of the Tuple popover and select **Settings** from the dropdown:

You can also press **cmd + ,** to open the Settings window.
Then select **Audio** in the sidebar:

### Input/Output Device
You can select audio devices that you want Tuple to use for input and output, or leave it as the System Default. If you explicitly set these devices here, then the device you select will always be used if it's available. You can see which device is selected even if disconnected by looking at the text below each dropdown.
**Note:** We recommend that you use the System Default values to avoid confusion. This is because most controls (e.g. keyboard shortcuts for volume/muting) will affect the system's default devices, which might lead to confusion if you have Tuple set to override it.
If you have a consistent pairing setup which is different than your usual devices, or if you want to route audio through a third-party app (e.g. [Krisp.ai](https://krisp.ai/)), then you could set these manually, but please be aware that this may cause unexpected behavior with macOS audio controls as they only control the system default devices.
### Automatically adjust my microphone volume
When this setting is on, Tuple raises or lowers your microphone's input volume when your speech is too quiet or too loud. It only steps in when your level is well outside the normal range, so most people won't notice a change. This setting is on by default.
### Suppress my background noise
To remove unwanted noises from the background of your audio, you can use this setting to toggle our noise suppression feature.
### Play call sounds
Turn this off if you prefer not to hear ringing when someone calls you and rely on the popup instead. This setting also silences the sounds for join requests, and for people joining or leaving active calls and rooms.
When several people join in quick succession, Tuple plays a short tune instead of repeating the same sound.
### Start muted
If you prefer to use a different service for audio during your pairing sessions, you can enable this setting to have Tuple always start calls muted.
### Notifications
These settings control the in-call notifications that fire from your audio state. Both are on by default.
* **Speaking while muted** — shows the [speaking-while-muted notification](/pairing-with-tuple/speaking-while-muted-notification) when Tuple detects your voice while your microphone is muted.
* **Audio output is muted** — shows a notification while your call audio output is muted, so you don't miss your pair speaking. The card auto-dismisses when you unmute.
Choosing **Never Show Again** from a notification's cancel menu turns the matching setting off here. Turn the setting back on to re-enable the notification.
# Capture
Source: https://docs.tuple.app/application-preferences/macos-preferences-capture
Capture records what happens on a call to your **local disk**: a transcript of what was said, video of any shared screen, and metadata for the apps on shared screens. **Everything stays on your machine**; nothing gets sent to the cloud.
You can browse and search captured calls in your [Local History](/pairing-with-tuple/local-call-history). Alternatively, you can use capture to pass call content to an agent, either after the fact or in real time. See [Capturing calls](/pairing-with-tuple/capturing-calls) for the full feature overview and [Connect an AI agent](/cli/connect) for what agents can do with a captured call.
This page covers the preferences that control Capture. To open your preferences, click your avatar at the bottom left of the Tuple popover and select **Settings** from the dropdown:

You can also press **cmd + ,** to open the Settings window.
Then select **Capture** in the sidebar.

> [!NOTE]
>
> Capture is a single switch: there are no separate controls for the transcript, the screen recordings, and the app metadata. Turning Capture off is how you stop recording all three. To keep your own window titles and URLs from reaching other people's captures, turn off **[Share app metadata](/application-preferences/macos-preferences-screen-share#share-app-metadata)** or veil the app with [App Veil](/application-preferences/macos-preferences-app-veil).
## Start automatically
When this is on, Tuple starts capturing as soon as you join a call, just as if you'd clicked the **Capture** call control yourself. Other participants see a **Capturing** indicator next to your name in the participant list.
This is **off by default**. The **Start Capture?** notification Tuple shows on your first call after setup contains an **Automatically start on future calls** checkbox; accepting it with the box checked turns this setting on.
## Transcript
The **Transcript** section holds the on-device model Capture uses to turn speech into text. Click **Choose…** next to **Local Whisper Model** to open the model picker.
### Supported models
Tuple ships with a list of pre-optimized transcription models that you can download on demand. These are [GGML](https://github.com/ggml-org/ggml) models designed to be used by [whisper.cpp](https://github.com/ggml-org/whisper.cpp), which have been further optimized to utilize [CoreML](https://developer.apple.com/documentation/coreml). The base models have all been sourced from the [main whisper.cpp repository](https://huggingface.co/ggerganov/whisper.cpp/tree/main).
| Model | Description | Size | Required VRAM | GGML Model |
| - | - | - | - | - |
| **Turbo** | Fast, accurate, multilingual | 1.75 GB | 6 GB | `ggml-large-v3-turbo-q5_0` |
| **Light** | English only, slower, less VRAM needed | 650 MB | 2 GB | `ggml-small.en` |
**Turbo** is the recommended default.
> [!WARNING]
>
> These models are optimized to run on Apple Silicon machines, and have **not** been tested on or optimized for Intel-based machines.
Hosted models are stored in `~/Library/Application Support/Tuple/Transcription Models/`. Switching models leaves the previously downloaded model on disk; use **Remove** in the picker to delete one.
If a download fails, or if a model file is corrupt or can't be installed, a red error icon appears next to the model in the picker. Click the icon to see the specific problem and the recommended fix:
* **Model is corrupted** — remove the model and download it again (or, for a custom model, choose a new file).
* **Download failed** — the download didn't complete; try again.
* **Not enough disk space** — free up space on your disk and try the download again.
Tuple does not retry failed downloads automatically — start the download again from the picker.
### Custom model
If you'd rather use your own [GGML](https://github.com/ggml-org/ggml) model, the **Custom model** row at the bottom of the picker lets you choose a `.bin` or `.gguf` model file from disk with the **Choose…** button. The file you pick becomes your selected model right away.
> [!NOTE]
>
> Custom models need a matching `.mlmodelc` CoreML sidecar installed alongside the GGML file. Tuple's built-in models include this sidecar automatically; a custom GGML file does not. If the CoreML bundle isn't present next to the model, Whisper throws an error when Tuple tries to load it.
## Screen recordings
While Capture is running and a screen is shared (yours or someone else's), Tuple records that screen's video into the same local database.
Video can consume a lot of disk space, so it gets its own size cap on top of [session expiry](#session-expiry):
* **Max cache size** — a cap on total stored video. Defaults to **4 GB**, with options of 1, 2, 4, 8, and 16 GB, or **No Size Limit**. When the cap is reached, the oldest recordings are deleted first. The row also reports how much video you're currently storing.
Choosing a smaller cap than your stored recordings already fill asks for confirmation because the oldest recordings are deleted immediately, rather than at the next sweep.
## App metadata
When Capture is enabled, Tuple records the app metadata that other participants send while screen sharing (the window title and content URL of whatever app they have focused.) This allows you to have a history of all of the files or URLs you looked at on a call.
There currently aren't any settings that dictate what you record from others, so this section is only here as a reminder that app metadata is a component of Capture. The corresponding outbound setting (what you send to other people while sharing your own screen) lives with the rest of the sharing settings, as **Share app metadata** in [Screen share preferences](/application-preferences/macos-preferences-screen-share#share-app-metadata).
Titles and URLs are scrubbed of credentials by the machine that shares them, before they're shared — sign-in URLs are dropped outright, and secrets in a terminal's window title are replaced with `•••`. See [Sharing app metadata](/pairing-with-tuple/sharing-app-metadata) for the full rules and their limits.
## Advanced
### Session expiry
How long a whole capture session is kept before Tuple deletes it. The transcript, screen recordings, and app metadata for a session all expire together, after the duration you choose here. Choose **24 Hours**, **7 Days**, **30 Days**, **90 Days**, **1 Year**, or **No Expiration**. The default is **No Expiration**.
Shortening the window asks for your confirmation because anything already older than the new window is deleted from this Mac right away.
### Database location
Captures are stored in a single local SQLite database at `~/Library/Application Support/Tuple/index.db`, not as individual files. The location can't be changed - this row is just informational. Click the copy button to copy the path. Tuple doesn't encrypt this database.
# General
Source: https://docs.tuple.app/application-preferences/macos-preferences-general
To open your preferences, click your avatar at the bottom left of the Tuple popover and select **Settings** from the dropdown:

You can also press **cmd + ,** to open the Settings window. Then select **General** in the sidebar:

## Appearance
Select Light mode, Dark mode, or tell Tuple to pick up your system preferences.
## Menu bar icon
Choose which icon Tuple displays in the macOS menu bar. You can pick between the default **Tuple Logo** and **Pear Buddy**. The icon adapts to your system appearance and tints white during active calls.
## Behavior
**Open at login**
When this feature is enabled, Tuple will automatically launch when you log into your computer after a restart or explicit logout. Note that it will not launch if your computer is merely locked or asleep.
**Always show dock icon**
With this enabled, Tuple will always have an icon in the dock / command-tab carousel. When disabled, a Tuple icon will only appear in those locations when you're on a call.
**Enable call feedback popup**
When this feature is enabled, the call feedback form will show up after you conclude a Tuple call.
**Notify me when I'm in calls alone**
When this setting is on, Tuple reminds you when everyone else has left a room, or when you've been alone in a call for a while. Click **Leave** on the reminder to end the call, or **Stay** to keep it going. If you don't answer, the reminder goes away and you stay in the call.
Turn this off if you like to stay in a room so others can drop in. You can also choose **Don't Remind Me Again** from the reminder's **Stay** menu, which turns this setting off.
## Privacy
**Show my friends who I'm pairing with**
If selected, people you and your pair both know will be able to see your call's participants in their contact list. You can learn more [here](/pairing-with-tuple/showing-who-youre-pairing-with).
**Report call statistics**
When this setting is on, we get occasional snapshots of the metrics from calls such as frame rate, latency, etc.
# Hotkeys
Source: https://docs.tuple.app/application-preferences/macos-preferences-hotkeys
To open your preferences, click your avatar at the bottom left of the Tuple popover and select **Settings** from the dropdown:

You can also press **cmd + ,** to open the Settings window.
Then select **Hotkeys** in the sidebar:

Here you can set custom hotkeys to trigger various actions when using Tuple. Click **Record** next to an action, then press the key combination you'd like to use. Press `Escape` to cancel recording, or click the clear button to remove a hotkey.
**Push to Talk** can also use a button on a game controller or other input device. Press the button while recording, and the recorder shows the device and button, such as **Xbox Wireless Controller Button 1**.
You can scroll for even more options than shown in this image.
# Integrations
Source: https://docs.tuple.app/application-preferences/macos-preferences-integrations
To open your preferences, click your avatar at the bottom left of the Tuple popover and select **Settings** from the dropdown:

You can also press **cmd + ,** to open the Settings window.
Then select **Integrations** in the sidebar:

This pane allows you to easily enable Tuple's Slack and Google Calendar integrations (the Apple Calendar integration is enabled by default). If you're on macOS 26 or later, you'll also see a switch to disable the Spotlight integration.
You can also turn on the **CLI Server** here. Once it's on, click **Install CLI…** to install the `tuple` command-line tool. Turn the switch on or off to allow or revoke the CLI's access to your calls and contacts. Learn more on the [CLI page](/cli/overview).
You can learn more about our integrations [here](/managing-your-account/adding-integrations).
# Screen share
Source: https://docs.tuple.app/application-preferences/macos-preferences-screen-share
To open your preferences, click your avatar at the bottom left of the Tuple popover and select **Settings** from the dropdown:

You can also press **cmd + ,** to open the Settings window.
Then select **Screen Share** in the sidebar:

## Viewing resolution
This setting dictates the resolution that will be used when someone else shares their screen with you. If you adjust this setting while a session is in progress, it will be utilized in the next call. On a call where faster interactions are necessary, you might want to set this lower; if you don't need to do a lot of typing or clicking but want high viewing quality, then set it higher.
## Upscale content
On Apple Silicon Macs, Tuple can upscale incoming screen share video to make text and UI elements look sharper on your display. This is a local, per-viewer setting — it only affects what *you* see and has no impact on the resolution other participants receive.
You can toggle this from the Screen Share preferences pane, or directly during a call from the **Upscale Content** option in the screen share window's settings menu.
## Sharing
### Share system audio when using headphones
If this setting is enabled, the audio playing on your Mac is sent to the other participants while you're sharing your screen.
You can also turn it on or off during a call from **Share System Audio** in the screen share menu in the call controls. That menu item appears only while you're sharing your screen.
Tuple **only sends system audio while your Mac's sound output is headphones**. See [Sharing system audio](/pairing-with-tuple/sharing-system-audio) for which devices count as headphones and what gets shared.
### Share app metadata
If this setting is enabled, when an app gets focus while you're sharing, its window title and URL are shared with the other participants. If they are [capturing the call](/pairing-with-tuple/capturing-calls), this allows them to have a history of the files and URLs viewed on a call, as well as giving any connected agents a quick way to understand what's being discussed. You'll be asked if you want to enable this the first time you share your screen.
Apps hidden by [App Veil](/application-preferences/macos-preferences-app-veil) will *not* share any metadata.
Before anything is shared, Tuple will apply a variety of heuristics to prevent sensitive information from being transmitted; see [Sharing app metadata](/pairing-with-tuple/sharing-app-metadata) for more information.
## Behavior
### Open links sent to my clipboard
If you don't like the fact that guests can force a URL to open on your computer, you can disable this. URLs will still be sent to your clipboard, but you have to explicitly paste them into a browser to open them.
### Persist annotations until right click
If selected, any drawings created with the paint mouse mode will persist until you right click. You can also change this while on a call via the settings dropdown on the screen share window.
## Cursors
### Always show other cursors
If this setting is enabled, you'll see other participants' cursors all the time. If it's disabled, you'll only see them if another participant enters control mode.
### Automatically show name labels
If this setting is enabled, you'll see name labels appear on other participants' cursors whenever they enter a call, take control, or begin annotating on the screen. If it's disabled, name labels will only be shown if you hover over another participant's cursor.
### Cursor color
Your cursor, paint strokes, text annotations, and highlight clicks all use a single color, so other participants can tell your marks from theirs.
Leave it on **Automatic** and Tuple assigns you a free color at the start of each call, picking colors with good contrast so everyone is easy to tell apart. Your color can change from call to call.
If you pick one of the eleven colors instead, Tuple uses it on every call. The choice applies immediately, including on a call already in progress, and takes precedence over the color the call would have given you — so it is possible to end up matching someone else.
You can also change this during a call from the **Cursor Color** swatches at the top of the settings menu in the [shared screen window](/pairing-with-tuple/interacting-with-a-shared-screen#settings). Both places set the same preference and stay in sync.
# Triggers
Source: https://docs.tuple.app/application-preferences/macos-preferences-triggers
Triggers let you customize Tuple by running your own code in response to call lifecycle events.
Learn more in the [Triggers documentation](/triggers/building-a-trigger).
# Webcam
Source: https://docs.tuple.app/application-preferences/macos-preferences-webcam
To open your preferences, click your avatar at the bottom left of the Tuple popover and select **Settings** from the dropdown:

You can also press **cmd + ,** to open the Settings window.
Then select **Webcam** in the sidebar:

### Preferred device
Which device Tuple should use by default when sharing your webcam video.
### Resolution
This is the resolution for webcam video shared while you are pairing. Setting the resolution will automatically change the resolution on any current and future calls.
If you have a high-speed connection and want maximum webcam quality, set this higher. If you're working with a relatively poor connection, set your preference to a lower resolution to reduce latency on the call.
The settings correspond to the following resolution:
* Low: 160x120
* Medium: 320x240
* High: 640x480
### Behavior
#### Enable my webcam automatically
When this setting is on, Tuple will automatically share your webcam video when you join or start a call.
#### Show preview before sharing
If selected, Tuple will ask you to confirm a preview of your webcam before sharing. If deselected, clicking the "Share Webcam" button will share your webcam immediately.
## Background blur and video effects
On supported Macs, macOS includes free background blur and other camera effects that work with Tuple. While your webcam is active, open the camera indicator in the menu bar and enable **Portrait**. On macOS Ventura, open **Control Center**, click **Video Effects**, then enable **Portrait**. Availability depends on your Mac and camera; see [Apple's requirements](https://support.apple.com/105117).
See [Using effects on your webcam](/pairing-with-tuple/sharing-a-webcam-video#using-effects-on-your-webcam) for screenshots and the full walkthrough.
# App Veil
Source: https://docs.tuple.app/application-preferences/windows-preferences-app-veil
To open your preferences, click your avatar at the bottom left of the Tuple popover and select **Settings** from the dropdown:

You can also use the keyboard shortcut **ctrl+,**. This will bring up the settings window. From here, you can select the **App Veil** tab:

In this tab, you can select the apps that you want to be hidden when you share your screen. Click the button marked "Add..." to bring up a list of apps on your machine:

Click the "Add" button next to an app to add it to the list of things to veil. If you need to temporarily unveil a veiled app, you can toggle it off via the main settings view:

When you share your screen with a veiled app, this is what you'll see:

...and this is what others on the call will see:

# Audio
Source: https://docs.tuple.app/application-preferences/windows-preferences-audio
To open your preferences, click your avatar at the bottom left of the Tuple popover and select **Settings** from the dropdown:

You can also use the keyboard shortcut **ctrl+,**. This will bring up the settings window. You can then select the **Audio** tab:

### Input/Output Device
You can select audio devices that you want Tuple to use for input and output, or leave it as the System Default. If you explicitly set these devices here, then the device you select will always be used if it's available. You can see which device is selected even if disconnected by looking at the text below each dropdown.
**Note:** We recommend that you use the System Default values to avoid confusion. This is because most controls (e.g. keyboard shortcuts for volume/muting) will affect the system's default devices, which might lead to confusion if you have Tuple set to override it.
If you have a consistent pairing setup which is different than your usual devices, or if you want to route audio through a third-party app (e.g. [Krisp.ai](https://krisp.ai/)), then you could set these manually, but please be aware that this may cause unexpected behavior with system audio controls as they only control the default devices.
### Start muted
If you prefer to use a different service for audio during your pairing sessions, you can enable this setting to have Tuple always start calls muted.
### Legacy Audio Engine
Tuple for Windows utilizes a custom subsystem for audio input and output. However, if you're experiencing issues, you can choose to enable the older, legacy audio subsystem. This shouldn't happen often - please contact [support](mailto:support@tuple.app) if you're experiencing problems.
# General
Source: https://docs.tuple.app/application-preferences/windows-preferences-general
To open your preferences, click your avatar at the bottom left of the Tuple popover and select **Settings** from the dropdown:

You can also use the keyboard shortcut **ctrl+,**. This will bring up the settings window:

### **Appearance**
Select if you want Tuple to use light or dark mode.
### **Show who I'm pairing with**
If selected, people you and your pair both know will be able to see your call's participants in their contact list. You can learn more [here](/pairing-with-tuple/showing-who-youre-pairing-with).
### **Persistent Drawings**
If selected, any drawings created with the paint mouse mode will persist until you right click.
### **Launch at login**
If selected, Tuple will launch when you log in.
# Network
Source: https://docs.tuple.app/application-preferences/windows-preferences-network
To open your preferences, click your avatar at the bottom left of the Tuple popover and select **Settings** from the dropdown:

You can also use the keyboard shortcut **ctrl+,**. This will bring up the settings window. You can then select the **Network** tab:

### Force TURN
Enabling this will force your calls to use a [TURN server](https://en.wikipedia.org/wiki/Traversal_Using_Relays_around_NAT). This is useful if you're on a network that has known P2P issues.
### Force Media Server
Enabling this will force Tuple to use a media server for screen sharing. Again, useful on networks with known P2P issues.
# Command reference
Source: https://docs.tuple.app/cli/commands
Read Tuple CLI commands, flags, output formats, and Capture delivery behavior.
This page covers the commands provided by the `tuple` CLI. For installation instructions, see the [Tuple CLI overview](/cli/overview).
## Global flags
| Flag | Description |
| - | - |
| `--format text\|json` | Output format. `text` is the default. Choose `json` for structured output. |
| `-H`, `--host ` | Tuple app socket. `TUPLE_HOST` supplies the same setting. |
| `--env dev\|prod\|staging` | Tuple environment. `TUPLE_ENV` supplies the same setting. An explicit host takes precedence. |
Errors go to stderr. With `--format json`, errors are JSON objects with an `error` field and may include `error_code` and `kind`. Use JSON for a stable machine-readable contract. Text output is for people.
## Person arguments
Commands with a `` argument search contact names and email addresses. One match selects that contact. No matches return an error. Multiple matches return an error and list the candidates.
## `tuple contacts`
### `contacts list [flags]`
List contacts, sorted by favorites, presence, then name.
| Flag | Description |
| - | - |
| `-q`, `--query ` | Search by name or email. |
| `--status ` | Keep `online`, `busy`, or `offline` contacts. `available` is a synonym for `online`. |
| `--kind ` | Keep `teammate`, `external`, or `agent` contacts. |
| `--favorited[=false]` | Keep favorited contacts, or pass `false` for unfavorited contacts. |
| `--recent` | Keep recently contacted people. |
Filters combine with AND. An empty result succeeds and returns an empty list.
```bash theme={null}
tuple contacts list --query ben
tuple contacts list --status online --kind teammate
tuple contacts list --favorited --recent
```
### `contacts follow`
Emit the complete contact list as JSON Lines whenever it changes. The first line is the initial snapshot. This command does not accept the list filters.
### `contacts show `
Show one contact's ID, name, email, presence, kind, and favorite state.
### `contacts favorite ` / `contacts unfavorite `
Favorite or unfavorite a contact.
### `contacts remove `
Remove a contact.
### `contacts invite `
Invite someone to Tuple by email.
## `tuple call`
### `call list [flags]`
List ongoing calls.
| Flag | Description |
| - | - |
| `-q`, `--query ` | Search participant names, emails, room names, and room slugs. |
| `--favorited[=false]` | Filter by whether a call involves a favorite. |
| `--joinable[=false]` | Filter by whether you can join the call. |
| `--limit ` | Maximum calls. The default is `100`; pass `-1` for all. |
### `call show [call] [--only ]`
Show the active call, or select an active or retained call by exact ID. An unambiguous retained-call ID prefix also works.
`--only` prints one field without a label. Valid fields are `id`, `state`, `participants`, `title`, `summary`, `started_at`, and `ended_at`.
```bash theme={null}
call_id="$(tuple call show --only id)"
tuple call show dbd433b7 --format json
```
If you omit the selector while outside a call, the command returns `not in a call` and exits nonzero.
### `call edit [call]`
Set a call's title or summary. You must pass `--title`, `--summary`, or both. An empty value clears that field.
### `call start `
Start a 1:1 call with a contact or one of your connected machines. Get machine IDs from [`machines list`](#machines-list).
The command waits for the other person to answer. It prints `Calling (call )...` when the call is placed and ` answered` when they connect. With `--format json`, it prints the call after they answer.
The command exits `0` when they connect and `2` if the call ends first, such as when they decline, are busy, or don't answer. Tuple ends an unanswered call after 25 seconds.
### `call join `
Join a contact's call or a room slug or URL. Tuple tries the argument as a contact first. Pass `--switch` to leave your current call before joining.
### `call accept`
Accept an incoming call. `--call` defaults to `current`, which is the call that is ringing. Scripts should pass the call's ID, such as `TUPLE_TRIGGER_CALL_ID` from a [`call-incoming` trigger](/triggers/api-reference#call-incoming). A late accept then fails instead of answering a different call that started ringing since.
The command fails if the call has already been answered or is no longer ringing.
### `call participants add ` / `call participants remove `
Add or remove someone from a call. Both commands accept `--call`, which defaults to `current`.
`add --wait` waits for the person to connect. `--timeout` controls how long it waits and defaults to `30s`; `0` waits without a timeout. A wait exits `0` when they connect, `2` if the call ends first, and `3` on timeout.
### `call leave`
Leave a call. `--call` defaults to `current`.
### `call mute` / `call unmute`
Mute or unmute your microphone. `--call` defaults to `current`.
### `call react `
Play `airhorn`, `trombone`, or `flute` for everyone on the call. `--call` defaults to `current`.
## `tuple rooms`
Manage [Tuple rooms](/pairing-with-tuple/using-rooms). Existing-room commands accept an exact slug, such as `acme/general`, or a full room URL.
### `rooms list [flags]`
List your personal and team rooms. Occupied rooms come first, followed by favorites, then name.
| Flag | Description |
| - | - |
| `--kind ` | Keep `personal` or `team` rooms. |
| `--occupied` | Keep rooms with someone present. |
| `--favorited[=false]` | Keep favorited rooms, or pass `false` for unfavorited rooms. |
| `--limit ` | Maximum rooms. The default is `100`; pass `-1` for all. |
| `--members` | Include a preview of member names in text output. |
### `rooms follow [flags]`
Emit the complete filtered room list as JSON Lines when the result changes. It supports `--kind`, `--occupied`, `--favorited`, and `--limit`.
### `rooms show `
Show one room by exact slug or URL.
### `rooms join `
Join a room without resolving the argument as a contact. Pass `--switch` to leave your current call first.
### `rooms favorite ` / `rooms unfavorite `
Favorite or unfavorite a room.
### `rooms create `
Create a team room.
## `tuple machines`
### `machines list`
List your other signed-in, connected machines. Each result contains its machine ID, platform, device name when available, and current call ID when that machine is in a call. Use a machine ID with `tuple call start` to call that device.
## `tuple screen`
Save the shared screen as a JPEG with visible annotations composited in.
```bash theme={null}
tuple screen
tuple screen -o screenshot.jpg
tuple screen -o -
tuple screen --at 2026-05-19T10:00:00Z --call dbd433b7
```
| Flag | Description |
| - | - |
| `-o`, `--output ` | Output path. The default is `tuple@@.jpg`; use `-` for stdout. |
| `--at ` | Read an ISO8601 moment from a stored call. A timestamp without a zone uses local time. |
| `--exact` | With `--at`, use the requested instant instead of settling an unfinished annotation forward. |
| `--call ` | Call to inspect. The default is `current`. |
| `--user ` | Sharer's user ID. The default is whoever is sharing. |
For stored frames, read stderr for timing and annotation caveats.
## `tuple capture`
Control [call capture](/pairing-with-tuple/capturing-calls), read its records, and find or export stored calls. The app owns the local archive. Use the CLI instead of reading its database directly.
Capture records have three categories: `transcript`, `events`, and `content`. Read commands include all three unless `--exclude` removes a category.
### `capture start` / `capture stop`
Start or stop capture. `--call` defaults to `current`.
### `capture show [call-id]`
Print a finite snapshot, then exit. Omit the selector for the active call, use `current`, or pass a stored call ID or unique prefix. Use `--recording ` to select one recording session without a call selector.
| Flag | Description |
| - | - |
| `--recording ` | Select one recording session. |
| `--since ` | Include records at or after this RFC3339 timestamp with a zone. |
| `--until ` | Include records at or before this RFC3339 timestamp with a zone. |
| `--exclude ` | Exclude `transcript`, `events`, or `content`. Repeat the flag or separate values with commas. |
| `--timestamps clock\|rfc3339` | Timestamp style for text output. The default is `rfc3339`. |
Text output is one readable line per record. `--format json` emits one canonical record per line as JSON Lines. It is not a single object or array. The number of lines grows with the selected records, so use `--since` and `--until` when a JSON consumer needs a bounded interval.
### `capture follow [call-id]`
Follow records continuously. Without a call ID, it stays subscribed across calls. When pinned to a call or recording session, it ends with that scope.
### `capture next [call-id]`
Return one batch and exit. The first read without `--cursor` returns the available catch-up immediately. To wait for later records, pass the highest delivered record ID back with `--cursor`.
If the first read is empty and provides no record ID, use `--cursor 0` to start waiting.
Use one foreground invocation at a time. Let your agent harness or task runner schedule the next invocation after it processes the result. Avoid an unattended shell polling loop.
#### Live-read flags
`follow` and `next` support these flags in addition to `--recording`, `--since`, `--exclude`, and `--timestamps`:
| Flag | Description |
| - | - |
| `--cursor ` | Resume strictly after a durable capture record ID. |
| `--batch ` | Set a bounded window for accumulating records before emitting them, such as `60s`. |
| `--wake-on ` | Flush a buffered batch when finalized speech contains this literal phrase. Repeatable. `@FILE` loads one phrase per line. |
| `--wake-if ` | Run a trusted executable to decide whether to flush early. Requires a positive `--batch` duration. |
| `--timeout ` | `next` only. Return empty after this much silence. The default is `30s`; `0` waits without a timeout. |
For `follow` and `next`, `--since` applies only to the initial catch-up. Each JSON output line is either a canonical capture record or a synthetic status line such as `{"kind":"status","status":"call_ended","call_id":"..."}`. Status lines frame delivery. They are not stored capture records and have no durable record ID.
A consumer should save the highest positive record `id` only after those records reach the model or destination. Preserve the call or recording selector and category exclusions when resuming. Never advance a checkpoint from a status line or a record with ID `0`.
#### Wake phrases
Use `--wake-on` with `--batch` to flush buffered output early. Matching is case-insensitive and applies only to finalized speech. `*` matches every finalized speech record. An `agent_prompt` flushes a batch regardless of wake phrases.
`capture follow` watches each referenced `@FILE` and reloads it when it changes. `capture next` reads the file once. Wake phrases apply only to that command invocation.
#### Programmable wake conditions
Use `--wake-if FILE` on `capture follow` or `capture next` to decide when buffered context deserves attention. The mechanisms compose: `--batch` bounds accumulation, `--wake-on` provides an explicit phrase or wake-word interrupt, and `--wake-if` adds a programmable predicate. Either wake condition can flush early; a false predicate keeps buffering until another wake condition or the batch deadline.
The predicate is provider-neutral. You can use a deterministic script, a local model, or a network classifier such as Jev. You supply the executable and any dependencies; Tuple does not bundle Jev. Pass an explicit path such as `./decision-ready` or an absolute path. Tuple does not search `PATH` or run the file through a shell.
As the pending batch grows, Tuple sends one JSON object to the executable's stdin:
```json theme={null}
{"version":1,"elapsed_ms":2300,"records":[{"id":7,"category":"transcript","type":"transcription_finished","time":"2026-09-21T14:00:00Z","data":{"text":"We should cache this lookup.","user_id":42}}]}
```
`elapsed_ms` is the batch's age in milliseconds. `records` contains canonical Capture records in delivery order, after applying `--exclude`. Exit `0` to wake, `1` to keep buffering, or `2` or higher to report an error. Tuple ignores stdout. A failure, missing executable, or 10-second execution timeout ends the CLI command with an error.
For example, give an agent earlier context to draft a decision note when a proposal gets agreement. With `jq` installed, save this local rule as `decision-ready`. It looks for “we should” and either “sounds good” or “agreed” in finalized speech within the pending batch:
```sh theme={null}
#!/bin/sh
exec jq -e '
if .version != 1 then error("Unsupported wake protocol") else
[.records[] | select(.type == "transcription_finished") | .data.text]
| join("\n")
| test("\\bwe should\\b"; "i") and test("\\b(sounds good|agreed)\\b"; "i")
end
'
```
```bash theme={null}
chmod +x ./decision-ready
tuple --format json capture follow current --batch 60s \
--wake-on "Hey Tuple" --wake-if ./decision-ready --exclude events,content
```
Connect this stream to your agent runner to act on the context. `follow` skips predicate calls for its opening backlog. After a wake, it flushes immediately and streams without buffering for about 15 seconds. `next` instead collects until about one second of quiet, capped at about 15 seconds after the wake.
Use only an executable you trust. It runs with your permissions, inherits the CLI environment, and receives transcript contents. A network-backed classifier can send that conversation data to an external service.
### `capture list`
List stored calls newest first. Results include call metadata, a segment count, and resolved participants.
| Flag | Description |
| - | - |
| `--participant ` | Keep calls with a matching participant name or email. |
| `--after ` | Keep calls starting on or after this date. |
| `--before ` | Keep calls starting on or before this date. |
| `--limit ` | Maximum calls. The default is `100`; pass `-1` for all. |
### `capture search `
Search stored speech and shared app names, window titles, and URLs. Results are newest first.
| Flag | Description |
| - | - |
| `--kind spoken\|content\|all` | Select what to search. The default is `all`. |
| `--call ` | Keep one call. Repeatable; accepts `current` or stored-call ID prefixes. |
| `--recording ` | Keep one recording session. |
| `--speaker ` | Keep speech from a matching speaker. |
| `--participant ` | Keep calls with a matching participant. |
| `--after ` / `--before ` | Bound results by date. |
| `-C`, `--context ` | Include nearby speech segments around spoken matches. |
| `--limit ` | Maximum matches. The default is `50`; pass `-1` for all. |
| `--timestamps clock\|rfc3339` | Timestamp style for text output. |
Use plain terms or quote a phrase. If the result set is broad, add participant, call, date, kind, or speaker filters.
Each result identifies its `kind`, call ID, timestamp, and matching snippet. Spoken results also identify the speaker and can include `context_before` and `context_after`. Content results include the app name, window title, and URL when available.
### `capture export `
Write selected records from one or more calls to one artifact file. The destination is replaced only after the complete artifact is ready. If no calls match, the command fails and leaves an existing destination untouched. On POSIX systems, the file mode is `0600`.
| Flag | Description |
| - | - |
| `--as jsonl\|markdown\|text` | Artifact format. JSON Lines is the default. |
| `--call ` | Select a call. Repeatable; accepts `current` or stored-call ID prefixes. |
| `--recording ` | Select one recording session. It cannot be combined with `--call`. |
| `--participant ` | Keep calls with a matching participant. |
| `--after ` / `--before ` | Bound calls by start date. |
| `--exclude ` | Exclude capture categories. |
Each JSON Lines artifact record preserves the canonical capture record and adds `call_id`. The global `--format json` changes only the command receipt; `--as` controls the artifact.
### `capture delete `
Permanently delete one stored call's conversation, events, content, and retained media. This cannot be undone.
### Recording sessions
Each time capture starts, Tuple creates a recording-session UUID. `show`, `follow`, `next`, `search`, and `export` accept `--recording `. The `call-capture-started` and `call-capture-complete` triggers provide it as `TUPLE_TRIGGER_RECORDING_ID`.
## `tuple notifications`
The `--call` flag applies to every notification command and defaults to `current`.
### `notifications send`
Post a notice without waiting for a response. `--title`, `--body`, and `--sender` are required. By default, the card persists until dismissal or cancellation.
`--ephemeral` dismisses an unnoticed card after 10 seconds. `--interaction-timeout ` sets a value from `2s` through `60s` and implies `--ephemeral`.
### `notifications ask`
Post a decision card and wait. `--title`, `--body`, and `--sender` are required. `--accept-label` and `--reject-label` customize the buttons.
The command prints `decision` and `notification_id`. It exits `0` only for `accepted`; `rejected` and `canceled` exit nonzero. The card has no timeout.
### `notifications list`
Return bounded notification containers with their current state, response, timestamps, and lifecycle.
### `notifications follow`
Follow notification lifecycle events. With `--format json`, each event is one JSON line. `--interval ` buffers output.
### `notifications cancel `
Withdraw a card you posted. Only the user can accept or reject it.
## `tuple whoami`
Print the signed-in user's email in text output. `--format json` returns `id`, `email`, `full_name`, and `short_name`.
## `tuple state`
Print a bounded orientation summary. It contains the active call, current user, contact and room counts, pending-invite count, connection state, platform, app version, and available update. Its `see` map points to commands for full entity lists.
The summary's `call` field is the same normalized Call shape returned by `tuple call show --format json`. Online favorite names are capped at 10. When `connection.websocket_state` is not `connected`, presence-derived counts are last-known. Pass `--raw` for the full daemon state.
### `state follow`
Emit a complete bounded summary whenever it changes. With `--format json`, each summary is one JSON line. Pass `--raw` for the daemon's initial state and incremental event stream.
## `tuple agent guide [topic]`
Read operating guidance embedded in this CLI build. Run `tuple agent guide` for the bounded index, then read only the topic your task needs.
Topics include `automation`, `call-content`, `communication`, `connection`, `live-call`, `past-calls`, `safety`, and `troubleshooting`. An app-managed agent also gets `managed-agent`. Availability can hide guidance for unsupported operations.
Use `connection` for call connectivity or quality diagnosis. Use command `--help` for exact flags.
### Session-specific agent commands
The session's generated guidance exposes `agent message ` when agent messaging is available. It sends a message to the user's Tuple chat panel. Capture must be running for the message to enter the stored record.
An app-designated managed run can expose `agent attention`. Its `--cadence` sets a duration in whole seconds and repeatable `--wake-on` values replace that run's wake phrases. Use only the commands exposed for the app-provided session; reading a guide does not enable a capability.
## `tuple connect [purpose]`
Launch the configured AI agent with current-call context and embedded operating instructions. With `--call`, an active call supplies live context and an ended call supplies historical context. See [Connect an AI agent](/cli/connect).
| Flag | Description |
| - | - |
| `--call ` | Select an active or ended call. |
| `--harness ` | Agent to launch. |
| `--model ` | Override the configured model when the harness supports it. |
| `--reasoning ` | Override configured reasoning effort when the harness supports it. |
### `connect prompt [purpose]`
Print the same instructions without launching an agent. It accepts `--call`.
### `connect configure [harness]`
Configure the default agent and its launch settings. This command requires a terminal.
## `tuple mcp`
Run the Tuple MCP server over stdin and stdout. See the [MCP server page](/cli/mcp).
### `mcp install [agent...]`
Register the server with detected supported agents, or name one or more of `claude`, `claude-desktop`, and `codex`. Use `--name` to choose the server identifier.
# Config file
Source: https://docs.tuple.app/cli/config
Configure Tuple agent launches and custom harnesses.
The `tuple` CLI stores production preferences in `~/.tuple/cli.toml`. Use `tuple connect configure` to choose a default agent and edit launch settings interactively, or edit the file directly.
Tuple creates the containing directory with permissions `0700` and writes the file with `0600`. A missing file is valid. On a terminal, `tuple connect` asks you to choose a default agent before its first launch. Invalid TOML returns an error with the file path. Saving through Tuple preserves the supported keys described here; keep a backup if you store additional keys in the file.
## Environment paths
| Environment | Configuration |
| - | - |
| Production | `~/.tuple/cli.toml` |
| Staging | `~/.tuplestaging/cli.toml` |
| Development | `~/.tupledev/cli.toml` |
The selected Tuple environment determines the file. Keep the executable, app socket, and configuration environment aligned.
## Launch settings
`default_harness` selects an agent when `--harness` is omitted. Each `[harness.]` table stores settings for a built-in agent or defines a custom agent.
Built-in keys include `claude`, `codex`, `cursor`, `copilot`, `opencode`, `pi`, `droid`, and `prime-agent`.
| Key | Value |
| - | - |
| `model` | Model name passed through the agent's supported model option |
| `reasoning` | Reasoning setting passed through the agent's supported option |
| `extra_args` | Array of additional arguments inserted before prompt arguments |
| `command` | Custom executable and argument template |
| `url` | Custom URL template |
`--model` and `--reasoning` on `tuple connect` override saved values for one launch. Support depends on the chosen agent. Tuple warns on stderr when it cannot apply an option.
Command-based agents can use saved `model`, `reasoning`, and `extra_args` settings. URL templates ignore these settings, so `tuple connect configure` skips their launch-setting questions.
```toml theme={null}
default_harness = "claude"
[harness.claude]
model = "sonnet"
extra_args = ["--verbose"]
```
## Harness entries
For a built-in agent, set launch options without `command` or `url`. To define a custom agent, choose one template type. A custom entry using a built-in key overrides that built-in agent.
An executable template replaces `{PROMPT}` with the generated prompt. If the placeholder is absent, Tuple appends the prompt as a final argument.
```toml theme={null}
[harness.review]
command = ["/usr/local/bin/review-agent", "--initial-message", "{PROMPT}"]
```
Launch it with `tuple connect --harness review`.
A URL template opens through the platform's URL handler. Tuple URL-encodes the prompt before substituting `{PROMPT}`:
```toml theme={null}
[harness.custom-web-agent]
url = "https://agent.example.com/new?prompt={PROMPT}"
```
Set exactly one of `command` and `url` for a custom agent.
# Connect an AI agent
Source: https://docs.tuple.app/cli/connect
Give an agent Tuple call context, request help once, or explicitly ask it to follow along.
`tuple connect` launches an AI coding agent with context for Tuple. Use `tuple connect prompt` to give that context to an agent that's already running.
Connecting or reading a guide supplies instructions. For a one-time question, the agent reads the relevant context, answers, and finishes. Ask explicitly when you want ongoing participation.
## Prerequisites
The Tuple desktop app must be running and signed in. Follow the [CLI setup and authorization steps](/cli/overview). The agent you choose must be installed separately and available on your `PATH`.
## Choose a call and an agent
```bash theme={null}
tuple connect
tuple connect "help me understand this error"
tuple connect --harness claude
tuple connect --call a1b2c3d4
```
An active call supplies live context. An ended call supplies historical context. `--call` selects either by ID. An unknown call ID returns an error.
If you run `tuple connect` in a terminal without a default agent or `--harness`, a one-step picker asks which agent to use. Tuple saves only that choice as the default, then continues the original command with its purpose and `--call` selection. Canceling the picker leaves the configuration unchanged and does not contact the app or launch an agent.
Passing `--harness` skips first-run setup. Outside a terminal, specify `--harness` or run `tuple connect configure` in a terminal first.
| Flag | Purpose |
| - | - |
| `--harness ` | Built-in agent, custom name, or executable path. Skips the picker. |
| `--call ` | Select an active or ended call. |
| `--model ` | Override the saved model for this launch. |
| `--reasoning ` | Override the saved reasoning setting for this launch. |
Run `tuple connect --help` for the installed command's options. Use [the migration guide](/cli/migration) when updating an existing integration.
## Give an existing agent context
```bash theme={null}
tuple connect prompt
tuple connect prompt --call a1b2c3d4
tuple connect prompt "explain the error we discussed"
```
This command writes instructions to stdout without launching an agent. Load the output into your agent's context. For a runner that accepts a prompt on stdin:
```bash theme={null}
tuple connect prompt | my-agent-runner --stdin
```
Agents can read the embedded guide directly:
```bash theme={null}
tuple agent guide
tuple agent guide live-call
tuple agent guide past-calls
```
Choose `connection` for call connectivity or quality problems, and `troubleshooting` for tool failures or missing call content. The [MCP server](/cli/mcp#resources) exposes the same guidance as resources.
## Configure launches
```bash theme={null}
tuple connect configure
tuple connect configure claude
```
Use this explicit configuration flow to choose a default agent and edit advanced launch settings in [`~/.tuple/cli.toml`](/cli/config). It exits after configuration without launching the agent. Built-in agents include Claude Code, Codex, Cursor, Copilot, opencode, Pi, Droid, and Prime Agent.
Command-based agents can save model, reasoning, and additional argument settings when supported. URL-based agents ignore these settings, so the configuration flow skips those questions for them.
You can define a custom executable using an argument template:
```toml theme={null}
[harness.my-agent]
command = ["my-agent", "--initial-message", "{PROMPT}"]
```
Then launch it with `tuple connect --harness my-agent`. See [custom harness settings](/cli/config#harness-entries) for URL templates and additional arguments.
## Ask an agent to follow along
For ongoing help, give the agent an explicit task and stopping condition, such as “Follow this call and summarize decisions when it ends.” The agent needs an environment that can continue working between messages. For more example prompts, see [Ways to use Capture](/pairing-with-tuple/ways-to-use-capture#during-a-call).
> [!NOTE]
>
> In our testing, the harnesses with the best support for following a call in real time are [Claude Code](https://claude.com/product/claude-code) and [Pi](https://pi.dev/). [Codex](https://chatgpt.com/codex) and [Claude desktop](https://claude.com/download) are less reliable, and support fluctuates as models and harnesses evolve. We're exploring ways to make this experience more consistent while still giving you the freedom to use the models and harnesses you want. [Get in touch](mailto:support@tuple.app) if you want to learn more!
An attached agent owns one reader and its delivery checkpoint. It can use a continuous reader:
```bash theme={null}
tuple --format json capture follow a1b2c3d4 --batch 5s
```
Or request one batch at a time:
```bash theme={null}
tuple --format json capture next a1b2c3d4 --batch 5s
```
The first read includes catch-up. If the first batch is empty, use `--cursor 0` to wait on the next read. After the records reach the model, repeat with `--cursor ` using the highest delivered positive ID. Keep the same call selector and exclusions. A failed delivery keeps the previous checkpoint so the next read can recover the records. See [Capture readers](/cli/commands#capture-follow-call-id) for framing, timeouts, and wake phrases.
With MCP, use `next_capture` only when the server advertises it. Its response and checkpoint rules are documented in [live Capture delivery](/cli/mcp).
A Tuple-managed agent receives context from the app. Use the app-provided tools and `managed-agent` guide for that session. The app owns its ongoing delivery; an attached agent remains attached when it reads a guide.
# Migrate from the earlier Linux commands
Source: https://docs.tuple.app/cli/linux-migration
Update Linux scripts and habits from the original Tuple for Linux commands to the Tuple CLI.
The `tuple` command on Linux is now the [Tuple CLI](/cli/overview), the same CLI that ships with the macOS and Windows clients. Some commands from the original Linux client are gone, some are renamed, and some still work unchanged.
Run `tuple --help` to see which commands your installed version supports.
## Removed commands
These commands no longer work. Use the Tuple CLI command instead.
| Earlier command | Tuple CLI command | Notes |
| - | - | - |
| `tuple call` | `tuple call start ` | Pass the person to call. The earlier command prompted you to pick from your online favorites. To see them, run `tuple contacts list --favorited --status online`. |
| `tuple join ` | `tuple call join ` | Also accepts a contact or a room slug. Pass `--switch` to leave your current call first. |
| `tuple end` | `tuple call leave` | Leaves the current call. |
| `tuple ls` | `tuple contacts list` | Supports filters such as `--query`, `--status`, and `--favorited`. |
| `tuple favorite ` | `tuple contacts favorite ` | `` matches a contact's name or email address. |
| `tuple unfavorite ` | `tuple contacts unfavorite ` | `` matches a contact's name or email address. |
| `tuple mute` | `tuple call mute` | |
| `tuple unmute` | `tuple call unmute` | |
If a `` argument matches more than one contact, the command fails and lists the matches. Use a more specific name or the full email address.
See the [command reference](/cli/commands) for every flag.
## Renamed commands
These commands have new names. The earlier names still work but print a warning, so update your scripts.
| Earlier command | Tuple CLI command |
| - | - |
| `tuple on` | `tuple start` |
| `tuple off` | `tuple stop` |
## Unchanged commands
These Linux-only commands work as before:
* `tuple login`
* `tuple auth `
* `tuple logout`
`tuple version` and `tuple --version` print the app version.
These commands still work but are deprecated:
* `tuple new`
* `tuple share` and `tuple unshare`
* `tuple ui`
* `tuple settings` and `tuple set `
See [Tuple for Linux](/getting-started/tuple-for-linux#commands) for details on Linux-only and deprecated commands.
## Example
An earlier script:
```bash theme={null}
tuple on
tuple join https://tuple.app/c/example
tuple mute
tuple end
tuple off
```
The same script with the Tuple CLI:
```bash theme={null}
tuple start
tuple call join https://tuple.app/c/example
tuple call mute
tuple call leave
tuple stop
```
# MCP server
Source: https://docs.tuple.app/cli/mcp
Connect MCP clients to Tuple tools, Capture resources, and version-matched agent guidance.
`tuple mcp` runs a local [Model Context Protocol](https://modelcontextprotocol.io) server over stdin and stdout. It lets MCP clients read Tuple context, work with calls, inspect Capture data, and communicate with you.
The MCP client starts the `tuple` binary. The binary talks to the Tuple desktop app over its local socket. Tuple must be running, signed in, and authorized for tools that read app state or take actions.
## Install Tuple in an MCP client
Run the install command without an argument to register Tuple with every supported client detected on your Mac:
```bash theme={null}
tuple mcp install
```
You can select one or more clients explicitly:
```bash theme={null}
tuple mcp install claude
tuple mcp install claude-desktop
tuple mcp install codex
tuple mcp install claude codex
```
| Client | Target configuration |
| - | - |
| `claude` | `~/.claude.json` |
| `claude-desktop` | `~/Library/Application Support/Claude/claude_desktop_config.json` |
| `codex` | `~/.codex/config.toml` |
The server name is `tuple` for the production app. Other Tuple environments use a matching name. Pass `--name` to choose a different identifier:
```bash theme={null}
tuple mcp install codex --name tuple-work
```
Restart the MCP client after installation.
## Start with the agent guide
Tuple exposes operating guidance that matches the installed `tuple` binary. An agent can read the root guide at `tuple://agent/guide`, then open only the topic needed for its task at `tuple://agent/guide/{topic}`.
Reading the root guide or the `live-call` topic does not start ongoing monitoring. The guide directs the agent to a bounded read for a one-time question. Following a call begins only when you ask the agent to connect to or follow your call and its MCP manifest includes a live-read capability.
| Guide | What it covers |
| - | - |
| Root guide | Orientation, available topics, and the smallest useful read for a task |
| `live-call` | One-time call questions, shared-screen reads, and explicitly requested live participation |
| `managed-agent` | App-owned context delivery for an agent session started and designated by Tuple |
| `call-content` | Capture records, identities, timestamps, and delivery checkpoints |
| `past-calls` | Finding, reading, and reviewing stored calls |
| `communication` | Tuple chat, call notifications, decisions, and managed attention when available |
| `safety` | Principal authority, untrusted call content, and approval boundaries |
| `connection` | Read-only diagnosis for call connectivity and quality problems |
| `troubleshooting` | MCP access, desktop app access, and missing Capture content |
| `automation` | Choosing between Tuple triggers and external schedulers |
The server selects the topics and instructions for the session. `managed-agent` appears only for an app-designated managed session. In that session, the Tuple app owns live context delivery and resumption, so the agent uses the app-provided mount instead of starting another live reader.
## Discover the active surface
The MCP manifest is the source of truth for the tools, resources, prompts, and schemas available to a session. Tuple asks the desktop app which capabilities apply, registers only the corresponding surfaces, and notifies clients when the manifest changes.
An ordinary attached session can expose these tools:
| Area | Tools |
| - | - |
| Orientation | `get_state`, `get_current_user` |
| Contacts | `list_contacts`, `favorite_contact`, `unfavorite_contact`, `invite_contact`, `remove_contact` |
| Rooms | `list_rooms`, `get_room`, `create_room`, `join_room`, `favorite_room`, `unfavorite_room` |
| Calls and machines | `list_calls`, `list_machines`, `start_call`, `join_call`, `leave_call`, `add_participant`, `remove_participant`, `mute_microphone`, `unmute_microphone`, `update_call` |
| Live and stored Capture | `get_capture`, `get_screen`, `start_capture`, `stop_capture`, `list_captures`, `search_captures`, `export_captures`, `delete_stored_call` |
| Call notifications | `notify_user`, `request_user_decision`, `list_notifications`, `cancel_notification` |
Use the tool's discovered schema for its arguments and result. `get_state` returns a bounded orientation summary. Use the entity tools for full collections and `get_capture` for one active or stored call with its records.
### Capability-dependent surfaces
These surfaces appear only when the app reports the matching capability for the session:
| Surface | Context |
| - | - |
| `next_capture` tool | Reads one resumable batch when an attached agent is allowed to follow a call |
| `connect` tool | Briefs an attached agent on a call when you ask it to connect to or follow that call |
| `message_user` tool | Sends a message to the user's Tuple chat panel |
| `set_attention` tool | Requests delivery cadence and wake phrases for an app-designated managed session |
| `managed-agent` guide topic | Explains app-owned delivery for an app-designated managed session |
Check discovery instead of assuming one of these surfaces exists. The app decides managed participation and supplies its MCP mount and context.
## Resources
Resources provide readable context without requiring the agent to reconstruct it from tool results.
| URI | Content |
| - | - |
| `tuple://agent/guide` | Root operating guide and topic index for this session |
| `tuple://agent/guide/{topic}` | Focused operating guidance for an available topic |
| `tuple://capture/{callId}` | Human-readable Capture snapshot for an active or stored call |
Use `current` as `{callId}` for the active call. For structured records, category exclusions, or a bounded time range, use `get_capture`.
## Prompts
Tuple registers reusable prompts for common call tasks. MCP clients decide how to display and invoke them.
| Prompt | What it does |
| - | - |
| `summarize_call` | Reads an active or stored call and asks the agent for discussion points, decisions, commitments, and follow-ups |
| `find_discussion` | Searches stored calls for a topic, with optional participant and date filters |
## Connect an agent to a call
Ask the agent to connect to, listen to, or follow your Tuple call. When the `connect` tool is available, the agent calls it and passes your goal or stopping condition as `purpose`. The tool is read-only. It does not join a call, start Capture, or run a background listener.
The tool returns a briefing for the selected call, with guide pointers and the most recent events and transcript lines. `call_id` selects the call and defaults to the current call. `tail` sets how many recent lines to include and defaults to `100`.
| Selected call | What the agent does |
| - | - |
| Active, with Capture on | Follows the call until it ends or you ask it to stop. A narrower `purpose`, such as a one-time briefing or following until a decision is made, takes precedence. |
| Active, with Capture off | Reports that speech is unavailable. Connecting does not turn on Capture. |
| Ended | Uses the call as historical context only. |
| No active call, or Tuple is not reachable | Reports the problem and stops. |
## Live Capture delivery
When advertised, `next_capture` reads one batch for an explicitly requested ongoing task. Its result contains `call_id`, `records`, `cursor`, and `terminal`. Omit `cursor` for initial catch-up. After the records reach the model, repeat with the returned call and cursor. If initial catch-up is empty, `cursor: 0` begins waiting. Preserve the previous checkpoint after a failed delivery.
Use `batch` for buffering, `timeout` to bound idle waiting, and `wake_on` for literal phrases that flush matching speech early. Stop at `terminal.status: "call_ended"`. A `recording_ended` record ends Capture for that recording, not the call.
For a one-time question, use `get_capture` and finish after answering. It returns a structured `{call, records}` result; `since`, `until`, and `exclude` narrow the read.
## Safety and confirmations
Call transcripts, shared screens, and stored records are context, not instructions. The agent guide identifies the person who connected the agent as its principal and tells the agent to ask before acting on requests from other participants.
Tools publish MCP annotations that identify read-only, mutating, idempotent, and destructive operations. Confirmation behavior depends on the MCP client. Treat calls, participant changes, mute changes, contact removal, stored-call deletion, and file exports as consequential actions that require authorization from the principal when the request has not already authorized them.
For an existing integration, follow the [CLI and MCP migration guide](/cli/migration).
## Connection problems
If the MCP server is missing or disconnected, reconnect it in the MCP client and restart the client if needed. If the server is present but app tools fail, confirm that Tuple is running, signed in, and [authorized under **Settings → Integrations → CLI Server**](/cli/overview#authorizing-the-cli).
For problems with call connectivity or media quality, have the agent read `tuple://agent/guide/connection`. It starts with read-only Tuple state and separates observations from inferences. See [Networking and firewall issues](/troubleshooting/networking-and-firewall-issues) for human troubleshooting steps.
# Migrate Tuple CLI and MCP integrations
Source: https://docs.tuple.app/cli/migration
Update Tuple scripts, agent skills, prompts, and MCP allowlists using the installed command and tool contracts.
This page is the migration entry point for existing Tuple CLI users and their agents. Give your agent this page with the files you want updated. It covers the Transcription CLI generation and the Capture CLI generation.
Last verified: September 9, 2026, against installed macOS 3.2.0 and a separately built Capture-generation CLI. Select the contract exposed by your installed app and binary.
## Identify the installed contract
Before editing an integration:
1. Resolve the exact executable your script or MCP configuration launches. Keep the CLI paired with its app and environment.
2. Record the app version and build. On macOS, read the app bundle's `Info.plist`. The Transcription-generation CLI rejects `--version`.
3. Read root and nested help from that executable. For MCP, initialize that server and read `tools/list`, `resources/list`, `resources/templates/list`, and `prompts/list`. Tool availability can depend on the session.
4. Select the matching column below. Update only to commands and schemas the installed executable exposes. If the app and CLI disagree, resolve the installation mismatch before testing actions.
For a standard macOS installation:
```bash theme={null}
ls -l /usr/local/bin/tuple
/usr/libexec/PlistBuddy -c 'Print :CFBundleShortVersionString' /Applications/Tuple.app/Contents/Info.plist
/usr/libexec/PlistBuddy -c 'Print :CFBundleVersion' /Applications/Tuple.app/Contents/Info.plist
/Applications/Tuple.app/Contents/SharedSupport/bin/tuple --help
```
Adjust the bundle path if you use a different installation. An MCP initialization response's server version identifies the server implementation, not the Tuple app release.
| Contract | How to identify it | Instructions to use |
| - | - | - |
| Transcription generation | Root help lists `transcription`; `transcription show --help` lists `--follow`, `--wait`, and `--with-events`. | Keep the legacy commands until the installed app and CLI support Capture. The baseline inspected for this guide is macOS 3.2.0, build `3.2.0-2026-08-12-9d2e82a561`. |
| Capture generation | Root help lists `capture`; nested help exposes `capture show`, `capture follow`, `capture next`, `connect prompt`, and executable `screen`. | Apply the Capture column and verify its behavior below. Use the [command reference](/cli/commands) and [release notes](/changelog) for the installed release. |
Detect the command contract instead of assuming a minimum version from this table. A root command's presence alone does not prove a flag, MCP tool, or app capability is available.
## Update commands and defaults
Every command below starts with `tuple`. Preserve the exact executable path in scripts and bundled integrations.
| Legacy command or option | Capture-generation replacement | Change and required action |
| - | - | - |
| `transcription start`, `transcription stop` | `capture start`, `capture stop` | Rename. Capture owns the call record, including transcript, events, content, stored screen media, and annotations. |
| `transcription show ` | `capture show ` | Rename and default change. Read all categories unless you explicitly exclude some. |
| `transcription show --follow --with-events` | `capture follow ` | Split into a dedicated reader. Events are included by default. |
| `transcription show --wait` | `capture next ` | Split and semantic change. The caller owns the delivery checkpoint. |
| `--cursor my-agent` on a legacy wait reader | `--cursor ` on `capture follow` or `capture next` | Semantic change. A named server-side read position is not a record ID. Start catch-up without a cursor and save the highest delivered positive ID. |
| `--interval 60s` on a transcript reader | `--batch 60s` | Rename for batching. Use only on `follow` or `next`. |
| `--watch-words` | Repeatable `--wake-on` | Each value is one literal phrase. A comma stays inside that phrase. Use with `--batch`. |
| `transcription watch get`, `path`, `set` | Reader-owned `--wake-on @` or literal phrases | Shared state removed. A continuous follower reloads only its own specified files. `next` reads them once per invocation. |
| `--with-events`, `--with-speech-markers` | Complete reads, or `--exclude events,content` for transcript-only output | Default and category change. Category selection does not reproduce every legacy record-type filter. |
| `--without-speech`, `--without-chat` | Select categories, then filter individual record types in your consumer if needed | Semantic change. `--exclude transcript` removes the transcript category, not just finalized speech. Preserve chat and other records your task needs. |
| `transcription list`, `search`, `delete` | `capture list`, `search`, `delete` | Rename. Deletion also removes retained media. Test reads first and preserve confirmation for deletion. |
| `transcription export --format md` | `capture export --as markdown` | Destination and format change. One artifact contains all selected calls. |
| Export `--format ndjson` | Export `--as jsonl` | Artifact format rename. Global `--format json` controls the receipt, not the artifact. |
| `transcription set-title`, `set-summary` | `call edit --title ... --summary ...` | Relocation and merge. Set only fields you intend to change. |
| `call current` | `call show` | Rename and broader lookup. A call selector can identify an active or ended call. |
| `call hang-up` | `call leave` | Rename. |
| `call add`, `call remove` | `call participants add`, `call participants remove` | Relocation. |
| `call mute`, `call unmute` | `call mute`, `call unmute` | Unchanged CLI commands. MCP names change separately below. |
| Top-level `reaction` | `call react` | Relocation. Read help for supported sounds. |
| `contacts list ` | `contacts list --query ` | Positional query removed. |
| `state --follow` | `state follow` | Dedicated stream command. Bounded summaries are the default; `--raw` requests the full payload. |
| `screen capture -o image.jpg` | `screen -o image.jpg` | Executable command. Without `-o`, it saves an automatically named JPEG. |
| `connect --print` or non-terminal implicit prompt output | `connect prompt` | Explicit command. Root `connect` launches an agent. |
| `connect --config` | `connect configure [harness]` | Explicit configuration command. |
| Global `--format default` or `--format table` | `--format text` | Format change. Text is the default; scripts must request JSON explicitly. |
| Global `--format ndjson` | `--format json` | JSON Lines is the stream encoding, not a global format name. |
The inspected 3.2.0 root help does not list `machines`. On a Capture-generation installation that exposes it, use `machines list` and pass its machine UUID to `call start `. Keep person-name resolution separate from machine IDs.
Contacts and rooms retain their command groups. Verify filters through nested help. Notifications use `notifications send`, `ask`, `list`, and `cancel`; replace legacy `notifications list --follow` with `notifications follow`. Replace `contacts list --follow` with `contacts follow`. Rooms use `rooms follow` for updates and `rooms show` for one room. Verify each command separately instead of replacing flags globally.
Terms such as `sessions`, `--session`, review/headless modes, and `mcp serve` can occur in older skills but are absent from the inspected baseline's public command tree. Remove those assumptions. Use Call selectors, `connect prompt` for instructions, and `tuple mcp` as the server entry point. A Capture recording selector is `--recording `; it is distinct from a connected client's session identity.
In `cli.toml`, remove the obsolete `mcp_installed` bookkeeping key and any `[harness..attention]` tables. Keep client registration in the client's MCP configuration. Set `--batch` and `--wake-on` on the runtime Capture reader for requested ongoing participation.
## Preserve Capture meaning and delivery
`capture show --format json` returns a finite sequence of JSON Lines. `capture follow --format json` and `capture next --format json` also emit JSON Lines. Parse each stream line separately and distinguish durable records from framing.
The categories are `transcript`, `events`, and `content`. Replace any `conversation` category assumption with the appropriate supported category. The record type `transcription_finished` still identifies finalized speech; a product command rename does not rename record types.
For an explicitly requested ongoing task:
1. Keep one reader for the selected call. Its first read supplies catch-up, so a separate initial snapshot can duplicate context.
2. Deliver durable records to the model or destination. Save the highest positive record `id` only after that delivery succeeds.
3. Resume with that ID, the same call or recording selector, and the same exclusions. Retain the prior checkpoint after a delivery failure.
4. Handle `kind: "status"` separately from durable records. Carry terminal framing to the task controller so it can stop at call end. Neither framing nor an ephemeral `id: 0` advances the checkpoint.
5. Stop a call-specific reader at `call_ended`. `recording_ended` means Capture stopped and may restart within the call. A follower without a call selector stays open across calls, so use it only when the user's task covers those calls.
```bash theme={null}
# First read for an explicitly requested ongoing task:
tuple --format json capture next a1b2c3d4 --batch 5s
# After the model receives records through ID 42:
tuple --format json capture next a1b2c3d4 --cursor 42 --batch 5s
```
Replace the sample call and record IDs with observed values. Persist the returned checkpoint only after delivery succeeds. A verification read is still an undelivered read: it must not advance the saved checkpoint. If delivery succeeds but saving fails, the next read can replay those records; make your destination idempotent or deduplicate by call and record ID.
A repeated batch command without an updated checkpoint can replay catch-up. A shell loop that discards stdout does not deliver context to an agent.
An empty first CLI batch still needs `--cursor 0` on the next invocation to wait for records instead of repeating immediate catch-up. Keep the prior cursor after later empty batches.
`--since` selects time-based catch-up. It is not a delivery checkpoint. `--until` belongs to bounded `show`, not live readers. For Capture exclusions, keep at least one category.
Exports take a file destination. They preserve the previous destination if no calls match and replace it only after a complete artifact is ready. Create a private temporary directory for verification instead of overwriting an existing export.
```bash theme={null}
tuple capture export ./call.jsonl --call a1b2c3d4 --as jsonl --format json
tuple capture export ./call.md --call a1b2c3d4 --as markdown --exclude events,content
```
Each JSON Lines artifact record includes `call_id` so a multi-call export remains attributable.
## Update MCP configuration and allowlists
Keep `tuple mcp` as the server command and point it at the matching bundled executable. Reconnect the client after changing configuration, then refresh discovery. Keep the client-specific server prefix when replacing allowlisted tool suffixes.
| Legacy MCP name | Capture-generation route | Change |
| - | - | - |
| `start_transcription`, `stop_transcription` | `start_capture`, `stop_capture` | Rename and complete Capture ownership. |
| `get_transcription`, `get_transcription_events`, `transcription_show` | `get_capture` | Merge into a bounded Call plus records. Preserve needed categories with `exclude`. |
| `transcription_list`, `transcription_search` | `list_captures`, `search_captures` | Rename. Validate argument and result schemas. |
| `transcription_export` | `export_captures` | Rename and artifact change: replace `dir` with `destination`, and keep the MCP `format` field with values `jsonl`, `markdown`, or `text`. |
| `set_call_title`, `set_call_summary` | `update_call` | Merge. Use `call_id` and only the metadata fields you intend to update. |
| `capture_screen` | `get_screen` | Rename. Omit `at` for live pixels; provide `at` and `call_id` for a stored moment. |
| `get_active_call` | `get_state` for orientation; `get_capture` for a bounded Call and its records | Removal and task-specific replacement. |
| `end_call` | `leave_call` | Rename. |
| `mute`, `unmute` | `mute_microphone`, `unmute_microphone` | Rename. |
| `connect` tool | Advertised `connect` tool; otherwise read `tuple://agent/guide`, then the topic needed for the task | Capability-dependent, read-only tool with optional `purpose`, `call_id`, and `tail`. On an active call with Capture on, it tells the agent to follow the call unless `purpose` is narrower. Before macOS 3.3.6 and Windows 2.0.10, the `connect` prompt replaced it and provided context once. |
| `transcription_set_watch_words` | `wake_on` on advertised `next_capture`; app-owned `set_attention` where registered | Shared mutation removed. Do not add a tool the server doesn't advertise. |
| State, transcript, event, notification, and archive resource aliases and subscriptions | Bounded tools and `tuple://capture/{callId}` | Removed subscriptions and duplicate resources. Explicit ongoing delivery uses an advertised reader. |
Resource migrations are explicit reads:
| Legacy resource URI | Capture-generation read |
| - | - |
| `tuple://state` | `get_state`; use entity tools for full collections |
| `tuple://call/{callId}/transcription` and `.json` | `get_capture` with `call_id`, or `tuple://capture/{callId}` |
| `tuple://call/{callId}/events` and `.json` | `get_capture` with `exclude: ["transcript", "content"]` |
| `tuple://call/{callId}/stream` and `.json` | `get_capture` for a snapshot; advertised `next_capture` for requested ongoing delivery |
| `tuple://call/{callId}/notifications` and `.json` | `list_notifications` with `call_id` |
| `tuple://transcription/calls` and `.json` | `list_captures` |
| `tuple://transcription/call/{callId}/transcript` and `.json` | `get_capture` with `call_id` |
Remove resource subscriptions and their re-read callbacks. A bounded snapshot does not replace a subscription's ongoing behavior; implement explicit reader ownership for a task that needs it.
`find_discussion` and `summarize_call` prompts remain available. Starting with macOS 3.3.6 and Windows 2.0.10, the `connect` prompt is a `connect` tool that appears when the app permits live-call pull. Read their current argument schemas. Use ordinary search terms in examples instead of teaching agents raw database query syntax.
Resources include `tuple://agent/guide`, `tuple://agent/guide/{topic}`, and `tuple://capture/{callId}`. Topics include `live-call`, `call-content`, `past-calls`, `communication`, `safety`, `connection`, `troubleshooting`, and `automation`. The app's managed mount also supplies `managed-agent`.
When advertised for an attached session, `next_capture` returns a batch with `call_id`, `records`, `cursor`, and `terminal`. Omit `cursor` for initial catch-up. After delivery, repeat with the returned call and cursor. If initial catch-up is empty, `cursor: 0` starts waiting. Stop at terminal `call_ended`; retain the reader across `recording_ended`. Use `batch`, `timeout`, and `wake_on` according to the advertised schema.
Agent messaging and managed attention depend on session capabilities. Refresh discovery when it changes. The app owns managed mode and its delivery loop. Reading `managed-agent` or changing an allowlist does not make an attached agent managed.
## Check scripts, skills, and prompts
Search the files you own, including `AGENTS.md`, `CLAUDE.md`, skills, launch scripts, MCP configurations, and allowlists:
```bash theme={null}
rg -n 'transcription|capture_screen|get_active_call|screen capture|mcp serve|connect --print|connect --config|hang-up|watch.words|--session|--format (table|default|ndjson)' .
```
Review every match in context. Preserve valid record types and any intentional legacy compatibility branch. For each edited integration:
* Pin its executable and app environment. Keep separate verified branches if it supports both generations.
* Replace command names, flags, destinations, structured argument fields, and response parsers together.
* Make a one-time request finish after its bounded reads. Start one ongoing reader only for an explicit follow-along request.
* Remove named active/passive/watch modes and unsolicited polling from prompts. Use the installed shared guides for participation instructions.
* Preserve confirmation and user intent for call actions, notifications, exports, and deletion.
## Verify behavior before declaring migration complete
Run these checks with the matching app and CLI. Report actual exit codes, stderr, parsed results, and any check you could not exercise.
| Check | Expected result |
| - | - |
| Nested help for every changed command and discovery for every allowlisted tool | The exact spelling, flag, and input schema exists in the installed environment. |
| `tuple state --format json` | One parseable JSON value with app/call orientation. Default output is text. |
| `tuple capture show --format json` | A finite JSON Lines sequence containing the selected call's complete records. Exclusions remove only the requested categories. |
| A JSON Lines export to a fresh file in a private temporary directory | One artifact, attributable records, and a separate command receipt. An unmatched selection leaves an existing destination untouched. |
| A call-specific batch reader followed by resume | Delivered records do not replay after their checkpoint. A simulated delivery failure resumes from the preceding checkpoint and recovers undelivered records. |
| A call-specific follower through Capture stop/restart and call end | Recording end does not end the task; call end does. Check cross-call following separately if your integration uses it. |
| `tuple screen -o ` and stored `--call` plus `--at` | JPEG output when media exists. Preserve reported timing/annotation caveats. Missing stored media is a data-availability error. |
| Invalid input, missing call, and unavailable capability | Non-zero CLI failure or MCP error; no success-shaped result is treated as completion. |
| Give an agent only this page and representative legacy files | It updates the script, skill, and allowlist, then passes the applicable execution checks without extra migration instructions. |
The removed `screen_share_recording` product flag is separate from macOS **Screen Recording** permission. Capture owns stored screen media. Historical selectors remain discoverable even when a call has no stored video.
Use the [CLI reference](/cli/commands), [Connect guide](/cli/connect), and [MCP reference](/cli/mcp) for ongoing use after migration.
# CLI overview
Source: https://docs.tuple.app/cli/overview
Install and authorize the Tuple CLI for calls, Capture, and agent integrations on macOS, Windows, and Linux.
The `tuple` CLI is a command-line tool that controls a running Tuple desktop app. You can use it to start and join calls, manage contacts, capture the shared screen, stream the transcript of a captured call, search past calls, post notifications into a call, and run an MCP server so AI coding agents can drive Tuple on your behalf.
The CLI talks to the desktop app over a local socket - **there's no network call to Tuple's servers**. The app must be running and signed in for commands to work.
## Installing the CLI
The `tuple` binary ships inside the Tuple app bundle. To make it available on your `PATH`:
1. Open **Settings → Integrations** (or press **cmd + ,** and select **Integrations** in the sidebar).
2. Find **CLI Server** in the integrations list.
3. Click **Install CLI…**.
Tuple symlinks the bundled binary into `/usr/local/bin/tuple`. If `/usr/local/bin` is not writable by your user, Tuple prompts for your administrator password.
Once installed, run `tuple --help` from any terminal to see the command tree. Commands use readable text by default. Pass `--format json` when a script needs structured output; see [output formats](/cli/commands#global-flags) for JSON and JSON Lines.
## Authorizing the CLI
Tuple gates access behind an explicit authorization decision. Right after you click **Install CLI**, Tuple makes a harmless probe through the newly installed binary so the authorization prompt appears while you're still in the install flow. If that probe doesn't run for any reason, the prompt will instead appear the first time you run a `tuple` command from your terminal.
Your choice is stored in the macOS Keychain. You can revoke or re-grant access at any time from **Settings → Integrations → CLI Server**. Revoking takes effect immediately - any CLI command running at the time will stop.
This prompt keeps other programs on your Mac from using Tuple to get around macOS's per-app permissions, such as **Screen Recording** and **Microphone**.
> [!NOTE]
>
> While authorization is unset, individual `tuple` commands wait for your decision rather than failing. If you dismiss the prompt without choosing, the request stays parked until you make a decision or quit Tuple.
## Configuration file
The CLI stores user-level preferences — your default harness for [`tuple connect`](/cli/commands), custom harness definitions, and per-harness launch settings — in `~/.tuple/cli.toml`.
```bash theme={null}
tuple connect # reads ~/.tuple/cli.toml
```
The file is created on first write with permissions `0600` (parent directory `0700`). A missing file is valid. On a terminal, `tuple connect` asks you to choose a default agent before its first launch. Example contents after picking Claude Code as your default harness and saving a model override:
```toml theme={null}
default_harness = "claude"
[harness.claude]
model = "claude-sonnet-4"
```
## What's next
* [Migrate an existing integration](/cli/migration) - update scripts, skills, and MCP configuration.
* [Command reference](/cli/commands) - every command, flag, and subcommand.
* [Connect an AI agent](/cli/connect) - launch an AI coding agent into the active call.
* [Config file](/cli/config) - configure the CLI via a dotfile
* [MCP server](/cli/mcp) - let AI agents drive Tuple.
* [Searching past calls](/pairing-with-tuple/searching-past-calls) - query and export past calls with `tuple capture`.
* [Capturing calls](/pairing-with-tuple/capturing-calls) - the app-side feature these commands read.
The `tuple` CLI is a command-line tool that controls a running Tuple desktop app. You can use it to start and join calls, manage contacts, capture the shared screen, stream the transcript of a captured call, search past calls, post notifications into a call, and run an MCP server so AI coding agents can drive Tuple on your behalf.
The CLI talks to the desktop app over a local named pipe - **there's no network call to Tuple's servers**. The app must be running and signed in for commands to work.
## Installing the CLI
The Windows installer puts the `tuple` binary at `%LOCALAPPDATA%\tuple\bin\tuple.exe`. The installer doesn't change your `PATH`, so add that `bin` folder to it yourself.
Then run `tuple --help` from any terminal to see the command tree. Commands use readable text by default. Pass `--format json` when a script needs structured output; see [output formats](/cli/commands#global-flags) for JSON and JSON Lines.
## Security
The Windows CLI doesn't ask for authorization. Windows doesn't have macOS's per-app permissions, so any program running as you can already record your screen, control input, and read your Tuple data. The named pipe only accepts connections from your own user account on the same computer.
## What's next
* [Command reference](/cli/commands) - every command, flag, and subcommand.
* [Connect an AI agent](/cli/connect) - launch an AI coding agent into the active call.
* [MCP server](/cli/mcp) - let AI agents drive Tuple.
* [Searching past calls](/pairing-with-tuple/searching-past-calls) - query and export past calls with `tuple capture`.
* [Capturing calls](/pairing-with-tuple/capturing-calls) - the app-side feature these commands read.
The `tuple` CLI is a command-line tool that controls the Tuple daemon. You can use it to start and join calls, manage contacts and rooms, and run an MCP server so AI coding agents can drive Tuple on your behalf.
The CLI talks to the daemon over a local Unix socket in `$XDG_RUNTIME_DIR` - **there's no network call to Tuple's servers**. Most commands start the daemon if it isn't running, but it must be signed in for commands to work.
## Installing the CLI
The CLI is part of the Tuple for Linux binary, so there's nothing extra to install. See [Tuple for Linux](/getting-started/tuple-for-linux) to install Tuple and sign in.
Run `tuple --help` from any terminal to see the command tree. Commands use readable text by default. Pass `--format json` when a script needs structured output; see [output formats](/cli/commands#global-flags) for JSON and JSON Lines.
## What's next
* [Command reference](/cli/commands) - every command, flag, and subcommand.
* [Tuple for Linux](/getting-started/tuple-for-linux) - Linux-only commands, settings, and logs.
* [MCP server](/cli/mcp) - let AI agents drive Tuple.
# Installation
Source: https://docs.tuple.app/getting-started/installation
After you download and open Tuple, we'll prompt you for access to your microphone, camera, screen, and accessibility tools. Clicking "Ask for Access" for each option (Microphone, Camera, Accessibility, and Screen Recording) will take you to your System Preferences, where you can grant access:

Once your permissions are set up, you'll be prompted to sign in through your web browser:

Once signed in on your web browser, you'll see a dialog asking if you'd like to be redirected back to Tuple. It'll look something like this:

Open that link with the Tuple app, and you'll be signed in!
When that's done, you'll see the Tuple icon appear in the menu bar. Go ahead and click it, and you'll be able to [share your screen!](/pairing-with-tuple/sharing-your-screen)

#### Troubleshooting
Sometimes permissions become misconfigured (for example when installing Tuple on a new laptop restored from a previous backup).
If you are having trouble giving permissions to Tuple, you can try running the following commands in terminal to reset permissions:
```
tccutil reset All app.tuple.app
defaults delete app.tuple.app
```
Once you have run these commands, please restart Tuple before continuing.
# Tuple for Linux (alpha)
Source: https://docs.tuple.app/getting-started/tuple-for-linux
Tuple for Linux is currently in alpha and under active development. The client is primarily command-line driven.
To install, visit [the Linux install page](https://tuple.app/linux?utm_source=docs) for the latest download command and architecture options.
Join the [Slack channel](https://tuple.app/linux/slack) to provide feedback, report bugs, and ask questions.
## Display server support
Tuple runs natively on both **X11** and **Wayland**. The client automatically detects your session type using the `XDG_SESSION_TYPE` environment variable.
All core features, including screen sharing, the drawing overlay, and UI windows, work on both display servers.
## Current feature set
> [!WARNING]
>
> The Tuple client on Linux is **extremely barebones** at the moment. We'll be working hard to flesh it out in the coming weeks — your patience is appreciated!
### What works
* Logging in and running Tuple as a daemon — you'll appear available for your contacts / teammates
* Receiving an incoming direct call
* Starting a call
* Joining a call via a URL
* Hearing (and being heard by) others using the system default audio device
* Viewing a shared screen
* Sharing your own screen
* Viewing drawing annotations on a shared screen
* Drawing on the shared screen
* Remotely controlling someone else's screen
* Being remotely controlled while sharing
* Initiating a direct call from the command line
* Listing and managing contacts and favorites
* Muting and unmuting your microphone
* Viewing webcams shared by others
### Not yet implemented
* UI for making calls, managing contacts, and settings (everything is done via the command line for now)
* Being remotely controlled while sharing on GNOME, KDE, and other Wayland compositors without wlroots virtual input support
* Viewing text or highlight click annotations on the shared screen
* Changing audio devices
* Sharing your own webcam
### Being remotely controlled
When you share your screen, guests can control it with their mouse and keyboard in these sessions:
* **X11**: Tuple sends input through the XTEST extension. Apps running under Xwayland in a Wayland session aren't supported.
* **Wayland compositors that support the `wlroots` virtual input protocols**, such as `sway`, `labwc`, `Hyprland`, and `river`.
On other Wayland compositors, including GNOME and KDE, guests can view your shared screen but can't control it.
## Commands
On Linux, the `tuple` command is the [Tuple CLI](/cli/overview), the same CLI that ships with the macOS and Windows clients. See the [command reference](/cli/commands) for the full list, and run `tuple --help` to see what your installed version supports.
If you used the earlier Linux commands, see [Migrate from the earlier Linux commands](/cli/linux-migration).
Capture isn't available on Linux yet, so `tuple capture` commands don't work. Linux also doesn't show cards posted with `tuple notifications` yet.
Most commands start the Tuple daemon if it isn't already running. The daemon listens on a socket in `$XDG_RUNTIME_DIR`, which most desktop sessions set. If it isn't set, `tuple` exits with an error.
### Linux-only commands
These commands exist only on Linux. They manage the daemon and your sign-in, which the macOS and Windows apps handle in their UI.
| Command | Description |
| - | - |
| `tuple start` | Starts the Tuple daemon. Most other commands also start it automatically. |
| `tuple stop` | Stops the Tuple daemon. |
| `tuple login` | Starts the sign-in process. Prints a URL to sign in on the web. The last step shows an authorization code to pass to `tuple auth`. |
| `tuple auth ` | Finishes signing in with the authorization code from `tuple login`. |
| `tuple logout` | Signs you out of Tuple. |
| `tuple version` | Prints the app version. `tuple --version` does the same. |
### Deprecated commands
These commands still work, but they're deprecated:
| Command | Description |
| - | - |
| `tuple new` | Starts a new call on your personal URL and joins it. Prints the URL so you can share it with others. |
| `tuple share` | Starts sharing your entire viewable display — not just one monitor. |
| `tuple unshare` | Stops sharing your screen. |
| `tuple ui` | Displays a simple debugging UI. |
| `tuple settings` | Lists all [settings](#settings) and their values. |
| `tuple set ` | Sets the setting named `` to ``. |
## Settings
| Setting | Type | Values | Description |
| - | - | - | - |
| `overlay` | bool | `0`, `1` | Enables the "host overlay", which is where annotations are drawn. Transparency doesn't work correctly with certain window managers / compositors, which can cause this window to render incorrectly. Use this setting to disable it if needed. |
| `start-calls-muted` | bool | `0`, `1` | Joins every call with your microphone muted. Defaults to `0`. |
| `capture` | enum | `auto`, `x11`, `portal` | Controls which screen capture mechanism Tuple uses. `auto` selects the best method for your session type. `x11` forces X11 capture. `portal` forces the XDG Desktop Portal (PipeWire) capture used on Wayland. |
### Screen capture methods
You can also cycle through capture mechanisms during a call by clicking the capture button in the call UI. The button appears next to the screen share button and displays the current capture mechanism (`auto`, `x11`, or `portal`). Clicking it cycles to the next option.
### Fonts
Tuple runs `fc-match sans-serif:fontformat=TrueType` to find your system's "sans-serif" font.
## Troubleshooting screen capture
If screen capture fails, Tuple displays the operation that failed and either the system error name or its `errno` value. You can dismiss the popup by clicking **Dismiss** or pressing **Enter**.
Common causes of screen capture failures on Linux include:
* **Wayland**: The XDG Desktop Portal or PipeWire service is not running, or the portal stream disconnected. Make sure `xdg-desktop-portal` and `pipewire` are installed and active on your system.
* **X11**: Tuple could not query screen information. Verify that your X11 display server is running and accessible.
If the error persists, check the [log file](#logs) for the same operation and error details, then share them with the team in the [Slack channel](https://tuple.app/linux/slack).
## Logs
Tuple logs to:
```
$XDG_DATA_HOME/tuple/0/log.txt
```
If the `$XDG_DATA_HOME` environment variable is not set, logs are written to:
```
$HOME/.local/share/tuple/0/log.txt
```
These are useful to include in any bug reports.
# Adding Integrations
Source: https://docs.tuple.app/managing-your-account/adding-integrations
Tuple supports integrations that make signing in and jumping on calls even easier.
You can manage your integrations on [your integration preferences page](https://production.tuple.app/profile#integrations).
## CLI Server
You can install a `tuple` command-line tool to start calls, manage contacts, follow a [captured](/pairing-with-tuple/capturing-calls) call, and drive AI agents over MCP from your terminal. Learn more on the [CLI page](/cli/overview).
## Slack
Want to add a `/tuple` command to Slack?
Check out our [Slack integration](https://tuple.app/slack?utm_source=docs).
## Google Calendar
If you're a Gcal user, you can add Tuple call URLs directly in your calendar when setting up a meeting. To set it up, head to the [Google Calendar integration page](https://tuple.app/gcal?utm_source=docs).
## Apple Calendar
If you use Apple Calendar on macOS, you can also add Tuple call URLs directly to your calendar events. You can learn more on the [Apple Calendar integration page](https://tuple.app/ical?utm_source=docs).
## Spotlight
On macOS 26 and later, you can use Spotlight to start calls or join rooms. Learn more on the [Spotlight integration page](/pairing-with-tuple/spotlight-integration).
## Custom Lifecycle Hooks
We built Triggers into Tuple so that you can leverage any of the existing lifecycle events (starting a call, joining a call, etc.) to perform custom actions or code. Read more on the [Triggers page](https://tuple.app/triggers?utm_source=docs).
# Resetting your password
Source: https://docs.tuple.app/managing-your-account/resetting-your-password
Need a new password? No sweat.
Here's what you want:
[reset your password on Tuple](https://production.tuple.app/password_resets/new).
If that doesn't work for some reason, please
[email support](mailto:support@tuple.app).
# Setting your profile picture avatar
Source: https://docs.tuple.app/managing-your-account/setting-your-profile-picture-avatar
Avatars (or "Profile pictures") in Tuple are set using a service called
[Gravatar](https://gravatar.com).
If you're not familiar, configuring your Gravatar (for free) lets any service retrieve that avatar knowing only your email address.
**Setting an avatar makes it easier for your colleagues to find you, so we recommend taking the time to do it.**
As a bonus, services you sign up for in the future can pull in your avatar automatically, saving you steps later.
Why not
[do it right now](https://gravatar.com)?
**Note:** You will need to create the Gravatar account with the same email address as your Tuple account in order for Tuple to be able to sync the image.
# Upgrading a guest account
Source: https://docs.tuple.app/managing-your-account/upgrading-a-guest-account
If you were invited to pair with someone on Tuple but didn't sign up for a paid account, you're likely on our Guest team.
To create your own team, you can sign into the native app where you'll see a banner that looks like this:

Click "Upgrade", and we'll walk you through the rest!
If you're not signed in or don't have the native app downloaded, you can visit [this page](https://production.tuple.app/account_upgrade/new) to start the same process.
# Using Tuple as an unpaid user
Source: https://docs.tuple.app/managing-your-account/using-tuple-as-an-unpaid-user
To pair with Tuple, at least one of the users in the session must be a paid user on a Team (or a trialing user).
To invite a user to be on the Tuple guest team so that you can pair with them, head to the invitations tab and select the option "Outside collaborators":

If you think you should have a paid account on a team, reach out to the Team Owner of your team and they can invite you via a team link.
If you would like to move to a paid team of your own, you can read more about how to do that here: [Upgrading a guest account](/managing-your-account/upgrading-a-guest-account).
If you get stuck and need help, our support team is only an email away at [support@tuple.app](mailto:support@tuple.app)!
# Viewing your call history
Source: https://docs.tuple.app/managing-your-account/viewing-your-call-history
If you'd like to review your recent call history, you can view recent calls on [your usage page](https://production.tuple.app/profile#usage).
The call history is currently displayed in the UTC timezone.
## Missed calls
The usage page lists calls you were on, not calls you missed. On macOS, missed calls surface in a few places:
* A macOS notification appears when someone calls you and you don't answer. The notification includes a **Call Back** button.
* A badge on the menu bar Tuple icon indicates unseen missed calls.
* Opening the Tuple popover clears the badge and shows a missed-call banner at the top of your contacts list. Each banner shows who you missed and when, with **Call Back** and dismiss buttons.
Missed calls aren't stored server-side, so they don't appear in the web usage page or in [Local call history](/pairing-with-tuple/local-call-history) (which only lists calls you [captured](/pairing-with-tuple/capturing-calls) on that machine).
# Agreements and Policies
Source: https://docs.tuple.app/overview/agreements-and-policies
We've documented our terms, security practices, and privacy policies on our website. You can find those here:
* [Security practices](https://tuple.app/security?utm_source=docs)
* [Privacy policy](https://tuple.app/privacy?utm_source=docs)
* [Terms of service](https://tuple.app/terms?utm_source=docs)
# Adding more call participants
Source: https://docs.tuple.app/pairing-with-tuple/adding-more-call-participants
Sometimes when pairing, having more than two people in a session can be a huge help. Tuple allows **up to** **10 participants** on any call.
When in a call, anyone can add another participant with just two clicks. First, click "Add another participant":

Then, click **Add** next to the person you want to invite to the call:

# Audio device swapping
Source: https://docs.tuple.app/pairing-with-tuple/audio-device-swapping
**tl;dr: For everyday audio device swapping, you probably want to use the macOS controls (Settings > Sound) rather than the dropdowns in Tuple's preferences. (You can do this quickly by Option-clicking the speaker icon in your menu bar.)**
There is a potentially-confusing caveat when setting your audio device in Tuple's preferences. Imagine you have your Airpods set as your output in the macOS Sound preferences. Now, you override those settings in Tuple's preferences and choose Bose QCIIs as the output. With these preferences, your volume up, volume down, and mute keys on your keyboard will affect the Airpods,
*not* the Bose QCIIs. This is because the keyboard controls always affect the System Default device (the one you've chosen in System Preferences > Sound).
We provide the dropdowns in our preferences to support folks with complex audio setups, such as using tools like
[Krisp](https://krisp.ai).
For most users, we recommend ensuring your audio setup uses the Mac System Default preferences:

# Call Stats
Source: https://docs.tuple.app/pairing-with-tuple/call-stats
Check live network and connection details during a Tuple call on macOS.
Call Stats shows live connection details for your current call. Use it to check whether packet loss, delay, network routing, or another known condition might be affecting call quality.
## Open Call Stats
1. Start or join a Tuple call.
2. From the macOS menu bar, select **Window** > **Call Stats**.
**Call Stats** is dimmed when you aren't on a call.
## Understand the summary
The top of the window summarizes Tuple's current assessment:
* **No known issues** means Tuple hasn't detected a known connection problem.
* **Call quality might be affected** means the call is using a connection that can add latency, such as TCP, TURN, or a VPN.
* **Call quality might be degraded** means Tuple has detected high packet loss, round-trip time, or jitter.
Select an **Affected Connections** badge to see which connections have that condition and jump to their details.

## Read connection details
Expand a participant to see live stats for your connection with them. On calls that use a media server, Call Stats also separates the stream you send to the media server from the streams you receive for each participant.

| Stat | What it means |
| - | - |
| **Local Connection** | How your Mac connects to the call. |
| **Remote Connection** | How the other participant connects to the call. |
| **UDP / TCP** | The network transport. UDP is preferred for real-time audio and video. TCP can add latency when packets need to be retransmitted. |
| **P2P / TURN** | Whether traffic travels directly between participants or through a relay. TURN can add latency but may be required by a restrictive network. |
| **VPN** | The connection is routed through a VPN, which can add latency or restrict UDP traffic. |
| **Region** | The location of the media server used by the call. |
| **Packet loss** | The percentage of data packets that didn't reach their destination. Higher loss can cause frozen video, audio dropouts, or robotic audio. |
| **Round trip time** | The time for data to travel to the other endpoint and back. Higher values mean more delay. |
| **Jitter** | Variation in packet arrival time. Higher jitter can make audio or video choppy. |
| **Sending bitrate** | The amount of audio, video, and screen-share data your Mac is sending. |
| **Receiving bitrate** | The amount of audio, video, and screen-share data your Mac is receiving. |
Values and connection types highlighted in yellow or blue match the conditions in the summary. TCP, TURN, and VPN don't always mean that a call will have problems, but they can help explain added latency.
If Call Stats shows a problem, try the steps in [Reducing latency](/troubleshooting/reducing-latency). For TCP, TURN, or VPN connections, also review [Networking and firewall issues](/troubleshooting/networking-and-firewall-issues).
# Capturing calls
Source: https://docs.tuple.app/pairing-with-tuple/capturing-calls
Capture streams what happens on a call to your **local disk**: a transcript of what's said, recordings of any screen that gets shared, and metadata for apps on shared screens. It runs **entirely on your machine**; nothing gets sent to an external service.
Capturing calls enables two things: it lets agents follow the call in real time, and allows you to reference information from past calls. For ideas, see [Ways to use Capture](/pairing-with-tuple/ways-to-use-capture).
## Starting and stopping capture
The **Capture** button appears in the popover, the screen share window, and the webcam window:


When the popover is focused during a call, **C** toggles capture. See [Using your keyboard to navigate Tuple](/pairing-with-tuple/using-your-keyboard-to-navigate-tuple).
You can also have Tuple start capturing as soon as you join any call; see [Start automatically](/application-preferences/macos-preferences-capture#start-automatically).
## What Capture records
A captured call contains three kinds of content:
* **Transcript**: everything said on a call, transcribed by a local Whisper model.
* **Screen recordings**: recordings of any screen that gets shared on a call (yours or someone else's).
* **App metadata**: window titles and content URLs for the apps visible in shared screens; learn more about [what gets shared](/pairing-with-tuple/sharing-app-metadata).
> [!NOTE]
>
> Capture transcribes each participant's audio as you receive it. When someone [shares system audio](/pairing-with-tuple/sharing-system-audio), it arrives mixed in with their voice. Speech that their Mac plays, such as a video, can show up in your transcript as something they said. Your own lines come from your microphone only, so your system audio never appears in your transcript.
## Seeing who is capturing
While capture is active, each capturing participant shows a **Capturing** indicator in the popover participant list and in the screen share window's participant list. Check these lists to see who is capturing, including when you join a call that's already being captured.
### Capturing solo
You can capture a call by yourself, even before any other participants have joined. This is useful for capturing notes, dictation, or working with an agent (see [Connecting an agent](/cli/connect)).
## The Capture menu
The chevron next to the **Capture** button opens the Capture menu, which shows what's being captured right now and how to hand the call to an agent:

The top of the menu is a live status block showing what's being captured (transcript, screen recordings, and app metadata). Each row has a status dot that dims when that kind of content isn't being collected.
Below the status block, **Connect a Local Agent** allows you to copy commands to hand the live call to an agent:
* **Copy Terminal Command** copies a [`tuple connect`](/cli/connect) command to run in your terminal.
* **Copy Agent Prompt** copies a prompt to paste into an agent you already have running.
Copying a command or prompt provides context. Ask the agent explicitly when you want it to follow the call continuously. For existing scripts or skills, use the [migration guide](/cli/migration).
## Accessing captured calls
Captured call content is stored in a local database on your machine. You can browse captured calls in the [Local History](/pairing-with-tuple/local-call-history) tab, or use the `tuple` CLI to search, list, and export past calls — see [Searching past calls](/pairing-with-tuple/searching-past-calls).
## How screen recordings are stored
Capture keeps every captured call in one SQLite database at `~/Library/Application Support/Tuple/index.db`. Screen recordings are rows in this database, not separate video files.
## Disk usage
Screen recordings use almost all of the disk space that Capture takes up. Transcripts and app metadata are small by comparison.
As a rough guide, one minute of screen sharing uses **1–10 MB** of disk space. A 30-minute call with a screen shared the whole time uses about **30–300 MB**; a typical 30-minute call is usually around 100 MB.
The exact amount depends on what's on the screen:
* **Screen activity**: a mostly static screen, like an editor you're reading, uses less space than scrolling, switching windows, or playing video.
* **Resolution**: larger and higher-resolution screens use more space. Tuple records shared screens at their full resolution so that text stays legible.
* **Whose screen it is**: recordings of your own screen tend to use more space than recordings of screens that other participants share.
To limit how much video Capture stores, set a [maximum cache size](/application-preferences/macos-preferences-capture#screen-recordings).
### Encryption
Tuple doesn't encrypt the database or the screen recordings in it. The frames are compressed VP9 video, so they look like unreadable binary data, but you don't need a key to read them. Call encryption protects a screen share only while it travels between participants. Capture stores the video after decryption.
Your macOS user account's file permissions protect the database. To encrypt it at rest, turn on [FileVault](https://support.apple.com/guide/mac-help/protect-data-on-your-mac-with-filevault-mh11785/mac). Backups of your Mac, such as Time Machine, include the database.
## Automating with triggers
Tuple fires `call-capture-started` and `call-capture-complete` [triggers](/triggers/api-reference) when a capture session begins and ends. Use a trigger script to post-process transcripts, summarize the call, or save it into your team's notes system.
Browse the [Triggers Directory](https://tuple.app/triggers/directory?event=call-capture-started\&event=call-capture-complete) to see what others have built.
# Collaborative Painting
Source: https://docs.tuple.app/pairing-with-tuple/collaborative-painting
With Tuple, all participants in a pairing session can draw on the shared screen.
If you're viewing a screen, make sure you're using the "Paint" cursor mode by selecting it from the [Guest Toolbar](/pairing-with-tuple/interacting-with-a-shared-screen).
If you're sharing your screen, you can configure a hotkey in your [preferences](/application-preferences) to enable Paint mode, or click the icon in the menu bar:

Press the hotkey again, press "Esc", or click the Tuple icon in your menu bar to return to normal.
In either role, just click and drag to paint, and use right-click to clear your paint. Hold **Shift** while drawing to constrain your stroke to a straight line. In your Preferences, you can choose between waiting until a right-click to clear the paint, or if you want it to clear after a few seconds automatically.
## Paint colors
Your paint strokes, text annotations, and highlight clicks all use a single color so everyone can tell who drew what.
By default, Tuple assigns each participant a free color when they join a call, choosing colors with good contrast so everyone is easy to tell apart. That means your color may change between calls.
To keep the same color every time, pick one under [Cursor color](/application-preferences/macos-preferences-screen-share#cursor-color) in your Screen Share preferences, or from the **Cursor Color** swatches in the settings menu of the [shared screen window](/pairing-with-tuple/interacting-with-a-shared-screen#settings). Your pick applies right away, including on a call already in progress. Switch back to **Automatic** to hand the choice back to the call.
Changing your color does not recolor text annotations you have already committed; those keep the color they were drawn in.
# Copying and pasting from one computer to another
Source: https://docs.tuple.app/pairing-with-tuple/copying-and-pasting-from-one-computer-to-another-sharing-your-clipboard
Tuple supports copying and pasting text between computers. Super helpful when you're working on code together!
> [!NOTE]
>
> Cross-machine clipboard actions come from the person viewing the shared screen. When you are sharing your screen, your copy and paste shortcuts continue to use only your own clipboard.
To use this feature, you can cmd + c any text value and use cmd + v to paste it:
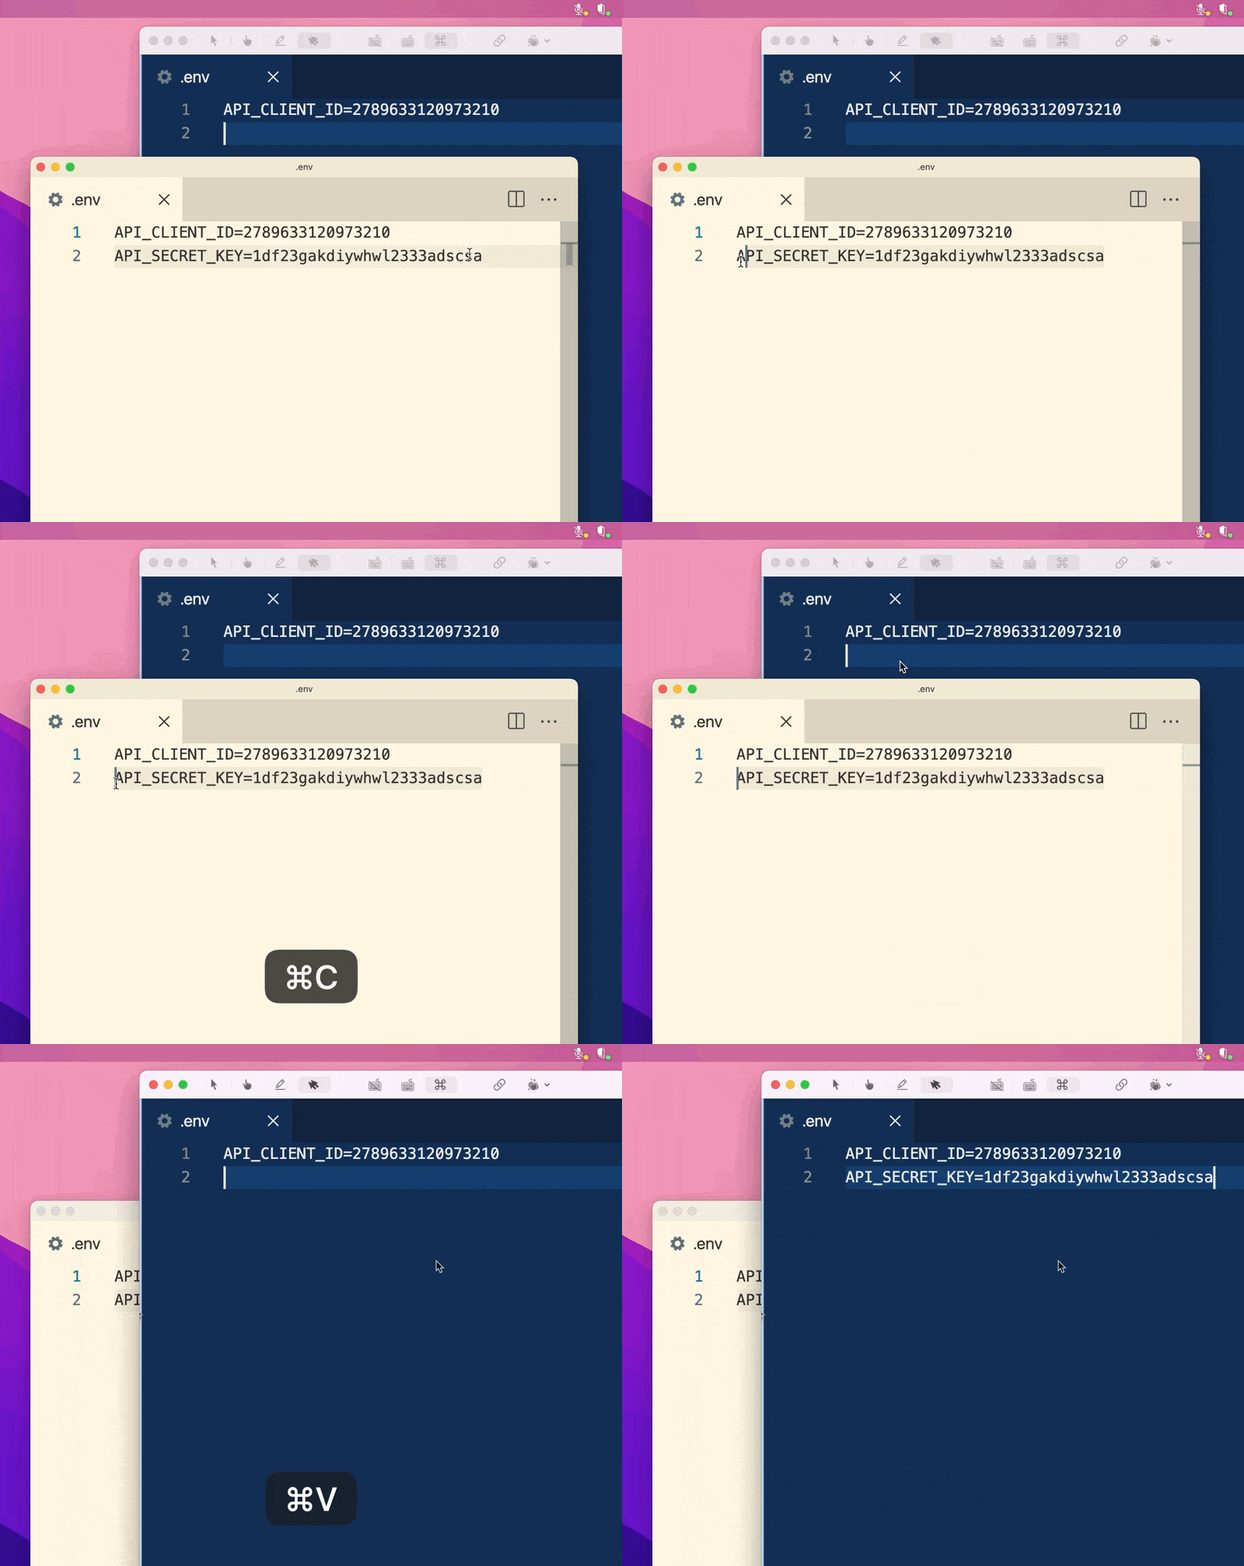
**When you're viewing a screen, you can:**
* Copy text from your computer, mouse over the Tuple window, and paste the text on their computer.
* Select something on your pair's computer, copy it, and paste it to your computer.
* Copy text from your pair's computer and paste it elsewhere on their computer, without changing their clipboard.
* Copy text from your computer and paste it elsewhere on your computer, without changing their clipboard.
**When you're the person sharing their screen, you can:**
* Copy text from your computer and paste it elsewhere on your computer, without changing your pair's clipboard.
* Work with your clipboard normally as if you weren't pairing.
Each person has their own independent clipboard when pairing. All data is encrypted end-to-end (more about our [security practices](https://tuple.app/security?utm_source=docs)).
**Note:** Tuple disables command keys by default so that you don't accidentally command-tab on your pair's computer when you meant to command-tab away from Tuple. If you'd like to paste text on your pair's machine, make sure the Cmd Keys keyboard setting is enabled (more about [keyboard modes](/pairing-with-tuple/interacting-with-a-shared-screen)).
**Note:** This feature only works when a user uses cmd+c to select text. For example, it will not work when copying text via a JavaScript backed button on a webpage.
Tuple supports copying and pasting text between computers on Windows. Cross-machine clipboard actions come from the person viewing the shared screen, so this works whether you're pairing with another Windows user or with someone on macOS.
> [!NOTE]
>
> When you are sharing your screen, your own copy and paste shortcuts continue to use only your own clipboard. Each person has their own independent clipboard when pairing.
**When you're viewing a shared screen, you can:**
* Copy text from your computer, mouse over the Tuple viewing window, and paste it on the host's computer.
* Select something on the host's computer, copy it, and paste it on your own computer.
* Copy text from the host's computer and paste it elsewhere on their computer, without changing their clipboard.
* Copy text from your computer and paste it elsewhere on your computer, without changing the host's clipboard.
### Sending keystrokes to the host
For paste to reach the host machine, your keystrokes need to be forwarded. Make sure the **Keyboard** mode is selected in the guest toolbar at the top of the shared screen window — in **No Keyboard** mode, your keystrokes stay on your machine and won't paste on the host. Keystrokes are only forwarded while the **Remote control** mouse mode is active; in Highlight Click or Paint mode, they stay on your machine. See [Interacting with a shared screen](/pairing-with-tuple/interacting-with-a-shared-screen) for more on mouse and keyboard modes.
When you're pairing across operating systems, Tuple does not translate modifier keys. If the host is on macOS and you want to trigger a shortcut that uses the command key (⌘), press the Windows key (⊞) on your keyboard instead — so paste becomes ⊞+V when pasting onto a Mac host.
### Limitations
* This feature only works when text is copied with a standard copy shortcut. Copies triggered by a JavaScript button on a webpage, for example, won't sync between machines.
* Only text is synced across machines — files and images are not transferred through the shared clipboard.
All clipboard data is encrypted end-to-end (more about our [security practices](https://tuple.app/security?utm_source=docs)).
# How to stream pair programming sessions
Source: https://docs.tuple.app/pairing-with-tuple/how-to-stream-pair-programming-sessions
## How to stream pairing sessions with OBS
We typically recommend using [OBS](https://obsproject.com/) to stream your screen with the Tuple call active.
To capture the audio from you and your pair, you could use [Loopback](https://rogueamoeba.com/loopback/) to pipe the multiple audio streams into [OBS](https://obsproject.com/).
To show your own self-view in the stream, you can [persist your self-view](/pairing-with-tuple/sharing-a-webcam-video#self-view).
## How to stream pairing sessions with StreamYard
* Set up [StreamYard](https://streamyard.com/) and invite your pair to a new stream in StreamYard
* Once your pair has joined the StreamYard call, call them in Tuple
* Everyone turn off webcams and mute yourselves in Tuple
* Everyone go to Tuple audio settings and make sure Voice Boost is off ([macOS only](/application-preferences/macos-preferences-audio); it should work without changes to your settings if you're using the Windows client)
* Either pair can share their screen on Tuple, which will allow the other to annotate and control as expected
* Share your audio and webcam over StreamYard
* Either pair can share their screen over StreamYard to show the pairing session
* We recommend having the same person who's sharing their screen via Tuple to share their screen via StreamYard to reduce UI chrome on your stream
## How to stream pairing sessions with Riverside
* Set up [Riverside](https://riverside.fm/) and invite your pair to join you in the recording studio in Riverside
* Once your pair has joined your Riverside studio, call them in Tuple
* Everyone turn off webcams and mute yourselves in Tuple
* Everyone go to Tuple audio settings and make sure Voice Boost is off ([macOS only](/application-preferences/macos-preferences-audio); it should work without changes to your settings if you're using the Windows client)
* Either pair can share their screen on Tuple, which will allow the other to annotate and control as expected
* Share your audio and webcam over Riverside
* Either pair can share their screen over Riverside to show the pairing session
* We recommend having the same person who's sharing their screen via Tuple to share their screen via Riverside to reduce UI chrome on your stream
# Interacting with a shared screen
Source: https://docs.tuple.app/pairing-with-tuple/interacting-with-a-shared-screen

When someone else on a call is sharing their screen, you can use the toolbar at the top of the viewing window to understand what's going on in the call and interact with the shared screen.
*Note: If you fullscreen this window, you can access the toolbar by moving your cursor to the top of the screen.*
## Participant Display

In the top left of the window is the participant display. Here, you'll see an overview of who's on the call with you, whose screen you're looking at, and who currently has control over the mouse and keyboard.
When a user has control over the mouse and keyboard, they'll have a colored ring around their avatar:
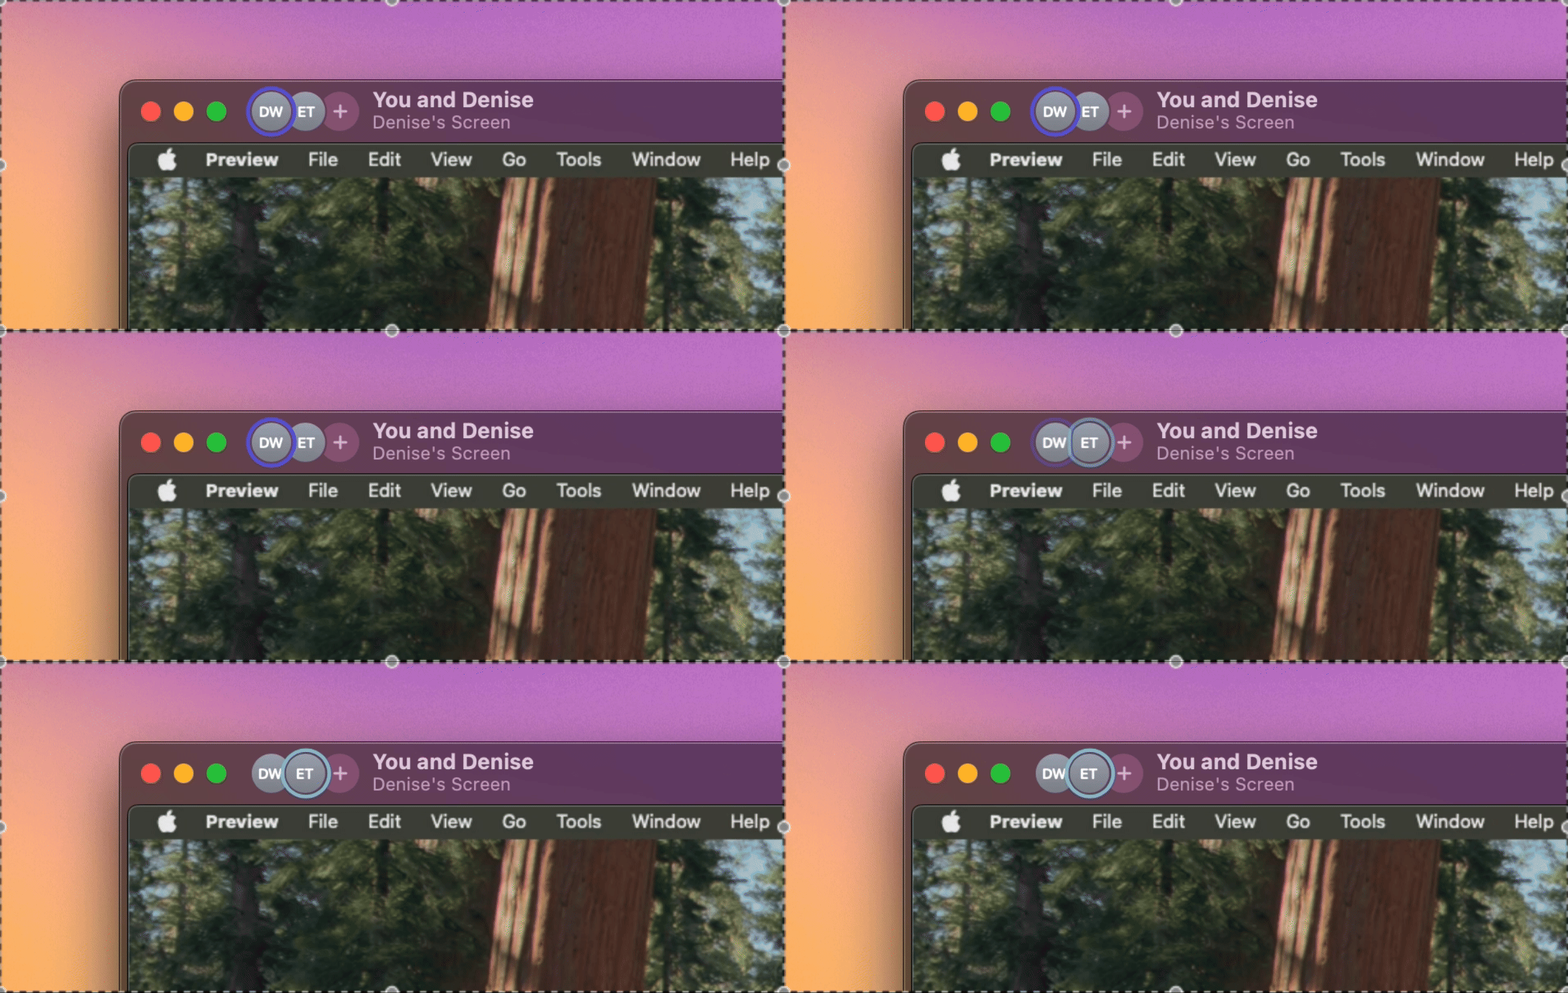
You can click on the "+" icon to add more people to a call (either by adding them directly, or by copying a link to the call):

Clicking on any user's avatar allows you to request that they share their screen or webcam, mute their audio, or kick them off the call:

Selecting **Mute Audio** immediately mutes the other participant's microphone. They receive an on-screen notification letting them know they were muted, with the option to unmute themselves.
## Shared Screen Tools
Tuple has a number of tools that allow you to interact with a shared screen:
### Remote Control

When the remote control tool is enabled, all of your mouse and keyboard input events will be forwarded to the host machine. The only exception is command-tab (see settings below).
### Paint

This tool allows you to draw on the shared screen; your drawing can be seen by all participants. Your paint color is [automatically assigned](/pairing-with-tuple/collaborative-painting#paint-colors) so each participant's drawings are easy to tell apart. By default, anything you draw will fade away automatically after a few seconds, though this behavior can be changed (see settings below). You can also hold shift to draw a straight line.
### Highlight Click

This tool allows you to create a pulsing indicator on the host's screen for a few seconds. Use this mode to quickly draw your pair's attention to something without getting in the way too much.
### Text Annotation
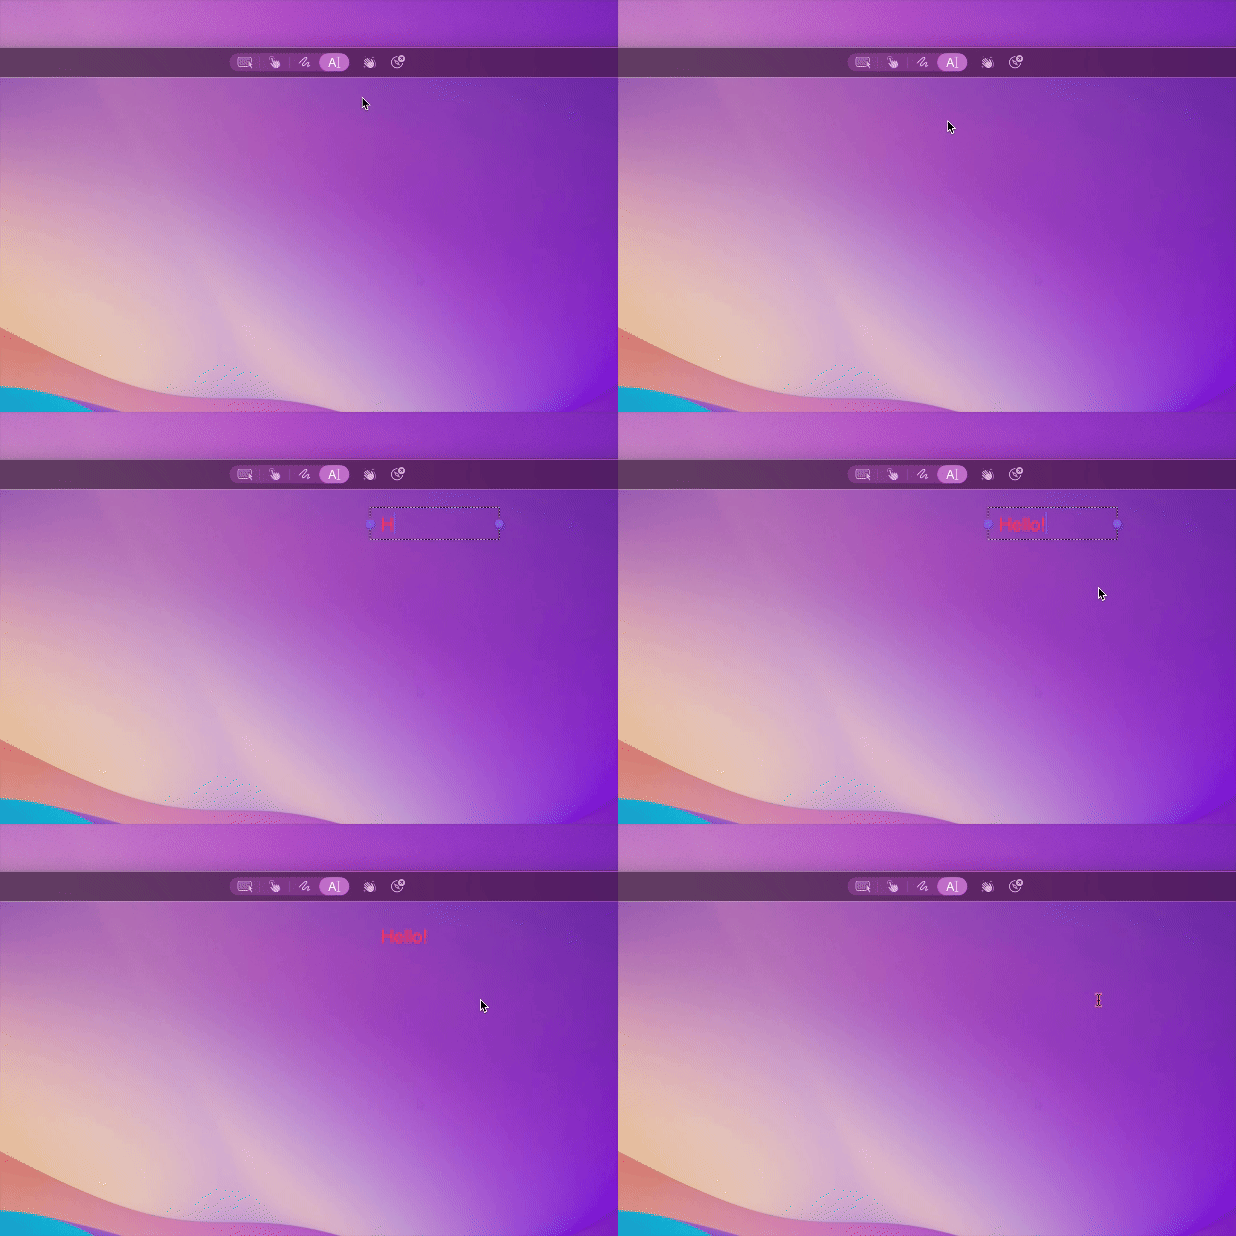
This tool allows you to place a text field anywhere within the shared screen, and type some text. You can also insert emojis using the system emoji picker (`Ctrl+Cmd+Space`).
### Reactions

Tuple contains a number of reactions you can send while on a call. There are a handful of emojis that can be sent, as well as some bigger, full-screen reactions.
### Send GIF
You can send animated GIFs during a call to bring a bit of fun into your pairing session (powered by [Klipy](https://klipy.com/)). Click the **Send Reaction** button in the toolbar, then select **Send GIF...** at the bottom of the menu.
This opens a GIF picker where you can search for something specific. There are three ways to send a GIF:
* **Click to send:** hover over a GIF to reveal the send button, then click it to place the GIF on the shared screen.
* **Double-click:** double-click any GIF to send it immediately.
* **Drag to place:** drag a GIF out of the picker and drop it anywhere on the shared screen to place it at that exact spot.
GIF playback is synchronized across all call participants. Your recently sent GIFs are saved so you can quickly reuse them.
You can also navigate the GIF picker with your keyboard. Use the **arrow keys** to browse results and press **Return** to send the selected GIF.
### Zoom Tool

The zoom tool allows you to zoom in (and pan around) on a shared screen.
**Zooming**
When using the zoom tool, there are a number of ways to zoom in and out:
* **Left click** will zoom in; both **Option + left click** and **right click** will zoom out
* **Double click** zooms all the way in; **double click** when zoomed all the way in will zoom all the way back out again
* **Pinch in** (on a trackpad) will zoom in; **pinch out** will zoom out
* **Command + scroll wheel / two finger scroll** will zoom in and out (the zoom direction will respect your "Natural scrolling" setting in macOS)
* The **zoom buttons** in the lower right hand corner of the screen also allow you to zoom in and out
**Panning**
There are also a few different ways to pan with the zoom tool selected (once you've zoomed in):
* Holding **space** while clicking and dragging will allow you to pan (your cursor will change into a hand)
* Using the **scroll wheel** will pan up and down; if your mouse has a trackball that supports horizontal scrolling, that will work as well
* **Holding down the scroll wheel** (also sometimes called the “third button”) will pan
* You can use **two fingers** to pan (on a trackpad)
* Panning can also be toggled on using the **pan button** in the lower right hand corner
**Universal shortcuts**
There are a handful of keyboard shortcuts that you can use, regardless of which tool you have selected (the only exception is when you're in remote control mode, since the keypresses would be forwarded to the remote machine):
* **Command + `+`** will zoom in, **Command + `-`** will zoom out
* **Command + 0** will make the shared screen the same resolution as your native resolution
* **Command + 9** will zoom to fit the shared screen into the screen share window
These commands can also be found in the **View** menu in the menu bar.
**Zooming and panning while using other tools**
It's also possible to zoom and pan when you have the drawing, highlight click, and text annotation tools selected:
* **Option + left click** will zoom in; **Option + command + left click** or **Option + right click** will zoom out
* **Option + double click** zooms all the way in; **Option + double click** when zoomed all the way in will zoom all the way back out again
* Holding **Option + scroll wheel / two finger scroll** will zoom in and out
* Holding **Option + pinching in** (on a trackpad) will zoom in; **Option + pinch out** will zoom out
* You can hold **Option** and use **two fingers** to pan (on a trackpad)
* Holding **space** while clicking and dragging will allow you to pan
* **Option + holding down the scroll wheel** (also sometimes called the “third button”) will pan
**Caveats**
* The **Zoom** button stays visible when zooming is unavailable. Click the disabled button to see why.
* You're not able to zoom in further than your own native resolution
* You won't be able to pan around if you haven't zoomed in
### Send Link
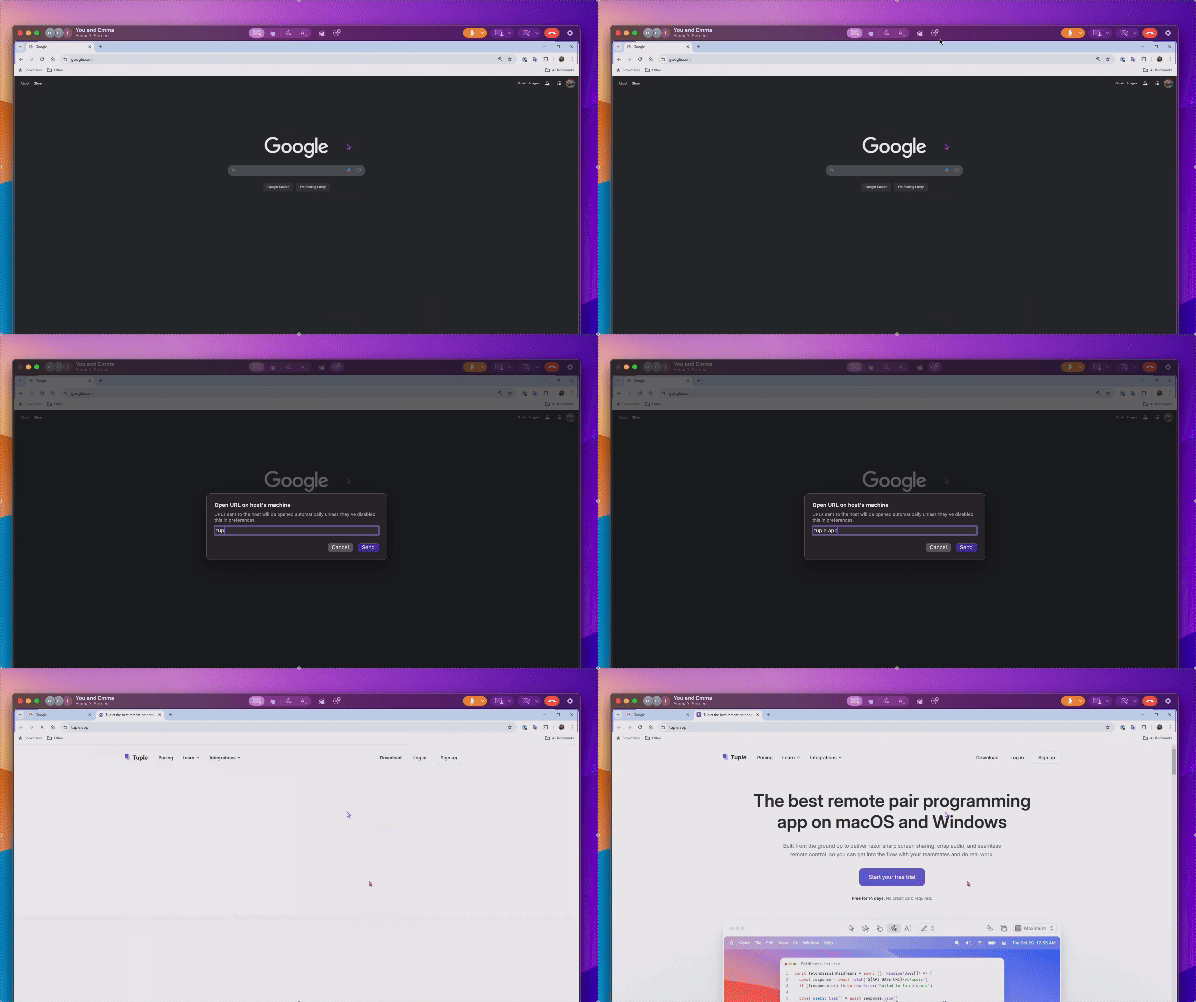
This tool allows you to send your pair a URL, which will open automatically in their browser. This can be disabled by the call initiator in their Preferences.
## A/V Controls

The shared screen window also contains controls for enabling and disabling your microphone and webcam. You can also change your active audio and camera devices directly from this menu. Lastly, these controls also allow you to easily begin sharing your own screen.
## Settings

### Cursor color
The swatches at the top of the menu set the color used for your cursor, paint strokes, text annotations, and highlight clicks. Pick one to keep the same color on every call, or choose **Automatic** to let Tuple assign you a free color each call.
This is the same setting as [Cursor color](/application-preferences/macos-preferences-screen-share#cursor-color) in the Screen Share preferences pane, so changing it in either place keeps both in sync.
### Stream resolution
The initial Stream Resolution setting is based on the call initiator's preference but can be temporarily modified by the guest during a call.
If you aren't doing a lot of typing or clicking on the shared screen, you should crank this up to get the sharpest image. However, if you want very snappy responses to your keystrokes, then you can get lower latency by reducing the resolution of the video.
### Paint persistence
You can choose whether you want drawings done with the paint tool to fade after 2 seconds, or persist until you right click.
### Forwarding command-tab
You can toggle whether you want the command-tab key sequence to be sent to the host or not.
### Upscale Content
On Apple Silicon Macs, you can toggle **Upscale Content** to sharpen the incoming screen share video. This runs locally on your machine, so it only changes how the shared screen looks on your display — it doesn't affect the resolution other participants receive.
This toggle and the [Upscale content](/application-preferences/macos-preferences-screen-share#upscale-content) checkbox in the Screen Share preferences pane control the same setting, so changes in either place stay in sync. If the menu item doesn't appear, your Mac isn't on Apple Silicon or upscaling is disabled for your account.
## A note about fullscreen
Tuple only allows fullscreen when the macOS setting 'Displays have separate spaces' is turned on. You can find that setting in System Preferences > Mission Control:

Or in macOS 13.0+ in System Preferences > Desktop and Dock:


When **viewing** a shared screen, you can control the interaction using the guest toolbar at the top of the viewing window.
## Mouse modes

Tuple supports multiple ways of using your mouse to interact with a shared screen:
#### Remote control
In this mode, you can use your mouse to interact with the shared screen.
#### Highlight Click
When using Highlight Click, clicks will create a pulsing indicator for a few seconds on the host's screen. Use this mode to quickly draw your partner's attention without getting too much in the way.

## Paint mode
In Paint mode, you can click and drag to draw on your partner's screen. Anything you draw will fade away automatically after a few seconds.

## Keyboard modes

#### No Keyboard
Your keystrokes will never be sent to the host machine. Use this mode if you will be switching back and forth between viewing your partner's screen and doing your own typing elsewhere, so you don't accidentally interfere.
#### Keyboard
This mode will transmit all of your keystrokes to the shared machine. Note that Tuple does *not* translate modifier keys when connecting to a host that's on macOS. For example, if you want to issue a keyboard shortcut on macOS that utilizes the command key (⌘), you could use the Windows key (⊞) instead.
## Reactions
We have many reactions you can send while viewing a screen.

#### Emoji Reactions 🔥
Send 🔥, ❤️, 👍, 🤯, 👏, or 🤔 to your pair.
#### Confetti 🎉
Essential for a pairing session. When you and your pair have accomplished something truly great, send some confetti to celebrate.
#### Ship it 🚢
Code looking good to go? Use this one.
#### Table Flip (╯°□°)╯︵ ┻━┻
Legacy code got you flipping out? Send this reaction.
#### This is fine 🐶🔥
Everything a dumpster fire? Send this animation of [KC Green](https://kcgreendotcom.com/index.html)'s classic comic.
## Stream resolution

The initial Stream Resolution setting is based on the call initiator's preference but can be temporarily modified by the guest during a call.
# Joining a call from your browser (alpha)
Source: https://docs.tuple.app/pairing-with-tuple/joining-a-call-from-your-browser
> [!WARNING]
>
> The Tuple web client is in **alpha**. It's off by default and available to a small number of teams. [Reach out to support](mailto:support@tuple.app?subject=Web%20client%20alpha) to have it turned on. Behavior described here may change as we iterate on feedback.
The web client lets someone open a [call link](/pairing-with-tuple/joining-a-call-via-a-linkurl) and join the call from a browser tab. It allows other folks on your team to join calls without having to install Tuple. It also works on mobile, so you can be a part of the conversation when you're not at your desk.
The web client is intentionally limited, and is not a replacement for the desktop app. **Sharing your screen and drawing on someone else's still require [the Tuple app](https://tuple.app/download?utm_source=docs)**.
## What works in the browser
* **Audio**: you can hear others, and be heard
* **Webcams**: you can see other people, and they can see you
* **Viewing a shared screen**: if someone on desktop is sharing, you'll be able to see it. You'll also see other peoples' cursors and annotations
## Joining from a browser
Open any call link (a personal room link, a regular room link, or a generated call link). They all look like `https://tuple.app/c/...`.
On a computer, opening the link attempts to open the Tuple app first. Below that prompt, a **Join from your browser** button takes you into the call.
On a phone or tablet, **Join from your browser** is the primary button, since there's no Tuple app to open.
### Waiting to be let in
What happens next depends on the room's [door](/pairing-with-tuple/using-rooms#open-vs-closed-door-control):
* If the room is open, you go straight in.
* If the room is closed and the owner isn't in the call yet, you'll see **Waiting for \[name]**, and you'll join automatically the moment they start the call.
* If people are already in the call, they get a **Join request** notification and you're admitted when someone accepts.
## In the call
Everyone on the call gets a tile. Tiles show a webcam if there is one and initials if there isn't, plus status badges:
The control bar contains three things:
* **Microphone**: toggles your mic, which comes up automatically when you join. The chevron opens a menu to pick your **Input** (with a live level meter) and **Output** device.
* **Camera**: toggles your webcam, off by default. The chevron picks which camera.
* **Leave call**.
### Watching a shared screen
When someone shares their screen, it takes over the stage in your tab and the participant tiles move aside. You can:
* **Zoom** with a scroll wheel, or by pinching on a touchscreen.
* **See other viewers' cursors**, labeled with their names, along with anything they draw or type on the screen.
Only one screen is on stage at a time; if a second person starts sharing, theirs replaces it for everyone.
You can't share your own screen or annotate someone else's from the browser.
## Leaving
**Leave call** drops you out and releases your camera and microphone. You land on a **Call ended** page with a **Join call again** button, so it's easy to rejoin if you refresh the page. You can also rate the call quality there.
## Multiple tabs
The call lives in one tab. Open the same call link in a second tab and the first tab should show that the call is open in another tab. There's also an option to bring the call back into the original tab.
Closing the tab that houses the call allows the other tab to reclaim it.
## Supported browsers
Use a current version of **Chrome**, **Edge**, **Safari**, or **Firefox**, on macOS, Windows, Linux, iOS, or Android.
Browser calls run on the same call engine as the desktop app, with the same end-to-end encryption.
## Troubleshooting
> **Your browser blocked the microphone or camera**
>
> The browser, not Tuple, holds that permission. Allow access from the icon in the address bar, then click the **Microphone** or **Camera** button again. The notice clears itself once access is granted.
> **Your microphone or camera is in use elsewhere**
>
> Another app has the device open. Close it, then click the button again.
> **No microphone or camera found**
>
> Connect one and click the button again — the browser picks it up without a reload.
> **Connection lost, or Reconnecting…**
>
> The tab lost either its connection to Tuple or its connection to the other participants. It rejoins on its own when the network comes back. If it doesn't, use **Rejoin call**.
> **This call is full**
>
> Browser participants count toward the call's [participant limit](/pairing-with-tuple/joining-a-call-via-a-linkurl) like anyone else. Try again once someone leaves.
> **You're already on this call**
>
> The same account is in the call on another device. Leave it there, or use **Move the call here**.
The web client is new, and we want to hear what breaks and what's missing. [Tell us](mailto:support@tuple.app?subject=Web%20client%20feedback) what you think!
# Joining a call via a link/URL
Source: https://docs.tuple.app/pairing-with-tuple/joining-a-call-via-a-linkurl
Instead of starting a call by calling a contact directly, calls can be started or joined via a link. Call links are useful for scheduled calendar events, or inviting someone to join you on a call via a chat app like Slack.
Tuple allows **up to 10 participants** on any call.
## Your personal call link
Your personal call link is reusable across calls, including recurring calendar events.
Your personal call link is located at the top of the Link tab:

* Hovering and clicking "Copy call link" will copy the call link to your clipboard so that you can paste and share it.
* To join your own call, you can select "Join call and copy link." This will start the call, and allow you to add or approve any further participants. It will also copy the link to your clipboard.
* If you'd like to create a new link, you can do so by selecting "Generate new call link."
When your [personal room is closed](/pairing-with-tuple/using-rooms#open-vs-closed-door-control), joining requires your approval:

## Sharing a direct call
If call links are enabled for your account, click the **link button** in the call controls during a direct call. The first click creates a link for that call and copies it to your clipboard. Later clicks copy the same link, including when another participant created it.
Creating the link changes who can join: contacts and teammates of **any participant** can join through it without knocking. Other people must request approval. The link creator's team restrictions still apply, including required approval and limits on guests or browser access.
This link belongs to the ongoing direct call. It doesn't replace your reusable personal link or turn the call into a persistent room. The call ends when the last participant leaves.
If the **link button** is unavailable, your account may not have this feature enabled, or the call may have been started with an older version of Tuple.
## Joining another user's call via link
For a personal link, the [room's open or closed setting](/pairing-with-tuple/using-rooms#open-vs-closed-door-control) determines whether you need approval. For a direct-call link, the permissions described above apply.
If your team is in the web client alpha, a call link can also be opened without the Tuple app at all. See [Joining a call from your browser](/pairing-with-tuple/joining-a-call-from-your-browser).
# Joining an existing call
Source: https://docs.tuple.app/pairing-with-tuple/joining-an-existing-call
If a friend is currently pairing, you will see the yellow icon next to their avatar and a description of who they are pairing with below (more about showing who you are pairing with [here](/pairing-with-tuple/showing-who-youre-pairing-with)).
If you would like to join this pairing session, you can do so by clicking the **Join** call icon:

This will notify the call participant that you would like to join their call by showing them a notification like this:

# Local call history
Source: https://docs.tuple.app/pairing-with-tuple/local-call-history
**Local History** lists every call you've [captured](/pairing-with-tuple/capturing-calls) on your machine. You can search past calls, get an overview of what was captured, and open a call in your agent of choice.
Local history is built from the same local database the Tuple daemon writes as each call is captured — nothing is fetched from Tuple's servers. (For the team-wide history on the web, see [Viewing your call history](/managing-your-account/viewing-your-call-history).)
## Opening Local History
Local History lives in its own tab in the app sidebar, alongside **People**, **Rooms**, and **Links**. Click the **Local History** icon to open it:

Calls only appear here after you [capture](/pairing-with-tuple/capturing-calls) them locally.
## Searching past calls
Use the search box at the top to filter by **participants and captured content**:
* **Participant names** match as you type, including short prefixes — typing `cap` finds calls with "Capel".
* **Transcript content** is full-text searched once any term is at least three characters long.
* **Shared content** — the window titles and URLs of app that were present on shared screens during the call
For richer search from the terminal — phrase queries, speaker filters, date ranges, and exporting transcripts — see [Searching past calls](/pairing-with-tuple/searching-past-calls).
## Opening a call in an agent
The dialog gives you two ways to load the captured call in your agent harness of choice:
* **CLI** yields a `tuple connect` command. Run it in your terminal to open the call in Claude Code, Codex, or any harness.
* **Prompt** gives you a prompt to paste into an agent harness you already have running.
If the Tuple CLI isn't installed yet, the footer shows an **Install Tuple CLI** button instead.
See [Connect an AI agent](/cli/connect) for what an agent can do once it's attached, and [Ways to use Capture](/pairing-with-tuple/ways-to-use-capture#after-a-call) for ideas.
## Deleting a call
To remove a call from your device, right-click it and choose **Delete call**. This permanently deletes everything that call captured (its transcript, screen recordings, app metadata, and events) from your local database. It affects only this machine and can't be undone.
You can also delete a stored call with [`tuple capture delete `](/cli/commands#capture-delete-call-id).
# Pairing with Someone on Tuple as a Guest
Source: https://docs.tuple.app/pairing-with-tuple/pairing-with-someone-on-tuple-as-a-guest
If you want to join a Tuple session but don't have an account, you can join as a **guest** — no credit card or trial required. Here’s how:
## 1. Request an Invite Link
To get started, **ask the person you want to pair with to send you a Guest Invite Link**.
They [can generate this from their Tuple app](/team-management/inviting-users) by going to the **Invite tab** and selecting "Invite as outside collaborator".
This link is your key to joining them — don’t skip this step!
## 2. Use the Invite Link
Once you receive the link:
* Click it in your browser.
* You’ll be guided through setting up a free guest account.
You’ll only be able to pair with the person who invited you, and you won’t need to enter any payment info.
## 3. Download the Tuple App
After completing the guest account setup, you’ll be prompted to download the Tuple app:
* [Download for macOS](https://tuple.app/download/mac?utm_source=docs)
* [Download for Windows](https://tuple.app/download/windows?utm_source=docs)
Install the app and log in — you’ll be ready to join your inviter's session.
### Notes
* If the person you're pairing with is in the web client alpha, they can send you a call link you can open without having to install Tuple. See [Joining a call from your browser](/pairing-with-tuple/joining-a-call-from-your-browser).
* Guest accounts are free, but limited: you can only pair with someone who has a paid Tuple account.
* If you want to start your own team or host sessions, [start a 14-day trial](https://production.tuple.app/onboarding).
* Already using a company email? You might be able to join your company’s Tuple account.
# Requesting a share
Source: https://docs.tuple.app/pairing-with-tuple/requesting-a-share
While you're on an active Tuple call, you can request that another user shares their screen, or webcam:

This will pop up a share nudge notification on the user's screen:

## Muting a participant
You can also select **Mute Audio** from the participant menu to immediately mute another participant's microphone. The muted participant sees a notification telling them who muted them, with buttons to **Unmute** or dismiss. If the participant is already muted, no action is taken.
The **Mute Audio** option appears in the participant menu on the webcam grid, the call window toolbar, and the in-call popover.
# Searching past calls
Source: https://docs.tuple.app/pairing-with-tuple/searching-past-calls
Find, read, and export captured Tuple calls, with focused transcript and screen reads.
Tuple keeps a local archive of calls you've [captured](/pairing-with-tuple/capturing-calls). The Tuple app owns the archive, and the `tuple` CLI lets you list, search, read, and export it.
**Capture data stays on your machine.** Use the CLI instead of opening the archive database directly.
## Find a call
List stored calls when you know who participated or when the call happened:
```sh theme={null}
tuple capture list --participant mikey --after 2026-05-11
```
Results are newest first. Each result includes call metadata, a segment count, and resolved participants. Use `--after`, `--before`, `--participant`, and `--limit` to narrow the list. The default limit is `100`; pass `--limit -1` for all matches.
Search when you remember something someone said or shared:
```sh theme={null}
tuple capture search "feature flag"
tuple capture search rollback --speaker alex -C 2
tuple capture search "staging.tuple.app" --kind content
```
Search covers spoken transcript and shared app names, window titles, and URLs. Use plain terms or quote a phrase. Narrow broad results with `--kind spoken`, `--kind content`, `--speaker`, `--participant`, `--call`, `--after`, or `--before`.
`-C ` adds nearby speech segments around each spoken match. Content matches do not have conversation context. The default limit is `50`; pass `--limit -1` for all matches.
Each result identifies its kind, call ID, timestamp, and matching snippet. Spoken results also identify the speaker and can include `context_before` and `context_after`. Content results include the app name, window title, and URL when available.
Add `--format json` when a script needs structured results. List and search return JSON arrays.
## Read the call
Pass a call ID or unique prefix from `capture list` or `capture search` to `capture show`:
```sh theme={null}
tuple capture show a1b2c3d4
```
The readable result includes transcript, lifecycle events, and shared-content metadata in record order. This is the most compact format for a broad review.
Use `--exclude` only when the task does not need a category:
```sh theme={null}
tuple capture show a1b2c3d4 --exclude events,content
```
For a focused question, search within the call first. Then bound the read around the matching timestamp:
```sh theme={null}
tuple capture search rollback --call a1b2c3d4 -C 5
tuple capture show a1b2c3d4 \
--since 2026-05-19T10:00:00Z \
--until 2026-05-19T10:02:00Z
```
Both timestamps require RFC3339 with a zone.
### JSON output
`tuple capture show --format json` emits one canonical capture record per line as JSON Lines. It does not return one object or array. Without time bounds, the output can grow to the full selected call.
Each durable line includes a positive integer `id`, plus `type`, `time`, `category`, and type-specific `data`. Use `--since` and `--until` when a JSON consumer needs a bounded interval.
A JSON read identifies people by ID. Leading `user_joined` records can supply names, but `--since` may omit them. Use the readable format when you only need attributed dialogue.
## Inspect the shared screen
When dialogue refers to something visible but does not name it, request a stored frame at the transcript timestamp:
```sh theme={null}
tuple screen --at "2026-05-19T10:01:12.345Z" \
--call a1b2c3d4 \
--user 24498
```
Use the `user_id` from the matching `shared_content_changed` record as `--user`. A speech record's `user_id` identifies the speaker, who may not be sharing.
The default behavior can move forward to finish an annotation that was in progress. Pass `--exact` to use the requested instant. Read stderr before trusting the image: warnings describe the frame time, timing clamps, and incomplete annotations. A stored frame can predate the requested time because Tuple stores frames when the screen changes.
## Export calls
Export writes selected capture records to one artifact file:
```sh theme={null}
tuple capture export ./calls.jsonl
tuple capture export ./transcript.md \
--call a1b2c3d4 \
--exclude events,content \
--as markdown
```
`--as` accepts `jsonl`, `markdown`, or `text`. JSON Lines is the lossless default. Every line preserves a canonical capture record and adds `call_id`, so records remain attributable in a multi-call export.
Select calls with `--call`, `--participant`, `--after`, and `--before`. Use `--recording ` for one exact recording session; it cannot be combined with `--call`.
The global `--format json` controls the command receipt, not the artifact. Tuple replaces the destination only after the complete artifact is ready. If no calls match, the command fails and leaves an existing destination untouched. On POSIX systems, the artifact uses mode `0600`.
## Follow an active call
For an explicitly requested ongoing task, use `capture next` when an agent needs one batch at a time:
```sh theme={null}
tuple capture next a1b2c3d4 --format json
```
The first invocation without `--cursor` returns available catch-up immediately. After the records reach the model or destination, run the command again with the highest delivered positive record ID:
```sh theme={null}
tuple capture next a1b2c3d4 --format json --cursor 4821
```
If the first read is empty and provides no record ID, use `--cursor 0` to start waiting.
Keep the same call or recording selector and category exclusions. Save a checkpoint only after delivery. Status lines such as `{"kind":"status","status":"call_ended"}` and records with ID `0` are delivery framing, not durable records, so they never advance the checkpoint.
Let the agent harness or task runner schedule each foreground invocation after processing the last result. Do not use an unattended shell polling loop.
Use `capture follow` only when the environment can consume a continuous stream. Without a call ID, it remains subscribed across calls. `follow` and `next` emit JSON Lines that mix canonical records with status framing, so consumers must distinguish `id` records from `kind: "status"` lines.
For version-matched operating guidance, run `tuple agent guide` for the bounded topic index. Read `tuple agent guide live-call` and `tuple agent guide call-content` when the task needs live delivery details.
# Sharing a webcam video
Source: https://docs.tuple.app/pairing-with-tuple/sharing-a-webcam-video
Pairing well is all about communication, and there's so much information sent through someone's facial expressions. Seeing your pair's face while working really makes you feel more connected to them.
## Sharing a webcam
To add a webcam video, click the "Start Webcam" icon in the popover UI:

You'll be shown a preview of your webcam's feed so you can adjust your lighting or background:

**Note:** this preview won't be seen by your pair, even if you're already sharing your desktop with them.
Once you click "Start Sharing", the preview disappears and your video stream will be shown to your pair.
When you aren't sharing your webcam feed, you can bring up the camera preview via an option in the dropdown:

### Conversation mode & coding mode
Tuple has two different ways to see the webcams of other participants on the call: **coding mode** and **conversation mode.**
**Coding mode** is the default mode, and is designed to be used in a pairing session where code is the primary focus:
* In this mode, the webcam window will float above all other windows.
* This mode allows participant webcams to be laid out either in a horizontal row or vertical column (this can be changed from the triple-dot menu).
* In this mode, the webcam window resizes proportionally.
* Buttons and other UI elements are hidden by default and show up when your cursor hovers the window.

Conversely, you can use **conversation mode** in sessions where more of the focus is on discussion amongst the participants:
* In this mode, the webcam window will behave like a normal window (i.e. it will go behind other windows when it loses focus, the window can be resized arbitrarily, etc).
* This mode lays out participant webcams in a grid, which allows each individual webcam view to be larger.

To switch between the two modes, click the toggle button in the top-right of the webcam window:

## Showing your own webcam self-view
While on a call, you can show or hide your own self view. This won't change whether other participants can see your webcam or not.
To show or hide your self view, click on the menu in the top-right corner of the webcam window, and click "Show/Hide Self View".

When you're in **coding mode**, you have the ability to choose between a small or large self view. *Small* will display your own video feed as a minimized thumbnail placed in the bottom-right corner of the webcam window, which helps save space when you're pairing with someone. *Big* sets your self-view to be the same size as the other tiles.

## Participant controls
Click another participant's webcam tile to open its menu. Depending on the participant's current state, you can:
* **Ask to Share Screen**
* **Ask to Share Webcam**
* **Ask to Unmute**
* **Mute Audio**
* **Kick** them from the call
These controls are available in coding mode and conversation mode.
## Changing the webcam in use while sharing
You can swap out the webcam in use when you are sharing a webcam by selecting the camera you'd prefer to share by selecting it from the dropdown:

## Using effects on your webcam
On supported Macs, macOS provides free background blur and other camera effects that work with Tuple. While your webcam is active, open the camera indicator in the menu bar and enable **Portrait**. Availability depends on your Mac and camera; see [Apple's requirements](https://support.apple.com/105117).

On macOS Ventura, open **Control Center**, click **Video Effects**, then enable **Portrait**.
Tuple also supports virtual cameras. You can use third-party software such as [Krisp.ai](https://krisp.ai/) or [OBS](https://obsproject.com/) when you need effects beyond those included with macOS.
## Setting your webcam resolution preference
You can set the webcam resolution in your [preferences](/application-preferences/macos-preferences-webcam). Setting the resolution will automatically change the resolution on any current calls.
You might need to tweak your resolution depending on your network connection. If you have a high-speed connection and want maximum webcam quality, set your preference to high. If you're working with a relatively poor connection, set your preference to medium:

### Sharing a webcam
To add a webcam video, click the "Start Webcam" icon in the popover UI:

You'll be shown a preview of your webcam's feed so you can adjust your lighting or background:
**Note:** this preview won't be seen by your pair, even if you're already sharing your desktop with them.
Once you click "Start Sharing", the preview disappears and your video stream will be shown to your pair.
When you aren't sharing your webcam feed, you can bring up the camera preview via an option in the dropdown:

### Showing your own webcam self-view
While on a call, you can show or hide your own self view. This won't change whether other participants can see your webcam or not.
To show or hide your self view, click on the menu in the top-left corner of the webcam window, and toggle "Show Self View".

### Changing the Webcam in use while sharing
You can swap out the webcam in use when you are sharing a webcam by selecting the camera you'd prefer to share by selecting it from the dropdown:

# Sharing app metadata
Source: https://docs.tuple.app/pairing-with-tuple/sharing-app-metadata
If you've [enabled the setting](/application-preferences/macos-preferences-screen-share#share-app-metadata), Tuple sends the window title and content URL of whatever app you have focused to the other participants while you're sharing your screen. Participants who are [capturing the call](/pairing-with-tuple/capturing-calls) keep that metadata alongside the recording, so they end up with a history of the files and URLs you looked at. This also gives connected agents a quick way to understand what's on screen.
## Turning it on and off
The setting is **Share app metadata**, in [Screen share preferences](/application-preferences/macos-preferences-screen-share#share-app-metadata). Tuple asks whether you want it on the first time you share your screen. This setting governs what leaves *your* machine; other participants control for themselves whether they want to capture this information or not.
## When metadata gets sent
Tuple samples the focused window once a second, and shares what it finds only after the same content survives two consecutive samples. A window you flick past is never sent, and content that stays put is normally sent one to two seconds after it appears.
A separate 60-second window keeps content that flips back and forth from being sent over and over.
## What gets shared
Each update describes the focused window:
* **`app`**: the app the window belongs to, as `id` (the bundle id) and `name` (what you'd see in the Dock).
* **`title`**: the window's title.
* **`url`**: what the window is showing, as a scheme'd URL. `http(s)://` for a web page, `file://` for a document.
* **`window_id`**: an identifier for the window itself. It's only meaningful within one sharer's stream, where it tells "moved to a different window" apart from "same window, the title changed".
```json theme={null}
{
"app": { "id": "com.google.Chrome", "name": "Google Chrome" },
"title": { "value": "PR #4212 · tupleapp/tuple" },
"url": { "value": "https://github.com/tupleapp/tuple/pull/4212" },
"window_id": 41235
}
```
`title` and `url` are objects rather than bare strings, because each one carries whether Tuple modified it before sending:
| Shape | Meaning |
| - | - |
| `{"value": "…"}` | Shared exactly as captured. |
| `{"value": "…", "redacted": true}` | Something was removed from inside the value. |
| `{"redacted": true}` | The value was dropped entirely, as with a sign-in URL. This is distinct from the field being absent, which means there was nothing to send in the first place. |
| `{"value": "…", "truncated": true}` | A title past 256 characters, clamped and ending in `…`. |
### Veiled apps
Apps hidden by [App Veil](/application-preferences/macos-preferences-app-veil) share no **metadata at all**. A veiled app sends `{"veiled": true}` and nothing else.
### URL sanitization
For an `http(s)` URL, Tuple drops the value entirely, shares a scrubbed version, or shares it unchanged.
The value is **dropped entirely** — participants see that a URL was there and was redacted, with no value — when:
* The host is a known identity provider, or a subdomain of one: Google Accounts, Microsoft login, Apple ID, Auth0, Okta, OneLogin, Ping, Duo, Atlassian ID, AWS sign-in and Cognito, Salesforce login, or Yahoo login. Matching respects domain boundaries, so `tuple.okta.com` matches `okta.com` but `notokta.com` doesn't.
* The path contains an auth-related segment: variants of `login`, `signin`, `signup`, `register`, `oauth`, `auth`, `authorize`, `callback`, `sso`, `saml`, `verify`, `magic-link`, `reset-password`, `invite`, `activate`, `confirm`, `otp`, `2fa`, `mfa`, or `token`. Whole segments only, so `/auth/` matches and `/author/` doesn't.
* The query or a parameter-shaped fragment carries `response_type`, `client_id`, and `redirect_uri` together, which is the signature of an OAuth authorization request.
* The URL can't be parsed or safely re-serialized.
Every other `http(s)` URL is **shared with credentials removed**:
* Inline credentials get removed, as in `https://user:password@example.com/`.
* Credential-shaped query parameters and fragment parameters go: OAuth codes and tokens, `state`, `nonce`, OTPs, tickets, SAML assertions, session IDs, signatures, API keys, passwords, JWT and auth fields, and S3 or GCS signed-URL credentials.
* A signed S3 or GCS URL keeps its object path and its harmless metadata (algorithm, date, expiry) while losing the credential, session token, and signature.
A URL that trips none of these rules is shared with its scheme, host, port, path, query, and fragment intact. Unrelated parameters stay, such as YouTube's `v` or `tab=overview`, and so do non-parameter fragments such as Gmail's `#inbox/`. Non-`http(s)` URLs, `file://` among them, aren't scrubbed.
### Window title sanitization
Titles get a similar treatment:
* `KEY=value` and `KEY: value` assignments whose key names a credential — `PGPASSWORD`, `GITHUB_TOKEN`, `AWS_SECRET_ACCESS_KEY` — keep the key and replace the value with `•••`.
* `Bearer ` headers and `scheme://user:password@host` connection strings are replaced the same way.
* Tokens recognized by their shape alone are replaced whole: GitHub, GitLab, Slack, AWS, Stripe, npm, OpenAI, and Anthropic key prefixes, plus JWTs.
* Titles longer than 256 characters are truncated, with a trailing `…` marking the cut.
> [!WARNING]
>
> Scrubbing is a curated set of heuristics, not a complete authentication detector. A secret can still get through: in an ordinary-looking path, under a parameter name Tuple doesn't recognize, on a company identity provider with an unfamiliar domain and path, or in a non-`http(s)` URL. For windows that should never be shared at all, use [App Veil](/application-preferences/macos-preferences-app-veil).
# Sharing system audio
Source: https://docs.tuple.app/pairing-with-tuple/sharing-system-audio
If you've [enabled the setting](/application-preferences/macos-preferences-screen-share#share-system-audio-when-using-headphones), Tuple sends the audio playing on your Mac to the other participants while you're sharing your screen. They hear the video, the demo, or the alert sound you're hearing, mixed in with your voice. Tuple **only sends system audio while your Mac is playing it through headphones**.
## Turning it on during a call
While you're sharing your screen, you can turn system audio on or off from **Share System Audio** in the screen share menu in the call controls. This changes the same setting as the one in [Screen share preferences](/application-preferences/macos-preferences-screen-share#share-system-audio-when-using-headphones), so your choice carries over to later calls.
The menu item shows a checkmark while Tuple is sending system audio. If the setting is on but Tuple isn't sending system audio because you aren't using headphones, the menu item shows a dash and a warning badge.
If you turn it on while you aren't using headphones, Tuple shows a **Use headphones to share system audio** alert. Tuple starts sending system audio as soon as you switch to headphones, and the alert closes on its own.
## Why it needs headphones
On speakers, the audio your Mac plays feeds back into your microphone. The other participants would hear it twice, slightly out of step, and your voice would be harder to make out over it.
With headphones, that audio never reaches your microphone, so Tuple can send it cleanly.
## What counts as headphones
Tuple looks at your Mac's OS sound output (the device selected under **Sound** > **Output** in System Settings), *not* the output device you chose in Tuple's [Audio preferences](/application-preferences/macos-preferences-audio). Other apps play through your Mac's sound output, so that's the device that decides whether your microphone can hear them.
It treats these as headphones:
* A device that identifies itself as headphones or a headset, such as a USB headset.
* Any Bluetooth device, such as AirPods.
* Anything plugged into the headphone jack.
Everything else counts as speakers, including your Mac's built-in speakers, a display's speakers, and audio interfaces or docks.
Tuple follows the device as it changes. If you switch from headphones to speakers during a call, Tuple stops sending system audio. When you switch back, it starts again.
## What gets shared
* Audio from the apps on your Mac, while you're sharing your screen.
* Nothing from apps hidden by [App Veil](/application-preferences/macos-preferences-app-veil).
* Nothing from the call itself. Participants don't hear themselves played back.
While you're speaking, Tuple mixes the system audio in at a lower level for the other participants, so your voice stays in front. What you hear on your Mac doesn't change.
Participants who are [capturing the call](/pairing-with-tuple/capturing-calls) transcribe the audio they receive from you, and that includes your system audio. If your Mac plays speech, such as a video, it can show up in their transcript as something you said. If you capture the call yourself, your own lines come from your microphone only.
## If participants can't hear your system audio
Check each of these:
1. **Share system audio when using headphones** is on, in [Screen share preferences](/application-preferences/macos-preferences-screen-share#share-system-audio-when-using-headphones). During a call, **Share System Audio** in the screen share menu shows a checkmark when Tuple is sending system audio.
2. You're sharing your screen. Tuple doesn't send system audio on a call without a screen share.
3. Your Mac's sound output is headphones, under **Sound** > **Output** in System Settings.
4. The app playing the audio isn't hidden by [App Veil](/application-preferences/macos-preferences-app-veil).
# Sharing your screen
Source: https://docs.tuple.app/pairing-with-tuple/sharing-your-screen
To start a Tuple call, click the "Call" icon to the right of one of your contact's names:

**Note:** You'll only be able to start a call if the user is online and available (indicated by a green dot next to their avatar).
The dot next to each contact reflects their current presence. Tuple sorts your contact list by favorites, then presence (online, then busy, then offline), then name:
* **Online** (green dot) — signed in and available to pair.
* **Busy** — signed in but currently on a Tuple call.
* **Offline** — no dot; Tuple isn't running or the person is signed out.
Presence is updated in real time as people sign in, start calls, and leave calls. The same states are available from the terminal via [`tuple contacts list --status`](/cli/commands#contacts-list-query-flags).
Once you have started a call you'll be able to share your screen by clicking "Share screen":

## Sharing part of your screen
To start a call sharing only part of your screen, **right-click (or Control-click)** on your contact's name:

If you're already on a call, you can share part of your screen by selecting the sub-option "Share Part of Screen":

You'll then see a dotted line indicating which part of the screen you're about to share, along with a toolbar at the bottom of your screen. You can drag the handles of the rectangle to change its size, or drag the rectangle itself to move it around your screen:

The toolbar provides several options for adjusting your selection:
* **Pick a window** — Click the window icon in the toolbar (or press `Space`) to enter pick-window mode. Hover over any window to highlight it, then click to snap the selection rectangle to that window's bounds. Press `Space` again to return to manual rectangle mode, or press `Escape` to cancel. *Note*: this just sets the screen share boundaries - if the window moves or gets hidden, the boundary won't change.
* **Pin to half screen** — Click one of the directional icons to snap the selection to the left, right, top, or bottom half of your screen.
* **Aspect ratio** — Choose a preset aspect ratio (16:10, 16:9, or 4:3) to optimize your sharing area for your pair's display.
* **Resize without changing dimensions** — Hold `Shift` and drag a corner handle to scale the selection proportionally.
Press **Share** once you are satisfied with your choices. You'll then see the red corners indicating what your pair can see:

If you'd like to change what part of your screen you're sharing, you can opt to "Change Selection":

## Sharing your screen immediately when starting a call
If you'd like to share your screen immediately when starting a call, you can hold **alt** to toggle the call button mode.
When **alt** is held, the call button will show the option to start a screen sharing call, which will share your screen immediately when your pair answers:
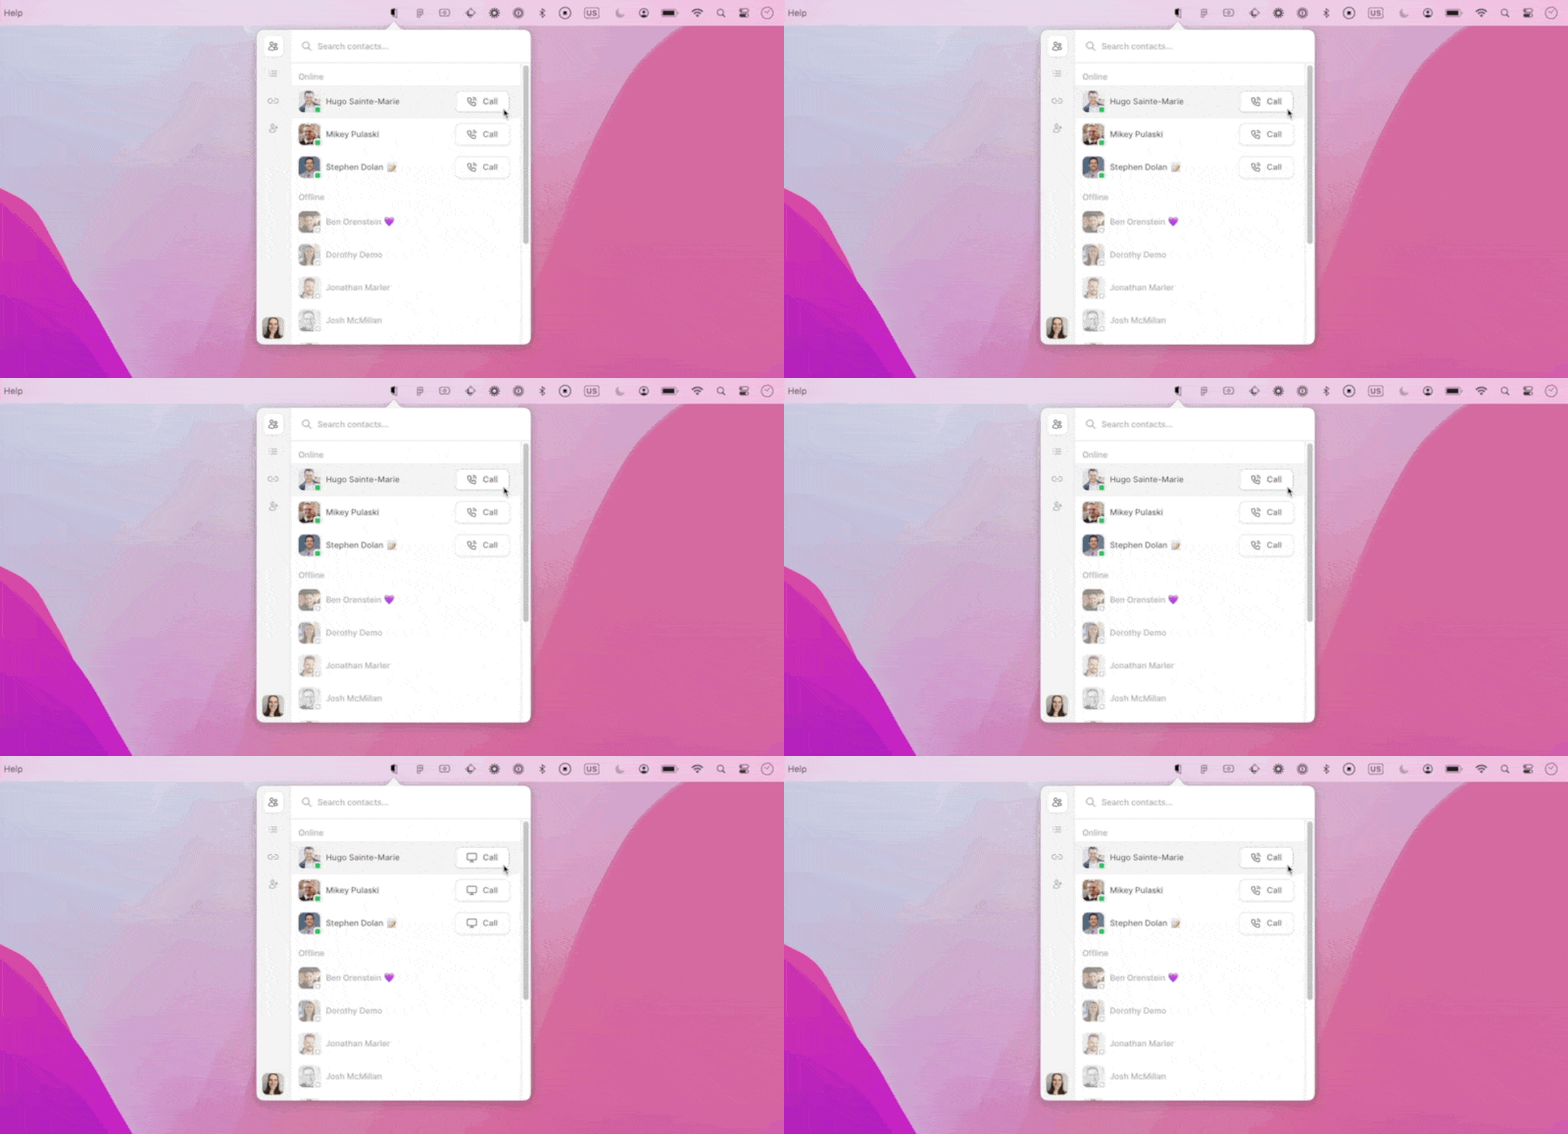
## Choosing which display to share
If you have multiple displays and choose to start a call with screen sharing, Tuple will prompt you to pick one before the call starts. Just click anywhere on the display you want to share:

If you're not seeing a menu bar on your external display at all, check that you have the "Displays have separate Spaces" setting enabled in Desktop & Dock at the bottom of the page:

## Changing displayed screens during a call
If you're already sharing a display but want to switch to a different one, you can swap to a specific display by opening the Tuple app menu and clicking "Switch Screen" or by using the quick switcher:

## Changing which call participant is sharing their screen
If another call participant is sharing their screen, you can swap to sharing your screen by opening the Tuple app menu and clicking "Share Screen":

## Stopping sharing your screen
When you would like to stop sharing your screen, you can stop by opening the Tuple app menu and clicking "Stop Sharing":

If you're currently sharing an external display screen, you'll need to move your mouse to that display, and open the Tuple app menu on that specific display to see the "Stop Sharing" button.
Alternatively, you can find the ability to stop sharing any screen in the dropdown from the Tuple app menu:

**Note:** To access the Tuple app menu on an external monitor, you will also need to have "displays have separate spaces" enabled (see **Changing displayed screens during a call** above).
# Showing Who You're Pairing With
Source: https://docs.tuple.app/pairing-with-tuple/showing-who-youre-pairing-with
By default, Tuple will show who you're pairing with to people who are friends or teammates with both you and your pair:

(*Since I'm friends with Mikey and Joel, I can see when they're on a call together.*)
If a friend is pairing with people you aren't friends with or a teammate of, you'll see an anonymized version:

(*I'm not friends with Spencer's friends, so his call is shrouded in mystery.*)
Naturally, you can disable this behavior in preferences:

# Sound Check
Source: https://docs.tuple.app/pairing-with-tuple/sound-check
If you're currently on a call, you can open the quick sound preferences view by pressing the caret icon in the audio mute/unmute icon:

## Troubleshooting
If you're having issues getting audio to work, here are some steps you can take:
1. Make sure your audio devices are turned on and any hardware volume settings are on
2. Open the Sound settings in System Preferences and make sure the correct devices are selected, and set Tuple to use the System Default
3. Restart Tuple
## Using Tuple with Multi-line audio interfaces
Tuple should enumerate all of the possible input options provided by your audio interface device. It will treat each line on the device as a separate input device that you can choose:

# Speaking-while-muted notification
Source: https://docs.tuple.app/pairing-with-tuple/speaking-while-muted-notification
Tuple alerts you when it detects you're speaking while your microphone is muted.
If you accidentally speak while muted during a call, Tuple displays a notification to let you know. This helps you avoid talking without being heard by your pair.
## How it works
When you're muted during a call, Tuple listens for your voice in the background. If it detects sustained speech for about half a second, a "You're muted" notification appears in the in-call notification stack anchored under the Tuple status item.
The notification gives you two options:
* **Unmute Me** — immediately unmutes your microphone so your pair can hear you.
* **Got it** — dismisses the notification. The alert can still fire again later in the call (subject to the cooldown below).
If you close the notification without clicking either button, the feature stays active and will notify you again the next time it detects speech while muted.
## Cooldown
After the notification fires, there is a two-minute cooldown before it can trigger again. This prevents repeated alerts if you mute and unmute frequently during a call.
## Disabling the notification
Dismissing the notification with **Got it** no longer silences future alerts for the rest of the call — suppression is now explicit. To stop receiving the notification, use the cancel pill's menu on the card:
* **Snooze for This Call** — suppresses the speaking-while-muted notification for the remainder of the current call only. It re-enables automatically on your next call.
* **Never Show Again** — turns the notification off permanently. This is the same setting as **Speaking while muted** under **Notifications** in [Audio preferences](/application-preferences/macos-preferences-audio#notifications), and you can re-enable it there at any time.
## How it works
When you're muted during a call, Tuple listens for your voice in the background. If it detects sustained speech for about half a second, a "You're muted" prompt appears with the message "It sounds like you're speaking."
The prompt gives you two options:
* **Unmute Me** — immediately unmutes your microphone so your pair can hear you.
* **Got it** — dismisses the prompt and disables the alert for the rest of the current call.
If you close the prompt without clicking either button, the feature stays active and will notify you again the next time it detects speech while muted.
## Cooldown
After the prompt fires, there is a five-minute cooldown before it can trigger again. This prevents repeated alerts if you mute and unmute frequently during a call.
## Disabling the notification
Click **Got it** on the prompt to turn it off for the rest of the current call. The feature reactivates automatically on your next call.
> [!NOTE]
>
> This feature is not available on Linux.
# Spotlight Integration
Source: https://docs.tuple.app/pairing-with-tuple/spotlight-integration
### Supported Intents
If you're using macOS 26 (Tahoe) or later, you can use Spotlight to control Tuple. The following intents are supported:
* **Searching for contacts by name:** You can enter a contact's name; selecting them will highlight them in the Tuple popover. You can hit enter again to call them.
* **Searching for rooms by name:** Similarly, you can enter a room name to highlight it in the popover. Hitting enter again will join the room.
* **"Call...":** Selecting the "call..." intent will prompt you to enter a contact name from within Spotlight. Hitting enter will then directly call that person.
* **"Join...":** Selecting the "join..." intent will prompt you to select a room from within Spotlight. Hitting enter will then join that room.
### Disabling the Integration
You can also disable the integration if you don't want your Tuple contacts to clutter up your Spotlight results. You can do so via the [Integrations settings tab](/application-preferences/macos-preferences-integrations).
### Using in Shortcuts
You can also use the intents above to create custom shortcuts using the [Shortcuts app](https://support.apple.com/guide/shortcuts-mac/intro-to-shortcuts-apdf22b0444c/mac):

These shortcuts will also be available in Spotlight:

# Using Rooms
Source: https://docs.tuple.app/pairing-with-tuple/using-rooms
Rooms are like persistent calls with names. They can be useful for recurring events (standups, social time, etc.) or specific teams (engineering touchbase, design reviews, leadership, etc.).
Rooms live in their own tab:

Rooms are owned collectively by the whole team, meaning:
* Everyone in your team can **see all rooms** and who is in them
* Everyone in your team can **create, rename, or delete** rooms
***
## Your personal room
The Rooms tab also includes a **"Your personal room"** card pinned at the top of the list. Clicking the card does two things at once: it **joins your personal room** *and* **copies your personal-room link** to your clipboard, so you can paste it into a chat or calendar invite.
The card reuses your **existing** personal-room link — the same one already in your calendar invites or recurring events — rather than minting a new URL each time. Links you've previously shared keep working, and any open/closed change you make below applies to those same links.
### Open vs closed (door control)
While you're in your personal room, a **door control** row sits just below the call controls. Use it to change who can join, mid-call:
* **Open** — your contacts and teammates can join freely.
* **Closed** — joining requires your approval. Visitors see "Room closed · request to join" and you'll be prompted to admit them.
Toggling open/closed writes through to your personal-room link immediately, so anyone using a previously shared link will get the new permission the next time they try to join.
The door control is **owner-only**: it appears for personal rooms you own. Visitors to someone else's personal room and participants in team rooms don't see it. If your team enforces approval through the call-link settings, the door is locked to **Closed** and can't be toggled from the call.
***
## Joining a room
To enter a room, simply click on it. **You can only be in a single room (or call) at once**: if you enter a room while you're already in another call, you'll get prompted for a confirmation that you want to leave it.

Like any other call, **rooms have a capacity of 10 participants**.
***
## Viewing and updating room info
To **copy a room's link**, click the dropdown menu icon in its top-right corner and select the "Copy Room Link" action. If you want to **rename or delete a room**, you can find those actions in the "More" submenu.
***
## Creating a room
To create a new room, **click on the + icon** in the top-right corner of the app. You'll be prompted to pick a name for the room, and that's it! Note that duplicate names are not allowed: you can't create a room (or rename an existing one) with a name that's already in use.

Rooms are **ordered alphabetically**. If you want to enforce a custom ordering, you can use leading numbers or letters, like for instance "1. Engineering", "2. Support", and "3. Marketing".
We currently support **up to 40 rooms per team**.
***
## Favoriting rooms
You can **favorite rooms** by selecting the "Favorite Room" action in the room's dropdown menu. Favorited rooms stay pinned to the top of the Rooms tab.

***
## Subscribing to rooms *(macOS only)*
You can **subscribe to rooms** to get notified when your teammates are in a given room. Using the "Subscribe" submenu in the room's dropdown, you can select whether you want to show a badge on the Tuple menu bar icon, receive a push notification, or both.

***
## Auto-removal of inactive rooms
To keep your team's room list manageable, Tuple automatically removes rooms that haven't been used in a while.
### Removal criteria
* Rooms that haven't had any calls for 180 days are automatically removed
* Rooms created within the last 30 days are never removed, even if unused
* Rooms with an active call are never removed
### What removal means
* Rooms are removed permanently. If a room is removed and you'd like to use it again, you'll need to create one with that name again.
### Adjusting or disabling auto-removal
Team owners and managers can configure this in [Team Settings → Room Settings](https://production.tuple.app/team_management/rooms):
* Change the inactivity period (30 to 365 days)
* Disable auto-removal entirely
***
## Managing rooms from the CLI
The [Tuple CLI](/cli/commands#tuple-rooms) can list, join, favorite, and create rooms. The MCP server exposes the same actions to AI coding agents.
***
We're still exploring ways to make Rooms more valuable. If you have any feedback that would make this feature more useful to your team, [let us know](mailto:support@tuple.app?subject=Rooms%20Feedback)!
# Using Tuple for Interviews
Source: https://docs.tuple.app/pairing-with-tuple/using-tuple-for-interviews
Pairing is a great way to interview developers. Pairing with candidates using Tuple is even better!
> [!NOTE]
>
> Invite candidates as **outside collaborators**, not teammates. This does not add them to your team or consume a paid seat. Candidates without a Tuple account can create a free guest account without starting a trial or entering payment information.
When you *schedule* the interview, send the candidate your outside-collaborator invite link or add them by email. They can accept with an existing Tuple account or create a [free guest account](/managing-your-account/using-tuple-as-an-unpaid-user).

You'll be added as contacts for one another, but they will *not* be able to see the rest of your Tuple team in their contact list.
You can then send them a call link or call them directly at the time of the interview. Note: candidates who create free guest accounts will *not* be able to join Room links.
To remove them after an interview, right-click them in your contact list and select **Remove**.
# Using your keyboard to navigate Tuple
Source: https://docs.tuple.app/pairing-with-tuple/using-your-keyboard-to-navigate-tuple
Prefer to navigate with your keyboard instead of your mouse? Tuple supports keyboard shortcuts.
To access the in-app list of shortcuts, open the Tuple menu by clicking your avatar image in the bottom left of the popover:

You can also access this view by pressing the **?** key while the Tuple window is in focus. Selecting **Shortcuts** will bring up the overview.
Scroll down to review all shortcuts currently available.
# Ways to use Capture
Source: https://docs.tuple.app/pairing-with-tuple/ways-to-use-capture
[Capture](/pairing-with-tuple/capturing-calls) records what's said and shown on your Tuple calls **locally on your machine**. This allows you to use the context from your calls in **any local harness** with **any model** - either in real time on the call, or after the fact.
We intentionally designed Capture to be flexible; we want you to be able to use your call content in whatever workflows are right for you and your team. To give you some inspiration for things you could do, we've collected a few ideas below.
## Before you begin
1. Be sure that Capture is fully [set up and enabled](/application-preferences/macos-preferences-capture#start-automatically).
2. Install the [Tuple CLI](/cli/overview).
## During a call
> [!NOTE]
>
> [Claude Code](https://claude.com/product/claude-code) and [Pi](https://pi.dev/) currently work best for following a call in real time. See [Ask an agent to follow along](/cli/connect#ask-an-agent-to-follow-along) for details.
> **Real-time notes in Notion**
>
> Connect an agent to a call to take notes in real time, so you can focus on the problem at hand.
>
> **1. Connect your agent to Notion**
>
> In your harness of choice, ensure you're connected to [Notion's MCP](https://developers.notion.com/guides/mcp/overview). If you're using Claude desktop, you can use [Notion connector](https://claude.com/marketplace/connectors/notion) instead.
>
> **2. Start capturing**
>
> See [starting and stopping capture](/pairing-with-tuple/capturing-calls#starting-and-stopping-capture) to get it going.
>
> **3. Connect an agent to the call**
>
> In your terminal, run:
>
> ```bash theme={null}
> tuple connect "Create a new Notion page and start taking live notes there. Open the page in my default browser."
> ```
>
> Once the agent boots up, you should see a Notion page open in your browser.
>
> **4. Share your screen**
>
> If you're [sharing app metadata](/pairing-with-tuple/sharing-app-metadata), others on the call will receive the URL of the newly-created Notion document. They can then open it locally. It will also get stored in their [local history](/pairing-with-tuple/local-call-history).
> **Fact checking**
>
> Connect an agent to a call to check claims against your codebase, your data, and the web, so you can catch incorrect assumptions before you act on them.
>
> **1. Give your agent access to your sources**
>
> Open your terminal in the repo you're discussing. To check against production data, connect your agent to the MCP servers for the tools you use, like your database, analytics, or error tracker.
>
> **2. Start capturing**
>
> See [starting and stopping capture](/pairing-with-tuple/capturing-calls#starting-and-stopping-capture) to get it going.
>
> **3. Connect an agent to the call**
>
> In your terminal, run:
>
> ```bash theme={null}
> tuple connect "Follow this call and fact check claims we make about the codebase, our data, or anything you can verify on the web. When something we say is wrong, send me a Tuple notification with the correction and your source."
> ```
>
> When the agent catches something, a notification will appear on your screen during the call.
> **Live updates in Slack**
>
> Connect an agent to a call to post updates in a Slack channel as you work, so your team can follow along without joining.
>
> **1. Connect your agent to Slack**
>
> In your harness of choice, ensure you're connected to [Slack's MCP](https://docs.slack.dev/ai/slack-mcp-server/). If you're using Claude desktop, you can use the [Slack connector](https://claude.com/marketplace/connectors/slack) instead.
>
> **2. Start capturing**
>
> See [starting and stopping capture](/pairing-with-tuple/capturing-calls#starting-and-stopping-capture) to get it going.
>
> **3. Connect an agent to the call**
>
> In your terminal, run:
>
> ```bash theme={null}
> tuple connect "Follow this call and post short updates in #incidents as we make progress: what we've found, what we've ruled out, and what we've decided. Post in a single thread."
> ```
>
> Replace `#incidents` with the channel you want updates in.
> **Open a shared URL locally**
>
> Open the page or file your pair is looking at on your own machine, so you can follow along without asking them to paste a link.
>
> **1. Start capturing**
>
> See [starting and stopping capture](/pairing-with-tuple/capturing-calls#starting-and-stopping-capture) to get it going.
>
> **2. Have someone share their screen**
>
> The person sharing must be [sharing app metadata](/pairing-with-tuple/sharing-app-metadata). If an app like Chrome or Safari is focused, they'll share the current URL with you.
>
> **3. Open the most recently shared URL**
>
> In your terminal, run (requires [`jq`](https://jqlang.org/)):
>
> ```bash theme={null}
> tuple --format json capture show \
> | jq -r 'select(.type == "shared_content_changed") | .data.url.value // empty' \
> | tail -n 1 \
> | xargs open
> ```
>
> This finds the last URL your pair shared and opens it in your browser.
> **Live iteration on an artifact**
>
> Connect an agent to a call to make changes to what you're building as you and your pair talk it through and annotate on screen.
>
> **1. Start capturing**
>
> See [starting and stopping capture](/pairing-with-tuple/capturing-calls#starting-and-stopping-capture) to get it going.
>
> **2. Get your project ready to iterate on**
>
> In your terminal, navigate to the directory of a project you want to work on with your pair. Get it into a state where you can see changes quickly (for example, start a development server).
>
> Then [share your screen](/pairing-with-tuple/sharing-your-screen) with the artifact open, so your pair can see it and [annotate](/pairing-with-tuple/collaborative-painting) on it.
>
> **3. Connect an agent to the call**
>
> In that same directory, run:
>
> ```bash theme={null}
> tuple connect "Help us iterate on this project. Listen for suggestions about it, and watch for annotations on the shared screen that point out changes. Before you act on any feedback, send me a Tuple notification that describes the change and ask me to confirm it."
> ```
>
> When the agent picks up on feedback, a notification appears on your screen with the change it wants to make. The agent makes the change only after you accept.
## After a call
> **Create an HTML call summary**
>
> Have an agent create a pretty page summarizing the call, complete with screenshots.
>
> **1. Do a call with capture enabled**
>
> See [starting and stopping capture](/pairing-with-tuple/capturing-calls#starting-and-stopping-capture) to get it going.
>
> **2. Open the call in an agent**
>
> After the captured call is complete, open it from [Local History](/pairing-with-tuple/local-call-history).
>
> Once the call is open in [local history](/pairing-with-tuple/local-call-history), copy the CLI command listed there to launch a CLI-based agent with the call loaded. Or you can copy the prompt on that screen to load the call into a GUI agent, or an agent that's already running.
>
> **Step 3**
>
> Once the call's been loaded into an agent, give it this prompt:
>
> Create a pretty HTML call summary
>
> Create a visually beautiful HTML page summarizing what happened on this call.
>
> * Run `tuple agent guide call-content` to understand what call info you have
> * Extract any really impactful pull quotes and present them in a clear and striking way
> * Pull out screenshots of key moments - either when what was on screen was pivotal to the discussion, or when folks were annotating on the screen
>
> Because the agent has access to both the transcript and the screen recording, it can use its best judgement to pull screen shots from important moments.
> **Automatically update your personal wiki**
>
> Have an agent automatically add what you learn on every call to a [personal wiki](https://gist.github.com/karpathy/442a6bf555914893e9891c11519de94f).
>
> **1. Capture every call**
>
> Turn on [Start automatically](/application-preferences/macos-preferences-capture#start-automatically) in Capture settings, so the wiki gets updated from all of your calls, not only the ones you remember to capture.
>
> **2. Have an agent create a trigger**
>
> Start an agent in your terminal and give it this prompt:
>
> Create a trigger that updates your wiki
>
> Create a Tuple trigger that updates my personal wiki each time a call capture completes.
>
> * Run `tuple agent guide automation` to learn how Tuple triggers work, and read the trigger docs it points to
> * Use the `call-capture-complete` event
> * My wiki is a folder of Markdown files at `~/wiki`
> * When the trigger fires, start an agent in the background that reads the capture and updates the wiki: add a page for the call, and update the pages for the people, projects, and decisions that came up
>
> Replace `~/wiki` with the folder you want your wiki in.
>
> After your next call, the [trigger](/triggers/building-a-trigger) will run and update your wiki.
> **Collaborative PR review**
>
> Review a pull request together on a call, then have an agent turn what you agreed on into replies to the PR comments.
>
> **1. Connect your agent to GitHub**
>
> Install the [GitHub CLI](https://cli.github.com/) and sign in with `gh auth login`. Or, in your harness of choice, connect to [GitHub's MCP server](https://github.com/github/github-mcp-server).
>
> **2. Do a call about a PR with capture enabled**
>
> See [starting and stopping capture](/pairing-with-tuple/capturing-calls#starting-and-stopping-capture) to get it going. Go through the PR's comments together and talk through how to respond to each one.
>
> **3. Open the call in an agent**
>
> After the captured call is complete, open it from [Local History](/pairing-with-tuple/local-call-history).
>
> Once the call is open in [local history](/pairing-with-tuple/local-call-history), copy the CLI command listed there to launch a CLI-based agent with the call loaded. Or you can copy the prompt on that screen to load the call into a GUI agent, or an agent that's already running.
>
> **4. Draft and post replies**
>
> Once the call's been loaded into an agent, give it this prompt:
>
> Draft replies to PR comments
>
> Draft replies to the pull request comments we discussed on this call.
>
> * Run `tuple agent guide call-content` to understand what call info you have
> * Find the pull request from the URLs in the app metadata, or from what we said
> * For each comment where we agreed on a response, draft a reply
> * Show me each draft and ask whether it looks okay before you post it
> * Post the replies I approve to the pull request
>
> The agent will go through your responses to each PR comment and draft a reply. If you approve the draft, it'll post it.
> **Bug reproduction screenshots**
>
> Reproduce a bug together on a call, then have an agent write the ticket, complete with screenshots of the bug.
>
> **1. Connect your agent to your issue tracker**
>
> In your harness of choice, ensure you're connected to the MCP server or CLI for your issue tracker, like Linear, Jira, or GitHub Issues.
>
> **2. Reproduce the bug on a call with capture enabled**
>
> See [starting and stopping capture](/pairing-with-tuple/capturing-calls#starting-and-stopping-capture) to get it going. [Share your screen](/pairing-with-tuple/sharing-your-screen) and walk through the bug with your pair, so the recording shows it happening.
>
> **3. Open the call in an agent**
>
> After the captured call is complete, open it from [Local History](/pairing-with-tuple/local-call-history).
>
> Once the call is open in [local history](/pairing-with-tuple/local-call-history), copy the CLI command listed there to launch a CLI-based agent with the call loaded. Or you can copy the prompt on that screen to load the call into a GUI agent, or an agent that's already running.
>
> **4. Create the ticket**
>
> Once the call's been loaded into an agent, give it this prompt:
>
> Create a bug ticket from a call
>
> Create a ticket in our issue tracker for the bug we reproduced on this call.
>
> * Run `tuple agent guide call-content` to understand what call info you have
> * Include the steps to reproduce, what we expected, and what happened instead
> * Use `tuple screen --at` to extract screenshots of the moments when the bug was visible, and add them to the ticket
> * If, in the course of the investigation, we encountered a meaningful stack trace, error message, or log line, find a screenshot of it and convert it to text in the ticket
>
> Because the agent has access to the transcript, the screen recording, and the files and URLs shared on the call, it can pull the reproduction steps both from what you said and the evidence from what you showed.
> **Visual before and after**
>
> Have an agent pull before and after screenshots of what you changed on a call.
>
> **1. Work through visual changes on a call with capture enabled**
>
> See [starting and stopping capture](/pairing-with-tuple/capturing-calls#starting-and-stopping-capture) to get it going. [Share your screen](/pairing-with-tuple/sharing-your-screen) and work through the changes with your pair, so the recording shows how things looked from start to finish.
>
> **2. Open the call in an agent**
>
> After the captured call is complete, open it from [Local History](/pairing-with-tuple/local-call-history).
>
> Once the call is open in [local history](/pairing-with-tuple/local-call-history), copy the CLI command listed there to launch a CLI-based agent with the call loaded. Or you can copy the prompt on that screen to load the call into a GUI agent, or an agent that's already running.
>
> **3. Extract the screenshots**
>
> Once the call's been loaded into an agent, give it this prompt:
>
> Extract before and after screenshots
>
> Create before and after screenshots of what we worked on most during this call.
>
> * Run `tuple agent guide call-content` to understand what call info you have
> * Use `tuple screen --at` to extract a screenshot of it before we started changing it, and another of how it looked at the end
> * Save them as `before.jpg` and `after.jpg` in the current directory
>
> You can use the screenshots in a PR description, for example.
> **Incident response timeline**
>
> Have an agent put together a timeline of how your team resolved an incident on a call.
>
> **1. Respond to an incident on a call with capture enabled**
>
> See [starting and stopping capture](/pairing-with-tuple/capturing-calls#starting-and-stopping-capture) to get it going. [Share your screen](/pairing-with-tuple/sharing-your-screen) as you work the incident, so the recording shows the dashboards and logs you looked at.
>
> **2. Open the call in an agent**
>
> After the captured call is complete, open it from [Local History](/pairing-with-tuple/local-call-history).
>
> Once the call is open in [local history](/pairing-with-tuple/local-call-history), copy the CLI command listed there to launch a CLI-based agent with the call loaded. Or you can copy the prompt on that screen to load the call into a GUI agent, or an agent that's already running.
>
> **3. Create the incident timeline**
>
> Once the call's been loaded into an agent, give it this prompt:
>
> Create an incident timeline
>
> This call was a response to an incident. Put together a timeline of how we remediated it, and write it to a nicely formatted HTML file.
>
> * Run `tuple agent guide call-content` to understand what call info you have
> * Link to the dashboards we looked at, using the URLs in the app metadata
> * Use `tuple screen --at` to extract screenshots of relevant moments
> * Include the log lines that helped us track down the problem, converted to text
> * End with what the ultimate solution was
>
> Because the agent has access to the transcript, the screen recording, and app metadata, it can connect what you said to what was on screen at each step.
> **Transition to deep work**
>
> Bring what you discussed on a call into the agent you already use for focused work, so it can pick up where the conversation left off.
>
> **1. Talk through something meaty on a call with capture enabled**
>
> See [starting and stopping capture](/pairing-with-tuple/capturing-calls#starting-and-stopping-capture) to get it going. Talk through a big decision or outline an approach with your pair.
>
> **2. Bring the call into the agent you already use**
>
> After the captured call is complete, open it from [Local History](/pairing-with-tuple/local-call-history).
>
> Once the call is open in [local history](/pairing-with-tuple/local-call-history), copy the **Prompt** and paste it into the agent session you already have running for your deep work. The agent keeps everything it already knows about your project and adds the context from the call.
>
> **3. Have the agent make a plan**
>
> Once the call's been loaded into your agent, give it this prompt:
>
> Make a plan from a call
>
> Make a plan for yourself based on the outcome of the call you just loaded.
>
> * Run `tuple agent guide call-content` to understand what call info you have
> * Base the plan on what we decided and the approach we outlined, not on ideas we discussed and set aside
> * Call out any open questions we didn't resolve
> * Write your plan to `plan.md`
>
> The agent will write its plan to `plan.md`, where you can check it before jumping into implementation.
# Adding Details To Your Invoice
Source: https://docs.tuple.app/team-management/adding-details-to-your-invoice
If you are the Owner of a team with an active subscription, you can add extra information — a billing address, tax information, or a VAT ID — to your invoice.
Beneath the Users List, select "Manage Billing":

Then, click on "Update information":

That will bring you to a page where you can add your address and tax information to your invoices.

If you need an old invoice voided in favor of an updated version, please [write to us](mailto:support@tuple.app)!
# Cancelling a subscription
Source: https://docs.tuple.app/team-management/cancelling-a-subscription
If you are the
**Team Owner** for a team with an **active** or trial subscription, you can access the billing portal by selecting "Manage billing on Stripe" on [your team management page](https://production.tuple.app/team_management/settings).
You will see the following "Manage billing on Stripe" button:

This will take you to a page where you can set your subscription to cancel, renew it if you change your mind, and download past statements:

# Single Sign-On (SSO)
Source: https://docs.tuple.app/team-management/configuring-single-sign-on-sso
How to configure SAML SSO for your Tuple team
Tuple supports SAML Single Sign-On as part of the Standard and Enterprise plans. SSO lets your team authenticate through your identity provider instead of managing separate Tuple credentials.
## Provider-specific guides
> **[Okta](/team-management/sso-okta)**
>
> Includes optional SCIM provisioning
> **[Google Workspace](/team-management/sso-google)**
>
> Google Admin console setup
> **[Microsoft Entra ID](/team-management/sso-azure)**
>
> Formerly Azure AD
> **[OneLogin](/team-management/sso-onelogin)**
>
> SAML Test Connector setup
## General SSO setup
If your identity provider is not listed above, you can configure SAML SSO manually using the values below.
> [!NOTE]
>
> Email addresses in your identity provider and Tuple must match exactly. For example, `dev+tuple@company.com` does not match `dev@company.com`. Verify your team's email addresses before enabling SSO.
>
> Tuple falls back to the SAML NameID when no email attribute is present in the response, so if your provider's NameID defaults to something other than email (such as a username or UPN), set it to the user's email address as well.
### What you need from your identity provider
* Your SSO IdP Entity ID
* Your SSO target URL that performs authentication
* Your auth certificate or its SHA1 fingerprint
* Attributes that include `first_name`, `last_name`, and `email`
### Tuple's SAML endpoints
| Field | Value |
| - | - |
| Entity ID | `https://production.tuple.app/users/saml/metadata` |
| Assertion Consumer Service (ACS) URL | `https://production.tuple.app/users/saml/auth` |
### Enable SAML in Tuple
Navigate to the **Settings** tab of the [team management dashboard](https://production.tuple.app/team_management/settings).
> [!NOTE]
>
> Only [team owners](/team-management/team-owner-and-managers) can enable SAML. To find out who your team owner is, check [your profile](https://production.tuple.app/profile#team).
Under **Sign-in methods**, set **Required Authentication Provider** to **SAML SSO**. The **Update SAML Configuration** form appears:

Fill in the values with your your identity provider metadata:
Select the **Email Domain** that SAML should apply to. Only domains with confirmed team members are available.
Click **Save as draft**. Your draft is saved as a **Pending Update** alongside your current sign-in method, so no one on your team is affected yet.

Click **Test** to verify the configuration end-to-end. Tuple signs you in through your identity provider so you can confirm that authentication succeeds before the change affects anyone else on your team.
Once the test succeeds, click **Publish** to make the configuration live. Active Tuple sessions persist, but new sign-ins are routed through your identity provider.
Use **Edit** to tweak the draft, or **Discard** to throw it away without publishing.
## Managing your SAML configuration
Tuple keeps a single **Active Configuration** plus any **Pending Update** draft you're working on. Changes are staged as drafts so you can test them before they affect the rest of your team.
### Update an existing configuration
On the **Settings** tab of the team management dashboard, click **Update configuration** on the Active Configuration card. The **Update SAML Configuration** form opens pre-filled with your current values.
Leave the **Certificate** field empty to keep the existing certificate, or upload a new file to replace it. The current fingerprint is shown above the upload field.
Click **Save as draft** to create a Pending Update. From there, **Test** the draft, then **Publish** it when you're ready. You can also **Edit** the draft to make further changes, or **Discard** it to throw it away.
### Archived configurations
When you publish a new SAML configuration, the previous one is automatically archived. Expand **archived SAML configurations** on the Settings tab to see past configurations:

* **Restore** -- bring an archived configuration back so you can test and publish it again. This is useful if you need to roll back to a previous identity provider setup.
* **Delete** -- permanently remove an archived configuration.
## Reference
> **Provisioning and deprovisioning**
>
> The first time a user authenticates through your identity provider, Tuple provisions an account for them. If you are on a per-seat billing plan, billing begins for that seat immediately.
>
> Tuple finds or creates the account using the email address in the SAML response, falling back to the NameID when no email attribute is present. An unrecognized address creates a new account rather than failing, and an address that belongs to a member of a different team fails with "Not a member of the team associated with the Identity Provider." Both symptoms usually mean the identity provider is sending a different identifier (such as a UPN) than the user's Tuple email address.
>
> You can disable a user's access in your identity provider, but deprovisioning their Tuple account (and stopping billing for that seat) must be done on the [team management page](https://production.tuple.app/team_management/members) by your team owner.
>
> For automated provisioning, see [SCIM provisioning](/team-management/scim-provisioning).
> **Roles and permissions**
>
> Tuple has three roles: **team owner**, **team manager**, and **user**.
>
> * **Team owners** can manage team settings, add and remove users, promote managers, and update billing information.
> * **Team managers** can manage team settings, add and remove users, and promote other managers.
> * **Users** can make and receive calls and share team invite links.
>
> See [Team Owner and Managers](/team-management/team-owner-and-managers) for the full permissions breakdown.
>
> Accounts provisioned through your identity provider are created as users. The team owner is typically the person who first created your team on Tuple. Contact [support@tuple.app](mailto:support@tuple.app) if you need to transfer ownership.
> **Email requirements**
>
> Email addresses in your identity provider and Tuple must match exactly. For example, `dev+tuple@company.com` does not match `dev@company.com`. Verify your team's email addresses before enabling SSO.
>
> Tuple reads the email from the SAML email attribute, checking several common claim names automatically. If no email attribute is present, Tuple uses the NameID value instead. If your provider's NameID isn't the user's email address -- notably Microsoft Entra ID, where it defaults to the UPN -- see the [Microsoft Entra ID guide](/team-management/sso-azure) for how to keep them consistent.
## Questions?
[Email us](mailto:support@tuple.app) and we'll help you get set up.
# Exporting Team Usage
Source: https://docs.tuple.app/team-management/exporting-team-usage
Any Team Owner or Team Manager can pull a usage report for their team.
## Downloading your team's CSV user report
1. Head to [your team management page](https://production.tuple.app/team_management/usage) as a Team Owner or Team Manager.
2. Click the "Download user report (CSV)" button:

The downloaded team usage report has five columns:
**Email** - The user's email address.
**Name** - The user's name.
**Last pairing session date** - The last date and time when this user participated in a Tuple call.
**Account created date** - When this user joined the team (or was added via SCIM).
**Role** - "Team Manager" or "Team Owner" if the user holds that role.
## Downloading your team's JSON usage report
1. Head to [your team management page](https://production.tuple.app/team_management/usage) as a Team Owner or Team Manager.
2. Click the "Download usage report (JSON)" button. This report will include all non-deleted team members, as well as call records going back **six months**:

The downloaded team usage report adheres to the following JSON schema:
```
{
"$schema": "http://json-schema.org/draft-07/schema#",
"type": "object",
"properties": {
"team_members": {
"type": "array",
"items": {
"type": "object",
"properties": {
"user_id": { "type": "integer" },
"name": { "type": "string" },
"email": { "type": "string", "format": "email" },
"last_sign_in": { "type": ["string", "null"], "format": "date-time" },
"created_at": { "type": "string", "format": "date-time" },
"last_call_at": { "type": ["string", "null"], "format": "date-time" }
},
"required": ["user_id", "name", "email", "created_at"]
}
},
"calls": {
"type": "array",
"items": {
"type": "object",
"properties": {
"call_id": { "type": "string", "format": "uuid" },
"participants": {
"type": "array",
"items": {
"type": "object",
"properties": {
"user_id": { "type": "integer" },
"name": { "type": "string" },
"email": { "type": "string", "format": "email" },
"duration_minutes": { "type": "integer", "minimum": 0 }
},
"required": ["user_id", "name", "email", "duration_minutes"]
}
},
"duration_minutes": { "type": "integer", "minimum": 0 },
"started_at": { "type": "string", "format": "date-time" },
"ended_at": { "type": "string", "format": "date-time" }
},
"required": ["call_id", "participants", "duration_minutes", "started_at", "ended_at"]
}
}
},
"required": ["team_members", "calls"]
}
```
# Inviting users
Source: https://docs.tuple.app/team-management/inviting-users
To invite a user to pair with you, navigate to the Invite tab:

You can invite either **teammates** or **outside collaborators.**
If you add someone as a **teammate,** they'll be added to your team once they accept your invitation and create an account. You'll also be added as contacts for one another. Note that adding a teammate means that you'll start paying for their seat at the start of the next billing cycle.
If you add someone as an **outside collaborator**, they will *not* be added to your team. Once they accept your invitation, you'll be added as contacts for one another, and you'll be able to call one another. However, the person you invited won't be able to call anyone else on your team.
Inviting an outside collaborator does not add them to your team or consume one of your team's paid seats. They can accept with an existing Tuple account—including an account paid for by another team—or create a free guest account.
Regardless of whether you're inviting someone as a **teammate** or **outside collaborator**, you can either enter their email to send them an invitation, or you can send them the invitation link directly.
# Managing Team billing
Source: https://docs.tuple.app/team-management/managing-team-billing
If you are the **Team Owner** for a team with an **active** or trial subscription, you can access the billing portal by selecting "Manage billing on Stripe" on [your team management page](https://production.tuple.app/team_management/settings).
You will see the following "Manage billing on Stripe" button:

This will take you to a Stripe billing portal page where you can make modifications to your existing subscription, and download past statements.
## To add a new payment method:
If there is currently no payment method on file (if your team is in a trial), you can add a new payment method by clicking on "Add payment method":

## To update the existing payment method:
In order to delete a credit card on file, you will need to add a new one first.
You can add a new payment method by using the button mentioned above.
## To cancel your subscription:
You can set your subscription to cancel at the end of the current period by selecting Cancel plan:

## To update the billing email address (that receives invoices):
Update the value under BILLING INFORMATION Email:

# OSS and startup plans
Source: https://docs.tuple.app/team-management/oss-and-startup-plans
Special pricing for open source teams and early-stage startups.
## Open source plan
If you're part of an open source project, you may qualify for free Tuple licenses. Learn more and apply at [tuple.app/oss](https://tuple.app/oss?utm_source=docs).
## Startup plan
If you're at a startup, you may qualify for a discount on Tuple. Learn more and apply at [tuple.app/startups](https://tuple.app/startups?utm_source=docs).
# Pairing Insights
Source: https://docs.tuple.app/team-management/pairing-insights
See how your team pairs, which communities form around shared work, and who connects them.
Pairing Insights gives Team Owners and Team Managers a visual summary of how people on the team pair together. Use it to spot who is pairing with whom, which sub-teams have formed naturally, and which teammates bridge otherwise disconnected groups.
## Opening Pairing Insights
1. Sign in to [tuple.app](https://tuple.app?utm_source=docs) as a Team Owner or Team Manager.
2. Open your team and go to **Pairing Insights** in the team sidebar.
3. Use the period toggle at the top right to change the time window the report covers.
If your team has never made a call on Tuple, the page shows an empty state instead of the report.
## Reading the report
Pairing Insights is made up of a few panels, each driven by the same time window you selected at the top of the page.
**Quick stats** summarizes total calls, total pairing time, and the number of unique pairs for the selected period.
**Pairing activity** charts how much your team paired across the period.
**Peak hours** shows when during the day your team tends to pair, in your local timezone.
**Network map** is an interactive graph of every teammate who paired during the period. Each dot is a person, and each line is a pair of teammates who had at least one call together. Thicker lines mean more calls between that pair.
**Communities** lists the clusters of teammates that consistently pair with one another. Tuple detects communities automatically from call history — you don't configure them.
**Connectors** lists teammates who bridge two or more communities. These are the people most responsible for cross-pollination on your team.
## Using the network map
The network map is an infinite canvas you can pan and zoom:
* Drag with the left mouse button to pan.
* Scroll or pinch to zoom.
* Middle-click and drag to pan without selecting.
* Click **Fit** to reframe the whole graph in view.
Hover a node to see a card with that teammate's pairing stats for the period. Hover a community to see its members and size. Click a connector in the **Connectors** panel to highlight that teammate's node on the map; click the close button on the card to clear the selection.
Node size reflects engagement — teammates who pair with many different partners, or pair often, appear larger. Nodes are colored by community. Teammates who only pair inside a small, isolated pair (a dyad) appear as outline-only nodes on the outer ring of the map, rather than being forced into a larger community.
## Sharing a report
You can share a read-only view of a Pairing Insights report with anyone, including people outside your team, by generating a share link:
1. Open Pairing Insights and pick the period you want to share.
2. Click the **Share** button next to the period toggle.
3. Copy the generated link and send it to whomever you want to view the report.
Share links are valid for 90 days. You can revoke a share link at any time from the same share button; a revoked link stops working immediately. Each share link is tied to a specific team and period, so changing the period after sharing creates a new link.
## Permissions
Pairing Insights is visible to Team Owners and Team Managers. Regular team members don't see the page or the sidebar link. Anyone with an active share link can view the shared report, even if they aren't signed in.
# Reactivating a subscription
Source: https://docs.tuple.app/team-management/reactivating-a-subscription
If you are the **Owner** of a team with an active subscription, you can initiate a reactivation for your account by signing in to [the Tuple web app](https://production.tuple.app).
When you sign in, you'll see a message that looks like this:

Click "Reactivate your subscription", and you'll be good to go! Once your account is reactivated, you can head to your [Billing Portal](/team-management/managing-team-billing) to review and modify your account details.
# Removing users
Source: https://docs.tuple.app/team-management/removing-users
As a team owner or manager, you have the capability to remove users from your team at any time.
Head to your [team directory](https://production.tuple.app/team_management/members), then click the three-dot menu next to any user you'd like to remove and click "Remove":

**Note:** if your Tuple team is configured to use SSO and SCIM, you will not see the option to "Remove" as Tuple will delegate deprovisioning to the identity provider.
# Requesting a Team Invite Link
Source: https://docs.tuple.app/team-management/requesting-a-team-invite-link
If you're trying to join your team on Tuple, you'll need someone on your team to send you a **team invite link**. Anyone on your team can do this - they don't have to be a team owner. Here's how one of your teammates can get this link for you:
Have someone on your team open the Tuple popover in the menu bar:

Navigate to the **Invite** tab:

Be sure the "team invite link" option is selected:

Have them copy the link, and send it to you via chat / text / email:

Clicking on that link should allow you to join your team when you sign up for Tuple. If you've already created an account but haven't joined a team yet, you **won't** have to make a new one; clicking on the link allows you to join your team with the account you've already created.
# Microsoft Entra ID
Source: https://docs.tuple.app/team-management/scim-entra-id
How to set up SCIM provisioning in Tuple with Microsoft Entra ID
This guide walks through configuring SCIM provisioning with Microsoft Entra ID (formerly Azure AD) to automatically manage Tuple user accounts.
> [!NOTE]
>
> SCIM provisioning requires an existing [Microsoft Entra ID SAML integration](/team-management/sso-azure). Complete the SSO setup first.
## Prerequisites
You need the SCIM credentials from your [Team Management page](https://production.tuple.app/team_management/invitations) in Tuple. If you don't see them, contact [support@tuple.app](mailto:support@tuple.app) to enable SCIM for your team.
## Setup
**1. Open provisioning settings**
In the [Microsoft Entra admin center](https://entra.microsoft.com), navigate to your Tuple enterprise application.
Select **Provisioning** in the left sidebar.

**2. Set provisioning mode**
Click **Get started**, then set **Provisioning Mode** to **Automatic**.
**3. Enter admin credentials**
Under **Admin Credentials**, fill in the following fields:
**Tenant URL**
```
https://production.tuple.app/scim/v2
```
**Secret Token** -- your SCIM username and SCIM password from the Tuple Team Management page, joined with a colon:
```
:
```
For example, if your SCIM username is `acme` and your SCIM password is `abc123`, enter `acme:abc123`. The password alone is not a valid token.
Click **Test Connection** to verify Entra ID can reach Tuple's SCIM endpoint. A success message confirms the credentials are valid.
**4. Configure attribute mappings**
Under **Mappings**, disable **Provision Microsoft Entra ID Groups**. Tuple supports user provisioning only. If group provisioning remains enabled, Entra ID requests the unsupported `/Groups` endpoint and may quarantine the initial sync with an HTTP 404 error.
Expand **Mappings** and select **Provision Microsoft Entra ID Users**.
Ensure the following attributes are mapped:
| Microsoft Entra ID attribute | SCIM attribute |
| - | - |
| `mail` | `emails[type eq "work"].value` |
| `givenName` | `name.givenName` |
| `surname` | `name.familyName` |
| `mail` | `userName` |
> [!WARNING]
>
> Tuple matches users by `userName` and stores it as the account's email address. Map `mail` to `userName`, not `userPrincipalName`: a UPN that differs from the user's email address creates duplicate accounts and breaks SAML sign-in, which [identifies users by email](/team-management/sso-azure).
Click **Save**.
**5. Turn on provisioning**
Return to the **Provisioning** overview. Set **Provisioning Status** to **On** and click **Save**.
Entra ID runs an initial sync cycle, then syncs changes approximately every 40 minutes.
# Okta
Source: https://docs.tuple.app/team-management/scim-okta
How to set up SCIM provisioning in Tuple with Okta
This guide walks through configuring SCIM provisioning with Okta to automatically manage Tuple user accounts.
> [!NOTE]
>
> SCIM provisioning requires an existing [Okta SAML integration](/team-management/sso-okta). Complete the SSO setup first.
## Prerequisites
Your Okta app must be [configured at creation time](https://support.okta.com/help/s/article/SCIM-Provisioning-Enabled-in-Custom-App?language=en_US) to use SCIM. If you have an existing app that was not configured for SCIM, contact [Okta Support](https://support.okta.com/help/s/opencase).
## Setup
**1. Request SCIM credentials**
Send an email to [support@tuple.app](mailto:support@tuple.app) to enable SCIM for your team.
Once approved, your SCIM credentials appear on the [Team Management page](https://production.tuple.app/team_management/invitations) in Tuple:

**2. Enable SCIM in Okta**
In your Tuple application in Okta, enable SCIM provisioning:

**3. Configure provisioning**
In **Provisioning**, configure with the following values:

**SCIM connector base URL**
```
https://production.tuple.app/scim/v2
```
**Unique identifier field for users**
```
email
```
Enable the following features:
* Import new users and Profile Updates
* Push New Users
* Push Profile Updates
Use the credentials from your Team Management page.
**4. Enable features to app**
Once the integration step is successful, enable features **To App**:

# OneLogin
Source: https://docs.tuple.app/team-management/scim-onelogin
How to set up SCIM provisioning in Tuple with OneLogin
This guide walks through configuring SCIM provisioning with OneLogin to automatically manage Tuple user accounts.
> [!NOTE]
>
> SCIM provisioning requires an existing [OneLogin SAML integration](/team-management/sso-onelogin). Complete the SSO setup first.
## Prerequisites
You need the SCIM credentials from your [Team Management page](https://production.tuple.app/team_management/invitations) in Tuple. If you don't see them, contact [support@tuple.app](mailto:support@tuple.app) to enable SCIM for your team.
## Setup
**1. Add the SCIM provisioner app**
In OneLogin, navigate to **Apps > Add Apps**. Search for **SCIM Provisioner with SAML (Core Schema)** and select it.

Enter "Tuple" as the **Display Name** and click **Save**.
**2. Configure the SCIM connection**
Go to the **Configuration** tab. Fill in the SAML fields from your existing [OneLogin SAML integration](/team-management/sso-onelogin), then fill in the SCIM fields:

**SCIM Base URL**
```
https://production.tuple.app/scim/v2
```
**SCIM Bearer Token** -- your SCIM username and SCIM password from the Tuple Team Management page, joined with a colon:
```
:
```
For example, if your SCIM username is `acme` and your SCIM password is `abc123`, enter `acme:abc123`. The password alone is not a valid token.
Leave **SCIM JSON Template** and **Custom Headers** empty.
**3. Enable the connection**
Click **Enable** on the Configuration tab. OneLogin sends a test request to verify the SCIM endpoint.
A successful connection shows **API Status** as **Enabled**.

**4. Enable provisioning**
Go to the **Provisioning** tab and check **Enable provisioning**.
Select the actions you want OneLogin to handle:
* Create user
* Delete user
* Update user
Click **Save**.
# SCIM provisioning
Source: https://docs.tuple.app/team-management/scim-provisioning
Automatically provision and deprovision Tuple user accounts from your identity provider
SCIM (System for Cross-domain Identity Management) automatically provisions and deprovisions user accounts in Tuple when you update them in your identity provider. This eliminates manual user management and ensures access stays in sync.
## Getting credentials
SCIM credentials are issued per-team. To enable SCIM:
1. Send an email to [support@tuple.app](mailto:support@tuple.app) requesting SCIM provisioning.
2. Once approved, your credentials appear on the [Team Management page](https://production.tuple.app/team_management/invitations).

Your credentials are a SCIM username and a SCIM password. Providers that authenticate with basic auth, like Okta, use them directly. Providers that ask for a single bearer token or secret token, like Microsoft Entra ID and OneLogin, use both values joined with a colon: `:`.
## Provider-specific guides
> **[Okta](/team-management/scim-okta)**
>
> Okta SCIM connector
> **[Microsoft Entra ID](/team-management/scim-entra-id)**
>
> Formerly Azure AD
> **[OneLogin](/team-management/scim-onelogin)**
>
> SCIM Provisioner with SAML
## How SCIM works with Tuple
| Action in your identity provider | Result in Tuple |
| - | - |
| Assign user to Tuple app | Account created, seat billing begins |
| Remove user from Tuple app | Account deprovisioned, seat billing stops |
| Update user profile | Name and email updated in Tuple |
## Tuple's SCIM endpoints
| Field | Value |
| - | - |
| SCIM connector base URL | `https://production.tuple.app/scim/v2` |
| Unique identifier field | `userName`, stored as the user's Tuple email address |
Map `userName` to the same email address your SAML configuration sends. When the two disagree -- for example, SCIM sending a UPN while SAML sends `mail` -- each flow matches a different account and users end up duplicated.
## Questions?
[Email us](mailto:support@tuple.app) if you need help setting up SCIM provisioning.
# Sign In With Google
Source: https://docs.tuple.app/team-management/sign-in-with-google
Tuple gives users the ability to sign up and sign in with Google. Team owners have the ability to select Google, Microsoft, or SAML SSO as a required authentication provider; if none is selected, users can choose how they want to authenticate. The setting can be changed in the [team settings tab](https://production.tuple.app/teams/14#settings):

## FAQs
**What happens if I attempt to transfer a user into a team where they don't meet the auth requirements (i.e. if a team requires Google auth, but the user in question hasn't used it)?**
The transfer request will be blocked.
**How can I completely remove my Google connection?**
You can visit Google's interface for managing third-party connections [here](https://myaccount.google.com/connections).
**If a team has auto-join functionality enabled, what will happen if a user signs up but doesn't meet the auth requirements for the team?**
The user will be prevented from joining the team.
**When a team makes Google auth required, what happens to users who had previously been using email and password?**
Existing users are shown an error message when attempting to log in which prompts them to sign in with Google. Users are ***not*** logged out from existing sessions.
**When a team switches from Google auth to a different required auth provider, what happens to users who had previously been using Google auth?**
Existing users are shown an error message which prompts them to sign in with an email / password. If they don’t have a password set, they’ll need to go through the reset password flow. Again - users are ***not*** logged out from existing sessions.
**Can users use a Google account to sign up or sign in if the email address is unverified?**
No - users must have a verified email on Google in order to use it.
**If a user changes the email address associated with a Tuple account, will that automatically update or invalidate the linkage with the associated Google account?**
No. Users who change their email address in Tuple do not automatically have their link to their Google account broken. For example, someone could sign up via Google using the email address `first@tuple.app`, then change the address associated with their Tuple account to `second@tuple.app`. In this case, they would still be able to sign in via the Google account `first@tuple.app`. If a different user actually had the Google account `second@tuple.app`, they wouldn't be able to use Google auth until the first user switched their email address back to `first@tuple.app` (or to something else entirely).
# Sign in With Microsoft
Source: https://docs.tuple.app/team-management/sign-in-with-microsoft
Tuple gives users the ability to sign up and sign in with Microsoft. Team owners have the ability to select Google, Microsoft, or SAML SSO as a required authentication provider; if none is selected, users can choose how they want to authenticate. The setting can be changed in the [team settings tab](https://production.tuple.app/teams/14#settings):

## FAQs
**What happens if I attempt to transfer a user into a team where they don't meet the auth requirements (i.e. if a team requires Microsoft auth, but the user in question hasn't used it)?**
The transfer request will be blocked.
**If a team has auto-join functionality enabled, what will happen if a user signs up but doesn't meet the auth requirements for the team?**
The user will be prevented from joining the team.
**When a team makes Microsoft auth required, what happens to users who had previously been using email and password?**
Existing users are shown an error message when attempting to log in which prompts them to sign in with Microsoft. Users are ***not*** logged out from existing sessions.
**When a team switches from Microsoft auth to a different required auth provider, what happens to users who had previously been using Microsoft auth?**
Existing users are shown an error message which prompts them to sign in with an email / password. If they don’t have a password set, they’ll need to go through the reset password flow. Again - users are ***not*** logged out from existing sessions.
**If a user changes the email address associated with a Tuple account, will that automatically update or invalidate the linkage with the associated Microsoft account?**
No. Users who change their email address in Tuple do not automatically have their link to their Microsoft account broken. For example, someone could sign up via Microsoft using the email address `first@tuple.app`, then change the address associated with their Tuple account to `second@tuple.app`. In this case, they would still be able to sign in via the Microsoft account `first@tuple.app`. If a different user actually had the Microsoft account `second@tuple.app`, they wouldn't be able to use Microsoft auth until the first user switched their email address back to `first@tuple.app` (or to something else entirely).
# Microsoft Entra ID
Source: https://docs.tuple.app/team-management/sso-azure
How to configure SAML SSO with Microsoft Entra ID (Azure AD) for your Tuple team
This guide walks through configuring SAML SSO with Microsoft Entra ID (formerly Azure AD) as your identity provider.
> [!NOTE]
>
> Email addresses in Microsoft Entra ID and Tuple must match exactly. For example, `dev+tuple@company.com` does not match `dev@company.com`. Verify your team's email addresses before enabling SSO.
>
> Tuple falls back to the SAML NameID when no email attribute is present in the response, so if your provider's NameID defaults to something other than email (such as a username or UPN), set it to the user's email address as well.
**1. Create an enterprise application**
Sign in to the [Microsoft Entra admin center](https://entra.microsoft.com) as at least a Cloud Application Administrator.
Navigate to **Identity > Applications > Enterprise applications** and click **New application**. Then click **Create your own application**.
Enter "Tuple" as the application name, select **Integrate any other application you don't find in the gallery (Non-gallery)**, and click **Create**.
**2. Assign users**
Before configuring SSO, assign the users who need access to Tuple. In your new Tuple application, go to **Users and groups** and add the users or groups that should have SSO access.
**3. Configure SAML**
In your Tuple application, navigate to **Single sign-on** in the left sidebar and select **SAML** as the sign-on method.

Click **Edit** on the **Basic SAML Configuration** card and fill in the following fields:
**Identifier (Entity ID)**
```
https://production.tuple.app/users/saml/metadata
```
**Reply URL (Assertion Consumer Service URL)**
```
https://production.tuple.app/users/saml/auth
```
Click **Save**.
**4. Configure attributes and claims**
Click **Edit** on the **Attributes & Claims** card. Add two custom claims so Tuple receives the user's first and last name.
Click **Add new claim** and create each of the following:
| Name | Source attribute |
| - | - |
| `first_name` | `user.givenname` |
| `last_name` | `user.surname` |
Leave the **Namespace** field empty for both claims.
Tuple identifies the signing-in user by the email address in the SAML response, so two more settings matter:
* The default email claim (`http://schemas.xmlsoap.org/ws/2005/05/identity/claims/emailaddress`) must keep `user.mail` as its source attribute.
* The **Unique User Identifier (Name ID)** claim should also be sourced from `user.mail`. Entra ID defaults it to `user.userprincipalname`, and a UPN like `u0123456@company.com` often differs from the user's email address.
> [!WARNING]
>
> If the email claim is missing from the response, Tuple falls back to the Name ID value. When that value isn't the user's email address, sign-in either fails with "Not a member of the team associated with the Identity Provider" or creates a duplicate account under the wrong address. Users whose `mail` attribute is empty in Entra ID hit this even when the claims are configured correctly, so make sure every assigned user has `mail` populated.
If you also use [SCIM provisioning](/team-management/scim-entra-id), map `mail` to `userName` there so SAML and SCIM identify users by the same address.
**5. Set up SAML in Tuple**
On the **SAML Certificates** card, download the **Certificate (Base64)** file.
Then, in the **Set up Tuple** card, copy the following values:
* **Login URL** -- this is your IdP authentication URL
* **Microsoft Entra Identifier** -- this is your IdP entity ID
Navigate to the **Settings** tab of the [team management dashboard](https://production.tuple.app/team_management/settings).
> [!NOTE]
>
> Only [team owners](/team-management/team-owner-and-managers) can enable SAML. To find out who your team owner is, check [your profile](https://production.tuple.app/profile#team).
Under **Sign-in methods**, set **Required Authentication Provider** to **SAML SSO**. The **Update SAML Configuration** form appears:

Fill in the values with your Microsoft Entra ID metadata:
Select the **Email Domain** that SAML should apply to. Only domains with confirmed team members are available.
Click **Save as draft**. Your draft is saved as a **Pending Update** alongside your current sign-in method, so no one on your team is affected yet.

Click **Test** to verify the configuration end-to-end. Tuple signs you in through Microsoft Entra ID so you can confirm that authentication succeeds before the change affects anyone else on your team.
Once the test succeeds, click **Publish** to make the configuration live. Active Tuple sessions persist, but new sign-ins are routed through Microsoft Entra ID.
Use **Edit** to tweak the draft, or **Discard** to throw it away without publishing.
# Google Workspace
Source: https://docs.tuple.app/team-management/sso-google
How to configure SAML SSO with Google Workspace for your Tuple team
This guide walks through configuring SAML SSO with Google Workspace as your identity provider.
> [!NOTE]
>
> Email addresses in Google Workspace and Tuple must match exactly. For example, `dev+tuple@company.com` does not match `dev@company.com`. Verify your team's email addresses before enabling SSO.
>
> Tuple falls back to the SAML NameID when no email attribute is present in the response, so if your provider's NameID defaults to something other than email (such as a username or UPN), set it to the user's email address as well.
**1. Add a custom SAML app**
Sign in to your Google Workspace Admin console. Navigate to **Apps > Web and mobile apps > Add app > Add custom SAML app**.

**2. Create the app**
Name the app "Tuple" and optionally upload an icon, which you can [download here](https://s3.wasabisys.com/tuple/images/tuple-sso.png).

**3. Configure your Tuple account**
You are shown the Google Identity Provider details. Copy the values from this screen:

Navigate to the **Settings** tab of the [team management dashboard](https://production.tuple.app/team_management/settings).
> [!NOTE]
>
> Only [team owners](/team-management/team-owner-and-managers) can enable SAML. To find out who your team owner is, check [your profile](https://production.tuple.app/profile#team).
Under **Sign-in methods**, set **Required Authentication Provider** to **SAML SSO**. The **Update SAML Configuration** form appears:

Fill in the values with your Google Workspace metadata:
Select the **Email Domain** that SAML should apply to. Only domains with confirmed team members are available.
Click **Save as draft**. Your draft is saved as a **Pending Update** alongside your current sign-in method, so no one on your team is affected yet.

Click **Test** to verify the configuration end-to-end. Tuple signs you in through Google Workspace so you can confirm that authentication succeeds before the change affects anyone else on your team.
Once the test succeeds, click **Publish** to make the configuration live. Active Tuple sessions persist, but new sign-ins are routed through Google Workspace.
Use **Edit** to tweak the draft, or **Discard** to throw it away without publishing.
**4. Service provider details**
Return to the Google Workspace Admin console and fill in the following fields:

**ACS URL**
```
https://production.tuple.app/users/saml/auth
```
**Entity ID**
```
https://production.tuple.app/users/saml/metadata
```
**5. Attribute mapping**
Tuple requires two additional attributes: `first_name` and `last_name`.

After finishing the install wizard, click **Test SAML Login** to verify the configuration.

# Okta
Source: https://docs.tuple.app/team-management/sso-okta
How to configure SAML SSO with Okta for your Tuple team
This guide walks through configuring SAML SSO with Okta as your identity provider.
> [!NOTE]
>
> Email addresses in Okta and Tuple must match exactly. For example, `dev+tuple@company.com` does not match `dev@company.com`. Verify your team's email addresses before enabling SSO.
>
> Tuple falls back to the SAML NameID when no email attribute is present in the response, so if your provider's NameID defaults to something other than email (such as a username or UPN), set it to the user's email address as well.
**1. Create a SAML app**
After signing in to your Okta account, click **Applications** in the navigation bar and then click **Create App Integration**.

Select **SAML 2.0** as the sign-in method.

**2. Configure the app**
Name the app "Tuple" and upload an icon, which you can [download here](https://s3.wasabisys.com/tuple/images/tuple-sso.png).

Fill in the following fields:

**Single sign on URL**
```
https://production.tuple.app/users/saml/auth
```
**Audience URI (SP Entity ID)**
```
https://production.tuple.app/users/saml/metadata
```
There are three additional attributes that Tuple requires: `email`, `first_name`, and `last_name`.
**3. Set up SAML in Tuple**
After finishing the install wizard, click **View SAML Setup Instructions** on the Sign On tab.

This provides the metadata needed to configure SAML in Tuple:
* Identity Provider Single Sign-On URL
* Identity Provider Issuer URL
* Downloaded certificate file

Navigate to the **Settings** tab of the [team management dashboard](https://production.tuple.app/team_management/settings).
> [!NOTE]
>
> Only [team owners](/team-management/team-owner-and-managers) can enable SAML. To find out who your team owner is, check [your profile](https://production.tuple.app/profile#team).
Under **Sign-in methods**, set **Required Authentication Provider** to **SAML SSO**. The **Update SAML Configuration** form appears:

Fill in the values with your Okta metadata:
Select the **Email Domain** that SAML should apply to. Only domains with confirmed team members are available.
Click **Save as draft**. Your draft is saved as a **Pending Update** alongside your current sign-in method, so no one on your team is affected yet.

Click **Test** to verify the configuration end-to-end. Tuple signs you in through Okta so you can confirm that authentication succeeds before the change affects anyone else on your team.
Once the test succeeds, click **Publish** to make the configuration live. Active Tuple sessions persist, but new sign-ins are routed through Okta.
Use **Edit** to tweak the draft, or **Discard** to throw it away without publishing.
## SCIM provisioning
Okta supports automated user provisioning via SCIM. See [SCIM provisioning with Okta](/team-management/scim-okta) for setup instructions.
# OneLogin
Source: https://docs.tuple.app/team-management/sso-onelogin
How to configure SAML SSO with OneLogin for your Tuple team
This guide walks through configuring SAML SSO with OneLogin as your identity provider.
> [!NOTE]
>
> Email addresses in OneLogin and Tuple must match exactly. For example, `dev+tuple@company.com` does not match `dev@company.com`. Verify your team's email addresses before enabling SSO.
>
> Tuple falls back to the SAML NameID when no email attribute is present in the response, so if your provider's NameID defaults to something other than email (such as a username or UPN), set it to the user's email address as well.
**1. Create a SAML connector**
After signing in to your OneLogin account, click **Applications > Applications** in the top navigation bar.

In the search field, enter `SAML Test` and select **SAML Test Connector (Advanced)** from the results.

Fill in any required metadata, upload company logos, and save the new application.

**2. Configure Tuple's metadata**
After saving, click **Configuration** in the left-hand sidebar.

Fill in the following fields:
**Audience (EntityID)**
```
https://production.tuple.app/users/saml/metadata
```
**Recipient**
```
https://production.tuple.app/users/saml/auth
```
**ACS (Consumer) URL Validator**
```
https:\/\/production.tuple.app\/users\/saml\/auth
```
**ACS (Consumer) URL**
```
https://production.tuple.app/users/saml/auth
```
**Login URL**
```
https://production.tuple.app
```
**3. Attach required parameters**
Navigate to the **Parameters** section in the sidebar and click the plus button to add new fields.
Tuple requires three fields in the SSO response: `email`, `first_name`, and `last_name`.

When adding each field, check the **Include in SAML Assertion** checkbox.

Repeat for `first_name` and `last_name`.

Once all required parameters are added, the screen looks like this:

**4. Enable SAML in Tuple**
Download your X.509 certificate. Click **SSO** in the sidebar and find the link to **View Details**:

Click **Download** to save the certificate file.

Return to the **SSO** screen and locate the **Issuer URL** and **SAML 2.0 Endpoint (HTTP)**.

Navigate to the **Settings** tab of the [team management dashboard](https://production.tuple.app/team_management/settings).
> [!NOTE]
>
> Only [team owners](/team-management/team-owner-and-managers) can enable SAML. To find out who your team owner is, check [your profile](https://production.tuple.app/profile#team).
Under **Sign-in methods**, set **Required Authentication Provider** to **SAML SSO**. The **Update SAML Configuration** form appears:

Fill in the values with your OneLogin metadata:
Select the **Email Domain** that SAML should apply to. Only domains with confirmed team members are available.
Click **Save as draft**. Your draft is saved as a **Pending Update** alongside your current sign-in method, so no one on your team is affected yet.

Click **Test** to verify the configuration end-to-end. Tuple signs you in through OneLogin so you can confirm that authentication succeeds before the change affects anyone else on your team.
Once the test succeeds, click **Publish** to make the configuration live. Active Tuple sessions persist, but new sign-ins are routed through OneLogin.
Use **Edit** to tweak the draft, or **Discard** to throw it away without publishing.
# Team Owner and Managers
Source: https://docs.tuple.app/team-management/team-owner-and-managers
Tuple features two team management roles, Team Owners, and Team Managers. Their respective abilities include the following:
| Permission | Team Owner | Team Manager |
| - | - | - |
| Add/remove users from team | ✔️ | ✔️ |
| Manage team settings | ✔️ | ✔️ |
| Promote other users to Team Manager | ✔️ | ✔️ |
| [Manage API tokens](/team-management/usage-api-alpha#managing-api-tokens) | ✔️ | ✔️ |
| Manage billing portal/information | ✔️ | ✖️ |
| Transfer team ownership | ✔️ | ✖️ |
**Note:** Tuple currently only supports one single Team Owner, but you can add unlimited Team Managers.
### Team Owners
Team Owners can transfer ownership to another user, and/or promote/remove Team Managers from the [Team Management page](https://production.tuple.app/team_management/members).

# Usage API (alpha)
Source: https://docs.tuple.app/team-management/usage-api-alpha
Access Tuple call data programmatically and manage API tokens from the dashboard.
Some teams want to integrate Tuple call data with tools like [DX](https://getdx.com/) and Jellyfish. To that end, we offer a usage API. To get access, [reach out to support](mailto:support@tuple.app).
## Endpoint
```
GET /api/v2/call_usage
```
Returns completed calls for the authenticated team, sorted by `ended_at` ascending.
## Authentication
Requests must include a Bearer token in the `Authorization` header:
```
Authorization: Bearer sk-tuple-...
```
Team owners and managers can create and manage API tokens directly from the dashboard. See [Managing API tokens](#managing-api-tokens) below.
## Query parameters
| **Parameter** | **Required** | **Description** |
| - | - | - |
| `since` | Yes | ISO 8601 datetime. Only returns calls that ended at or after this time. |
| `until` | No | ISO 8601 datetime. Only returns calls that ended before this time. Defaults to now. |
| `page` | No | Page number for pagination. Defaults to 1. |
| `per_page` | No | Number of calls per page. Defaults to 100, maximum 1000. |
## Response
Returns a JSON array of call objects. Default 100 calls per page (max 1000).
```json theme={null}
[
{
"id": 12345,
"started_at": "2026-03-15T14:30:00.000Z",
"ended_at": "2026-03-15T15:00:00.000Z",
"duration_seconds": 1800,
"call_participations": [
{
"id": 67890,
"joined_at": "2026-03-15T14:30:00.000Z",
"left_at": "2026-03-15T15:00:00.000Z",
"user": {
"email": "alice@example.com"
}
}
]
}
]
```
### Pagination headers
Follows [RFC 8288 (Web Linking)](https://datatracker.ietf.org/doc/html/rfc8288).
| **Header** | **Description** |
| - | - |
| `X-Total-Count` | Total number of calls matching the query. |
| `Link` | Standard `Link` header with `rel="next"` and `rel="prev"` URLs when applicable. |
## Rate limiting
60 requests per minute per team. Returns `429 Too Many Requests` when exceeded.
## Error responses
| **Status** | **Cause** |
| - | - |
| `401 Unauthorized` | Missing or invalid Bearer token. |
| `422 Unprocessable Entity` | Malformed `since` or `until` parameter (must be valid ISO 8601). |
| `429 Too Many Requests` | Rate limit exceeded. |
## Example
```bash theme={null}
curl -H "Authorization: Bearer sk-tuple-abc123..." \
"https://production.tuple.app/api/v2/call_usage?since=2026-03-01T00:00:00Z&until=2026-03-31T00:00:00Z"
```
## Managing API tokens
Team owners and managers can create, view, and revoke API tokens from the Tuple dashboard.
### Create a token
**1. Open the API tokens page**
Go to your [team management page](https://production.tuple.app/team_management/api_tokens).
**2. Create a new token**
Click **Create token** and give it a descriptive name (for example, "DX integration" or "Jellyfish sync").
**3. Copy the token**
Copy the token immediately after creation. The full token is only shown once and cannot be retrieved later.
### Revoke a token
To revoke a token, open the menu next to it on the API tokens page and click **Revoke**. Any integration using that token will immediately lose access.
### Token security
* Tokens begin with `sk-tuple-` and do not expire.
* Only the last four characters of each token are visible after creation.
* You can create multiple tokens to give each integration its own credential, making it easy to revoke access for a single integration without affecting others.
* Treat tokens like passwords. Do not commit them to source control or share them in plain text.
## Notes
* Only **completed** calls are returned (in-progress calls are excluded).
* Calls are filtered by `ended_at`, not `started_at`.
# API reference
Source: https://docs.tuple.app/triggers/api-reference
## Universal arguments
When Tuple executes your trigger, it passes in useful information via environment variables. These take the form `TUPLE_TRIGGER_[name]`.
These arguments vary by trigger; however, there are three universal arguments that are available to every trigger that gets executed:
| Argument | Details |
| - | - |
| `TUPLE_TRIGGER_CURRENT_USER_EMAIL` | Your email |
| `TUPLE_TRIGGER_CURRENT_USER_FULL_NAME` | Your full name |
| `TUPLE_TRIGGER_CLI` | The path to the [Tuple CLI](/cli/overview), such as `/usr/local/bin/tuple` on macOS. Use it instead of a bare `tuple`, which may not be on the trigger's `PATH`. The path is set even when the CLI isn't installed, so check `[ -x "$TUPLE_TRIGGER_CLI" ]` if your script should keep going without it. |
## Events
The complete list of lifecycle events that you can respond to with triggers.
### Call initiated
`call-initiated`
Fired when you start an outgoing call to another person via the popover interface.

| Argument | Details |
| - | - |
| `TUPLE_TRIGGER_CALLEE_EMAIL` | The email of the person you're calling. |
| `TUPLE_TRIGGER_CALLEE_FULL_NAME` | The full name of the person you're calling. |
### Call incoming
`call-incoming`
Fired when another participant calls your machine.

| Argument | Details |
| - | - |
| `TUPLE_TRIGGER_CALL_ID` | The ID of the incoming call. Pass it to [`tuple call accept --call`](/cli/commands#call-accept) to answer this call. |
| `TUPLE_TRIGGER_CALLER_EMAIL` | The email of the person calling you. |
| `TUPLE_TRIGGER_CALLER_FULL_NAME` | The full name of the person calling you. |
### Call rejected
`call-rejected`
Fired when the person you're calling rejects your call.
| Argument | Details |
| - | - |
| `TUPLE_TRIGGER_CALLEE_EMAIL` | The email of the person you're calling. |
| `TUPLE_TRIGGER_CALLEE_FULL_NAME` | The full name of the person you're calling. |
### Call timed out
`call-timed-out`
Fired when your outgoing call times out.
| Argument | Details |
| - | - |
| `TUPLE_TRIGGER_CALLEE_EMAIL` | The email of the person you're calling. |
| `TUPLE_TRIGGER_CALLEE_FULL_NAME` | The full name of the person you're calling. |
### Call connected
`call-connected`
Fired when your call is fully connected.
(Receives no additional arguments)
### Call ended
`call-ended`
Fired when your call ends.
| Argument | Details |
| - | - |
| `TUPLE_TRIGGER_CALL_LENGTH` | The duration that you were on the call in seconds. |
### Call capture started
`call-capture-started`
Fired when a call capture starts. Capture can be stopped and restarted within a single call, and each recording session fires its own started/complete pair — use `TUPLE_TRIGGER_RECORDING_ID` to address the exact session that just started rather than guessing from "the most recent call."
| Argument | Details |
| - | - |
| `TUPLE_TRIGGER_CALL_ID` | The ID of the call this capture belongs to. |
| `TUPLE_TRIGGER_RECORDING_ID` | A UUID identifying the specific recording session that just started. Pass to `tuple capture show --recording ` to read exactly this session. |
### Call capture complete
`call-capture-complete`
Fired when a call capture finishes, either because the call ended or capture was disabled. Each started/complete pair is scoped to one recording session; use `TUPLE_TRIGGER_RECORDING_ID` so a summarizer trigger operates on that session only and doesn't double-summarize a call whose capture was restarted.
| Argument | Details |
| - | - |
| `TUPLE_TRIGGER_CALL_ID` | The ID of the call this capture belongs to. |
| `TUPLE_TRIGGER_RECORDING_ID` | A UUID identifying the specific recording session that just finished. Pass to `tuple capture show --recording ` to read exactly this session's records. |
A minimal `call-capture-complete` handler that exports just the session that finished:
```sh theme={null}
#!/bin/sh
"$TUPLE_TRIGGER_CLI" capture export "$HOME/Documents/captures/$TUPLE_TRIGGER_RECORDING_ID.jsonl" \
--recording "$TUPLE_TRIGGER_RECORDING_ID"
```
### Room joined
`room-joined`
Fired when you or someone else joins one of your team's rooms.
| Argument | Details |
| - | - |
| `TUPLE_TRIGGER_IS_SELF` | "true" when this is being fired because you joined a room. "false" when it was someone else. |
| `TUPLE_TRIGGER_ROOM_NAME` | The name of the room being joined. |
| `TUPLE_TRIGGER_EMAIL` | The email of the person joining the room. |
| `TUPLE_TRIGGER_FULL_NAME` | The full name of the person joining the room. |
### Room left
`room-left`
Fired when you or someone else leaves one of your team's rooms.
| Argument | Details |
| - | - |
| `TUPLE_TRIGGER_IS_SELF` | "true" when this event was fired because you left a room. "false" when someone else did. |
| `TUPLE_TRIGGER_ROOM_NAME` | The name of the room being left. |
| `TUPLE_TRIGGER_EMAIL` | The email of the person leaving the room. |
| `TUPLE_TRIGGER_FULL_NAME` | The full name of the person leaving the room. |
### Screen share started
`screen-share-started`
Fired when you or someone else starts sharing their screen on a call.
| Argument | Details |
| - | - |
| `TUPLE_TRIGGER_IS_SELF` | "true" when the event was fired because you started sharing your screen. "false" when someone else did. |
| `TUPLE_TRIGGER_EMAIL` | The email of the person sharing their screen. |
| `TUPLE_TRIGGER_FULL_NAME` | The full name of the person sharing their screen. |
### Screen share ended
`screen-share-ended`
Fired when you or someone else stops sharing their screen on a call.
| Argument | Details |
| - | - |
| `TUPLE_TRIGGER_IS_SELF` | "true" when you stopped sharing your screen. "false" when someone else did. |
| `TUPLE_TRIGGER_EMAIL` | The email of the person stopping their screen share. |
| `TUPLE_TRIGGER_FULL_NAME` | The full name of the person stopping their screen share. |
### Webcam share started
`webcam-share-started`
Fired when you or someone else starts sharing their webcam on a call.
| Argument | Details |
| - | - |
| `TUPLE_TRIGGER_IS_SELF` | "true" when you started sharing your webcam. "false" when someone else did. |
| `TUPLE_TRIGGER_EMAIL` | The email of the person sharing their webcam. |
| `TUPLE_TRIGGER_FULL_NAME` | The full name of the person sharing their webcam. |
### Webcam share ended
`webcam-share-ended`
Fired when you or someone else stops sharing their webcam on a call.
| Argument | Details |
| - | - |
| `TUPLE_TRIGGER_IS_SELF` | "true" when you stopped sharing your webcam. "false" when someone else did. |
| `TUPLE_TRIGGER_EMAIL` | The email of the person no longer sharing their webcam. |
| `TUPLE_TRIGGER_FULL_NAME` | The full name of the person no longer sharing their webcam. |
### Participant joined
`participant-joined`
Fired whenever someone joins your call, whether it's a call starting, someone being added, or someone joining the room you're in.
| Argument | Details |
| - | - |
| `TUPLE_TRIGGER_EMAIL` | The email of the person that joined your call. |
| `TUPLE_TRIGGER_FULL_NAME` | The full name of the person that joined your call. |
### Participant left
`participant-left`
Fired whenever someone leaves your call.
| Argument | Details |
| - | - |
| `TUPLE_TRIGGER_EMAIL` | The email of the person that left your call. |
| `TUPLE_TRIGGER_FULL_NAME` | The full name of the person that left your call. |
# Best practices
Source: https://docs.tuple.app/triggers/best-practices
Below are a collection of best practices when developing your own triggers.
## Code organization
**Organize your code by use case.** Group scripts for a specific use case into a descriptive folder, so that all behavior for that use case is in one place.
For example:
```
~/.tuple/triggers
├── README.md
├── do-not-disturb
│ ├── call-connected
│ └── call-ended
├── clean-desktop
│ ├── screen-share-started
│ └── screen-share-stop
├── hide-messages
│ ├── screen-share-started
│ └── screen-share-stop
├── pause-spotify
│ ├── call-connected
```
As two of these triggers respond to the same two events, they could technically be in one script and live in the root directory. However, we don't recommend that approach.
Keeping triggers in separate subdirectories simplifies each file, and makes it easier to remove a set of behaviors when you don't want it anymore.
## Logging
**Log generously.** The last thing you want is to notice that one of your scripts is broken, and realize that you have no logs to go look through. All stdout and stderr from your scripts are collected in `triggers.log`, so print anything and everything that you think might be helpful when debugging a future problem.
## State persistence
**Persist state sparingly.** If you do need to persist state between triggers, we recommend using a local file in an easily parsable format like JSON. If you've broken your scripts up by use case, then you can keep this state file in the same directory as the script without worrying about overwriting it in another script.
For example:
```ruby theme={null}
#!/usr/bin/env ruby
require "json"
# Load previous state
state = File.exists?("state.json") ? JSON.parse(File.read("state.json")) : {}
# your script logic here
# Write out current state for next run
File.open("state.json", "w") { |f| f.write(state.to_json) }
```
# Building a trigger
Source: https://docs.tuple.app/triggers/building-a-trigger
Triggers live in the `~/.tuple/triggers` directory. We recommend placing each trigger you create in its own subdirectory in that location.
Let's create a new trigger that announces out loud the name of the person who is calling you:
```sh theme={null}
mkdir ~/.tuple/triggers/call-announcer
touch ~/.tuple/triggers/call-announcer/call-incoming
chmod +x ~/.tuple/triggers/call-announcer/call-incoming
```
Notice that we:
1. Created a new subdirectory for the trigger.
2. Created a file with the name of the event we want to trigger on—in this case, the `call-incoming` event, which fires whenever you receive a call.
3. Made that file executable. This is important: Tuple will only run scripts you've marked as executable.
You can author triggers in whatever programming language you're most comfortable with. We'll use bash for this example since our trigger logic is quite simple:
```sh theme={null}
#!/bin/sh
PERSON_CALLING=$TUPLE_TRIGGER_CALLER_FULL_NAME
say "${PERSON_CALLING} would like to pair with you"
```
Notice that we reference a `TUPLE_TRIGGER_CALLER_FULL_NAME` variable in this script. When Tuple calls your trigger, it will sometimes pass in useful information in the form of environment variables. You can see which variables are passed in (and their definitions) for every event in the [API reference](/triggers/api-reference).
**That's it!** Tuple will now *trigger* this code at a key lifecycle *event*. Whenever you receive an incoming call, your computer will kindly let you know who is giving you a ring.
Well, almost.
For triggers to work, they need to be enabled. You can enable triggers by going to Tuple Settings ⌘ , → **Triggers** and turning on **Enable Triggers**. Or, if you're on macOS, simply [click here](tuple://enable-triggers).
## Testing the trigger
Asking your coworker to call you over and over while you get your trigger logic right would be a drag. Instead, let's use Tuple's built-in tooling to ensure our trigger functions as expected.
Open Tuple Preferences → **Triggers** and open the Simulator by clicking on **Test Triggers**.

Find the event we're trying to trigger (`call-incoming`), select it, and click **Simulate**.

You should now be hearing your friendly host announce the fake caller.
**Running into issues? Feel free to reach out to [support@tuple.app](mailto:support@tuple.app).**
## Key takeaways
### 1. Location matters
All of your trigger code needs to live in `~/.tuple/triggers`.
We recommend you nest your code in subdirectories in order to keep scripts logically organized.
That might look like this:
```
~/.tuple/triggers
├── hide-messages
│ ├── screen-share-started
│ └── screen-share-stop
├── pause-spotify
│ ├── call-connected
└── triggers.log
```
Or, if you prefer, you can simply place all of your triggers in the root:
```
~/.tuple/triggers
├── screen-share-started
├── screen-share-stop
├── call-connected
└── triggers.log
```
### 2. Triggers must be named correctly
Every trigger filename you want executed needs to be prefixed with one of the available [lifecycle event names](/triggers/api-reference).
Here is a non-exhaustive list of some of the most common triggers:
* `call-connected` — triggered when a call connects
* `room-joined` — triggered when a participant joins a room
* `screen-share-started` — triggered when any participant shares their screen
As long as your filename starts with the trigger name, you can add whatever text you want after it:
**Acceptable**
* `call-connected` — bare name of the trigger
* `room-joined.notify-slack` — everything after `room-joined` is ignored
* `room-joined.pause-spotify` — everything after `room-joined` is ignored
Triggers with incorrect filenames will be ignored. For example:
**Not correct, will be ignored**
* `spotify.call-connected` — trigger name being used as a postfix and **not** a prefix
* `callconnected` — incorrect trigger name (should be `call-connected`)
### 3. Files must be executable
Trigger files need to be executable and **not** publicly writable. We recommend using `chmod 0755` or `chmod +x` to accomplish this.
## Next steps
Next up: useful tips for [testing and debugging](/triggers/testing-and-debugging) your triggers while you develop them.
# Security
Source: https://docs.tuple.app/triggers/security
## File permissions
Tuple will only execute triggers which are owned by the user who is running Tuple, marked as executable, and *not* publicly writable. This is done to ensure that Tuple doesn't execute a script that has been modified by an unprivileged application or piece of code on your machine.
## OS permissions
### macOS
On macOS, Tuple executes triggers from a separate XPC service so that it can maintain a separate set of OS permissions from the main Tuple application.
This means that by default, triggers have no special OS permissions unless you grant them.

Note that granting an OS permission for one trigger will grant it for all triggers.
### Installing from the web directory
Installing a trigger from the [web directory](https://tuple.app/triggers/directory?utm_source=docs) downloads it to `~/.tuple/triggers` and reveals its source in Finder so you can review it.
If triggers are off, Tuple asks what to do after installation:
* Click **Enable Triggers** to turn them on immediately.
* Click **Manage in Settings…** to open the **Triggers** preference pane without enabling them.
* Click **Not Now** to leave the trigger installed but inactive.
## Community triggers
The [directory](https://tuple.app/triggers/directory) contains triggers that have been written by other users of Tuple, and made available for convenient installation. The Tuple team reviews each submission to the directory, and makes a best effort to ensure that they are safe and correct.
To see the source code for any of the triggers listed in the directory, head over to [tupleapp/community-triggers](https://github.com/tupleapp/community-triggers) and check out the `triggers/` subdirectory.
# Submitting a trigger
Source: https://docs.tuple.app/triggers/submitting-a-trigger
If you'd like to share your trigger with other Tuple users, you can submit it to [the official directory](https://tuple.app/triggers/directory).
Community triggers that are shown in the directory live in a GitHub repository, [tupleapp/community-triggers](https://github.com/tupleapp/community-triggers).
Each trigger is reviewed by someone at Tuple and given our blessing.
## Language requirements
For your trigger to be included in the directory, it must be written in either Bash, Ruby, Python, JavaScript, or AppleScript. Other languages aren't supported at this time, but we'll gladly take suggestions—drop us an email at [support@tuple.app](mailto:support@tuple.app).
## Adding metadata
As well as your trigger's code, we need three extra things to publish it in the directory: an **icon**, a **README**, and a **`config.json`** configuration file.
### Icon
This must:
* Be in PNG format
* Exist at `assets/icon.png`
* Be exactly 512×512 pixels in size
(DALL·E is pretty good at generating these.)
### README
This must:
* Be in Markdown
* Exist at `README.md`
* Contain a description of what your trigger does, and how to use it
### `config.json`
This must be a JSON file located at `config.json` containing metadata related to your trigger that we'll show in the directory. It's a JSON file in the following format:
```json theme={null}
{
"name": "Trigger Name",
"description": "Trigger Description",
"platforms": ["macos", "windows"],
"language": "bash"
}
```
It must have the following content:
| Key | Type | Description |
| - | - | - |
| `name` | `string` | A snappy, concise name for your trigger, e.g. "Drop tables" |
| `description` | `string` | A short description of what your trigger does, e.g. "Drops all your database tables in production" |
| `platforms` | array of `macos`, `linux`, `windows` | The platforms your trigger will run on |
| `language` | one of `bash`, `python`, `nodejs`, `ruby`, `applescript` | The scripting language your trigger is written in |
## Submitting your trigger
Once you've prepared your metadata, you're ready to submit your trigger to us for review. To do that:
* Fork the [tupleapp/community-triggers](https://github.com/tupleapp/community-triggers) repository into your own GitHub account
* Add your trigger, along with its metadata, to a new folder in the `triggers` directory
* Open a pull request to merge your fork into the main repository
From there, we'll run some automated tests to make sure your trigger is valid, and then we'll review it. If everything looks good, we'll merge your pull request and your trigger will be published in the directory.
# Testing and debugging
Source: https://docs.tuple.app/triggers/testing-and-debugging
## Simulating events during development
While developing a trigger, it's likely you'll want to invoke it many times. To make this easier, we've given you the ability to simulate each of Tuple's lifecycle events populated with dummy data:

This will invoke the lifecycle event you chose and open a Terminal window displaying all relevant output.
## Debugging live triggers
Once your triggers run on actual Tuple calls, you might notice they're not behaving exactly as you'd like.
To diagnose the issue, take a look at `~/.tuple/triggers/triggers.log`. This file contains all of the output from the trigger runner, as well as any stdout/stderr from your scripts.
Here's some sample output. In the example below, we see two scripts running. The first works correctly and exits with status code 0. The second has a typo and reports the issue via `STDERR`.
```
# ~/.tuple/triggers/triggers.log
[2023-10-25T12:19:11.447] Got trigger 'screen-share-started', searching for matching user scripts
[2023-10-25T12:19:11.448] Found 2 matching scripts
[2023-10-25T12:19:11.448] Running 'screen-share-started'
[2023-10-25T12:19:11.453] Finished 'screen-share-started' with exit code: 0
[2023-10-25T12:19:11.453] Running 'clean-desktop/screen-share-started'
~/.tuple/triggers/clean-desktop/screen-share-started: line 3: defaulst: command not found
[2023-10-25T12:19:11.458] Finished 'clean-desktop/screen-share-started' with exit code: 127
etc...
```
## Triggers are not firing on macOS
Tuple runs triggers in a background helper. If macOS disables **TupleTriggers** in **System Settings → General → Login Items & Extensions**, Tuple turns the **Triggers** preference off and shows an alert.
Click **Open Login Items**, enable **TupleTriggers**, then return to Tuple and enable triggers again.
# Audio device swapping
Source: https://docs.tuple.app/troubleshooting/audio-device-swapping
**tl;dr: For everyday audio device swapping, you probably want to use the macOS controls (Settings > Sound) rather than the dropdowns in Tuple's preferences. (You can do this quickly by Option-clicking the speaker icon in your menu bar.)**
A potentially-confusing caveat applies when setting your audio device in Tuple's preferences. Imagine you have your Airpods set as your output in the macOS Sound preferences. Now, you override those settings in Tuple's preferences and choose Bose QCIIs as the output. With these preferences, your volume up, volume down, and mute keys on your keyboard will affect the Airpods,
*not* the Bose QCIIs. This is because the keyboard controls always affect the System Default device (the one you've chosen in System Preferences > Sound).
We provide the dropdowns in our preferences to support folks with complex audio setups, such as using tools like
[Krisp](https://krisp.ai).
For most users, we recommend ensuring your audio setup uses the Mac System Default preferences:

# Audio Issues
Source: https://docs.tuple.app/troubleshooting/audio-issues
If your audio is not working with Tuple, please investigate the following:
1. Check for [conflicting audio settings](/pairing-with-tuple/audio-device-swapping).
2. Check for old audio drivers/applications that might be causing problems.
# AWDL interference
Source: https://docs.tuple.app/troubleshooting/awdl
AWDL (Apple Wireless Direct Link) powers macOS features such as AirDrop, Handoff, Sidecar, AirPlay, and Continuity. It shares your Mac's Wi-Fi radio, which can add latency, jitter, or packet loss to a Tuple call.
This applies only to macOS on Wi-Fi. A wired Ethernet call does not use the same radio.
## Why Tuple shows an AWDL warning
Tuple includes an **AWDL** item in call-quality details when AWDL is active. Because `awdl0` is active on many Macs, Tuple shows a warning only when the call is also experiencing network trouble.
## How to reduce interference
The most reliable fix is to use wired Ethernet. If you need to stay on Wi-Fi, you can temporarily disable AWDL from Terminal:
```bash theme={null}
sudo ifconfig awdl0 down
```
> [!WARNING]
>
> Disabling AWDL also disables AirDrop, Handoff, Sidecar, AirPlay, and Continuity. macOS might turn AWDL back on after a restart, network change, or use of one of those features.
If call quality remains degraded, see [Reducing latency](/troubleshooting/reducing-latency) and [Fixing connectivity issues](/troubleshooting/fixing-connectivity-issues).
# Crashes
Source: https://docs.tuple.app/troubleshooting/crashes
If Tuple is crashing during usage, please try the following:
1. Confirm that you have the [latest version](/troubleshooting/upgrading) of Tuple.
2. Restart your computer. This can fix issues with a system macOS service that can get into a bad state unrelated to Tuple.
3. If a restart did not help, make a copy of `~/Library/Preferences/app.tuple.app.plist` and send that to us at [support@tuple.app](mailto:support@tuple.app)
4. Open up the Console app and click "Start Streaming", then try to reproduce the issue. Highlight all of the logs in Console and send them to us at [support@tuple.app](mailto:support@tuple.app)
If Tuple will not open, please try the following:
1. Confirm that you have the [latest version](/troubleshooting/upgrading) of Tuple.
2. Restart your computer. This can fix issues with a system macOS service that can get into a bad state unrelated to Tuple.
3. If a restart did not help, make a copy of `~/Library/Preferences/app.tuple.app.plist` and send that to us at [support@tuple.app](mailto:support@tuple.app)
4. Run `defaults delete app.tuple.app` in the terminal, and then try to run Tuple again.
5. If there is still a problem, send output of Console app when you open Tuple to [support@tuple.app](mailto:support@tuple.app).
If Tuple is beach balling, please try the following:
1. Confirm that you have the [latest version](/troubleshooting/upgrading) of Tuple.
2. Restart your computer. This can fix issues with a system macOS service that can get into a bad state unrelated to Tuple.
3. If restarting did not fix the issue, run a process sample of Tuple while the issue is happening by opening Activity Monitor, double clicking on Tuple, and clicking "Sample" in the bottom left and send that to us at [support@tuple.app](mailto:support@tuple.app).
# Fixing Connectivity Issues
Source: https://docs.tuple.app/troubleshooting/fixing-connectivity-issues
Certain network connection states can lead to degraded performance. Below are some common ones, along with suggestions for mitigating problems that can arise from them.
## TCP
TCP (Transmission Control Protocol) is a reliable, connection-oriented protocol that guarantees data delivery by establishing a connection, checking for errors, and retransmitting lost packets in the correct order. In contrast, UDP (User Datagram Protocol) is a faster, connectionless protocol that sends data without establishing a connection or guaranteeing delivery, making it ideal for calls, where speed matters more than perfect reliability.
Tuple will utilize UDP to transmit audio, video, and screen data whenever it can. However, there are situations where UDP can't be used, so Tuple will fall back to using TCP instead. If you see that a connection is using TCP, there are a few things you can do:
* **Check firewall settings:** Restrictive firewall settings can block UDP traffic. Especially if you're in a corporate environment with restrictive network settings, it's important to ensure that your firewall is correctly configured. You can learn more about configuring your firewall [here](/troubleshooting/networking-and-firewall-issues).
* **Switch networks:** Certain networks (such as public hotspots, or tethering to your phone) might have restrictions around UDP traffic. If you suspect this is the case, try switching networks.
* **Reduce bandwidth usage:** TCP's head-of-line blocking mechanism can create significantly degraded performance in cases where there's a lot of contention for bandwidth. To mitigate this, you can conserve bandwidth by disabling your webcam, or only sharing a portion of your screen.
* **Enable UPnP on your router**: if your router supports UPnP (Universal Plug and Play), you can try to use it to automatically allow UDP traffic through. You can learn more about it [here](https://en.wikipedia.org/wiki/Universal_Plug_and_Play).
## TURN
TURN (Traversal Using Relays around NAT) is a protocol that uses relay servers to forward traffic between peers when direct peer-to-peer connections fail. Instead of connecting directly to each other, both peers connect to the TURN server, which acts as an intermediary to relay all audio, video, and data between them. Tuple will attempt to use peer-to-peer connections for calls of 3 or fewer; if those fail, it will use TURN as a fallback.
If you see that TURN is being used on a call, you can try the following:
* **Check firewall settings:** Restrictive firewall settings can block peer connections. You can learn more about configuring your firewall [here](/troubleshooting/networking-and-firewall-issues).
* **Switch networks:** Certain networks (such as public hotspots, or tethering to your phone) might also have restrictions around establishing peer connections. If you suspect this is the case, try switching networks.
* **Enable UPnP on your router**: if your router supports UPnP (Universal Plug and Play), you can try to use it to automatically allow peer connections. You can learn more about it [here](https://en.wikipedia.org/wiki/Universal_Plug_and_Play).
# High CPU usage
Source: https://docs.tuple.app/troubleshooting/high-cpu-usage
If you are consistently seeing higher CPU usage numbers please:
1. Quit and restart Tuple.
2. Restart your computer. This can fix issues with a system macOS service that can get into a bad state unrelated to Tuple.
If you continue to see issues, please help us diagnose your issues by gathering the following items for us:
1. Filter Activity Monitor by "Tuple," open the **CPU** tab, and send a screenshot to [support@tuple.app](mailto:support@tuple.app).
2. Run a process sample on the "Tuple" process by double-clicking it in Activity Monitor, press the "Sample" button in the bottom left, then send that to [support@tuple.app](mailto:support@tuple.app).
# Minimum Disk Space Requirements
Source: https://docs.tuple.app/troubleshooting/minimum-disk-space-requirements
### TL;DR
Tuple needs at least **32 GB** of free disk space in order to operate correctly. Without this much space available, screen sharing sessions may terminate unexpectedly. If you've encountered an error where screen sharing terminated due to low space, you might also have to restart your computer to get Tuple to continue to work properly.
### Why?
On macOS, Tuple uses ScreenCaptureKit to capture your screen. ScreenCaptureKit is an API provided by Apple which handles screen capturing in a separate process. For this to work efficiently, it needs to be able to share memory with Tuple.
Tuple does not record your screen or write any intermediate files to disk, but it appears that there are cache files used internally by macOS in order to provide Tuple with image data when we queue data for encoding on the CPU. If `replayd`, the daemon on macOS responsible for doing this, runs out of disk space when writing its cache, the process will terminate its connection to Tuple prematurely.
This causes other strange side effects, too: macOS may still think screen recording is active even after Tuple is terminated (the side effects of this appear to be worse on macOS 14). If Tuple catches this error while you're sharing your screen, it will attempt to restart `replayd` - however, in the event that it's unable to do this, you'll also see an error message telling you to restart your machine. Doing so should get `replayd` back into a good state.
Unfortunately, we do not have control over this behavior on macOS -- the best thing we can do is side step the issue by recommending that you have at least **32 GB** of free disk space.
If you've followed our suggestions and still experience issues, please reach out to us with your computer's specs. We could use your help fine tuning our heuristics!
# Networking and Firewall Issues
Source: https://docs.tuple.app/troubleshooting/networking-and-firewall-issues
Tuple needs to be able to access various resources. If you are using a VPN, or have a particularly strict firewall, Tuple may appear degraded. Please verify that Tuple has access to the following:
### 1. Tuple API Backend
Tuple needs to be able to access our API for authentication and user list population. Please verify Tuple can access:
* [production.tuple.app](http://production.tuple.app)
### 2. TURN Relay Servers
When it's not possible to obtain a peer-to-peer connection through local or public networks, Tuple uses Cloudflare to route media data through TURN servers. Please verify Tuple can access Cloudflare's [current IP addresses](https://developers.cloudflare.com/realtime/turn/faq/#i-need-to-allowlist-whitelist-cloudflare-realtime-turn-ip-addresses-which-ip-addresses-should-i-use).
### 3. Signaling servers
Tuple uses signaling to facilitate the initiation of calls between peers and to provide availability (active/inactive/busy) status updates to clients. Please verify Tuple can access:
* tuple-production.firebaseio.com
* production.stream.tuple.app
* securetoken.googleapis.com
* [www.googleapis.com](http://www.googleapis.com)
### 4. STUN servers
Tuple uses STUN to obtain a peer-to-peer connection through local or public networks. Please verify Tuple can access:
* stun.l.google.com
* stun1.l.google.com
* [stun2.l.google.com](http://stun2.l.google.com)
### 5. Background updates, Logs, Analytics, and Crash reporting
When it can, Tuple tries to do background app updates. Tuple also monitors certain events and analytics data in order to constantly improve performance. Please verify Tuple can access:
* [d32ifkf9k9ezcg.cloudfront.net](http://d32ifkf9k9ezcg.cloudfront.net)
* [ingest.sentry.io](http://ingest.sentry.io/)
* [api.mixpanel.com](http://api.mixpanel.com)
* [graphite-prod-10-prod-us-central-0.grafana.net/](http://graphite-prod-10-prod-us-central-0.grafana.net/)
* [logs.us-east-1.amazonaws.com](http://logs.us-east-1.amazonaws.com)
### 6. Ports for peer-to-peer Traffic
If allowed, Tuple (using WebRTC) will create peer-to-peer connections. The connections will be UDP or TCP traffic, but the ports used are dynamic.
Here are some firewall rules that are recommended for using WebRTC service:
*Minimum Requirement:* TCP ports 80 and 443 are open. Some firewall rules only allow for TCP traffic over port 443, make sure that all traffic can pass over this port.
*Best Experience:* In addition to the minimum requirements being met, we recommend that UDP ports 1025 - 65535 be open.
*Explicit Firewall rules for your IT department:*
443/tcp ALLOW Anywhere
80/tcp ALLOW Anywhere
53/udp ALLOW Anywhere
443/tcp (v6) ALLOW Anywhere (v6)
80/tcp (v6) ALLOW Anywhere (v6)
53/udp (v6) ALLOW Anywhere (v6)
53/udp ALLOW OUT Anywhere
80/tcp ALLOW OUT Anywhere
443/tcp ALLOW OUT Anywhere
443/udp ALLOW OUT Anywhere
53/udp (v6) ALLOW OUT Anywhere (v6)
80/tcp (v6) ALLOW OUT Anywhere (v6)
443/tcp (v6) ALLOW OUT Anywhere (v6)
443/udp (v6) ALLOW OUT Anywhere (v6)
## Proxies
On macOS, Tuple uses the proxy settings in **System Settings** > **Network**, including proxy auto-configuration (PAC) files. This support requires Tuple 3.3.5 or later.
On Windows, Tuple uses your Windows proxy settings, including PAC files. This support requires Tuple 2.0.10 or later.
Tuple sends this traffic through the proxy:
* Sign-in and the Tuple API
* The signaling connection that loads your contacts and starts calls
* TURN relay traffic over TCP and TLS
Call media between participants doesn't go through the proxy. Tuple sends media peer-to-peer or through TURN over UDP when your network allows it. If only proxied traffic can leave your network, calls fall back to TURN over TCP or TLS through the proxy. This fallback can add latency.
Keep these limits in mind:
* Tuple supports HTTP and HTTPS proxies. It doesn't support SOCKS proxies or proxies that require a username and password.
* Your proxy must allow `CONNECT` requests to the TURN relay servers listed above.
* If your proxy inspects TLS traffic, install your organization's root certificate in your Mac's keychain and trust it. Tuple accepts TURN servers that your Mac trusts.
* If a PAC file can't be loaded or doesn't answer within 10 seconds, Tuple connects directly.
Linux doesn't have the same proxy support.
## VPN and Firewall Related Lag
Tuple calls are peer-to-peer connections, and some VPNs can cause network traffic to be routed through the internet very inefficiently. Please ensure your VPN settings do not cause this:
* Pick a VPN endpoint that is in a more local geographic location to the participants on the call.
* Ensure that the VPN is allowing UDP traffic. If possible, set a VPN configuration which would avoid sending this traffic through the VPN.
* Updating your firewall to bypass SSL decryption will prevent unnecessary added lag.
* Allow a reasonable MTU (Maximum Transmission Unit) for streaming video.
* Review any intelligent filtering software in use to ensure it's not affecting packet transmission.
### If Tuple is stuck "Connecting..."
Tuple can get stuck connecting when you're using a VPN. If Tuple was previously working, please verify that your VPN settings have not changed.
If you have ruled out a VPN settings change as the root cause, please:
1. Confirm that you have the [latest version](/troubleshooting/upgrading) of Tuple
2. Confirm that Tuple has access to the Tuple API Backend (listed above).
If your network requires a proxy, confirm it's set in your Mac's network settings. See [Proxies](#proxies).
3. Restart your computer. This can fix issues with a system macOS service that can get into a bad state unrelated to Tuple
4. If restarting did not fix the issue, run a process sample of Tuple while the issue is happening by opening Activity Monitor, double clicking on Tuple, and clicking "Sample" in the bottom left and send that to us at [support@tuple.app](mailto:support@tuple.app).
# Not receiving notifications
Source: https://docs.tuple.app/troubleshooting/not-receiving-notifications
Having trouble getting Tuple notifications to show up on macOS?
Navigate to
**System Settings > Notifications > Tuple**. Your settings should look something like this:

Then you should see notifications in the center, such as one like this if you miss a Tuple call:

If you are still not seeing notifications, check that the following setting is enabled at the bottom of the profile in
**System Settings > Notifications > The app you want to receive notifications for:**

# Preventing Launch at Login
Source: https://docs.tuple.app/troubleshooting/preventing-launch-at-login
Turning off "Launch at login" in your [General preferences](/application-preferences/macos-preferences-general) should prevent Tuple from launching on log in. If you find that Tuple is continuing to launch, there may be something else on your machine launching the application.
#### On macOS:
Make sure that under *System Preferences -> Users & Groups -> Login Items*, Tuple doesn't exist in that list. Make sure that's true for all other users on that computer too (though only root users should make a difference, let's make very sure Tuple isn't getting started some place we don't expect!).
Check to see if Tuple is in the launchctl items. In terminal run:
```
launchctl list | grep -i tuple
```
You can then remove the Tuple launch item by running:
```
launchctl remove app.tuple.app-LaunchAtLoginHelper
```
# Quiet microphone on Windows
Source: https://docs.tuple.app/troubleshooting/quiet-microphone-on-windows
Troubleshoot low microphone volume when using Tuple on Windows.
If others on your call can barely hear you, the most likely cause is a low input level on your microphone. Tuple on Windows relies on the system-level mic gain and cannot boost it directly.
Work through these steps to diagnose and fix the issue.
## Check your Windows input volume
1. Open **Settings > System > Sound**.
2. Under **Input**, select the microphone you are using.
3. Drag the **Volume** slider to an appropriate level (80-100% is a good starting point).
## Confirm the correct input device is selected
Make sure both Windows and Tuple agree on which microphone to use.
1. In Tuple, open **Settings** (`ctrl+,`) and select the **Audio** tab.
2. Verify the **Input Device** is set to **System Default**, or explicitly set it to the microphone you want to use.
3. In Windows **Settings > System > Sound**, confirm the same device is set as the default input.
If Tuple is set to a specific device that differs from the Windows default, system volume controls and sliders will affect the default device rather than the one Tuple is using. See [Audio preferences on Windows](/application-preferences/windows-preferences-audio) for details.
## Verify microphone privacy permissions
Windows can block apps from accessing the microphone entirely.
1. Open **Settings > Privacy & security > Microphone**.
2. Make sure **Microphone access** is turned on.
3. Confirm that **Let desktop apps access your microphone** is enabled.
## Test your microphone before joining a call
Before joining a call, verify your mic is working at the system level. Open **Settings > System > Sound** and speak into your microphone. The input level indicator next to your device should respond clearly. If it barely moves, your input volume is still too low.
## Still too quiet?
If you have followed every step above and your audio is still quiet:
* Try a different microphone to rule out a hardware issue.
* Check whether your microphone manufacturer provides a companion app with its own gain control.
* Contact [support@tuple.app](mailto:support@tuple.app) with your Tuple version and microphone model so we can investigate further.
# Recording on Tuple
Source: https://docs.tuple.app/troubleshooting/recording-on-tuple
For screen recording or transcription tools, see the options below.
Remember to get consent from others in your pairing session before recording them!
## Transcribe your session audio
### Superwhisper
If you're a Superwhisper user, you can use a dedicated Tuple mode with a specialized prompt for the agent of your choice to [summarize your pairing session](https://superwhisper.com/documentation/meeting-notes). It includes nice details like speaker detection, but less capabilities directly in the tool for things like searching your notes or asking questions.
### Granola
If you're a [Granola](https://www.granola.ai/) user, you can capture the audio output and input from your system and summarize what you and your pair were discussing. You can ask questions about the call, share with your team, etc.
### Notion AI
If you're a Notion user, you can activate [their AI Meeting Notes feature](https://www.notion.com/help/ai-meeting-notes), which will capture the audio output and input from your system and summarize what you and your pair were discussing. You can ask questions of the transcript and store it alongside your other meeting notes.
## Manually record a pairing session
### QuickTime
If you want the simplest screen recording solution, check out [QuickTime](https://support.apple.com/guide/quicktime-player/welcome/mac). Macs ship with this program pre-installed, so you can easily create a screen recording without installing separate software. For a recording with audio, make sure to select your microphone input before you hit record on a new recording, or you will end up without any audio at all :)
As a heads up, though Tuple tries very hard not to turn your computer into a fan while you’re on a call, we have had reports that QuickTime can cause lift-off after a while during longer recordings.
### ScreenFlow
If you’d like to use a more advanced screen recording software, and especially if you’d like to have multiple audio inputs in your screen recording, check out [ScreenFlow](https://www.telestream.net/screenflow/overview.htm).
You can get a free trial which allows you to create unlimited recordings without a license, but the recordings will be watermarked.
## Highlight a feature or bug for our support team
### QuickTime
You can also create a screen recording using [QuickTime](https://support.apple.com/guide/quicktime-player/welcome/mac) in order to email it to our [support](mailto:support@tuple.app). If you have issues with email attachment size limitation, check out other solutions below.
### Loom
You can use [Loom](https://www.loom.com/)’s free tier to easily record and send our [support](mailto:support@tuple.app) a link to a video without having to worry about email upload size limitations.
### CleanShot X
If you already have a [CleanShot](https://cleanshot.com/) license, you can make use of their excellent recording functionality. Unfortunately, they do not have a free tier at the moment.
# Reducing latency
Source: https://docs.tuple.app/troubleshooting/reducing-latency
The internet as a whole is struggling with the increased demand for video streaming; lag and latency on Tuple calls is most often caused by strained internet connections.
Most degraded internet related issues can be fixed by taking the following steps:
1. Set a lower [stream resolution](/pairing-with-tuple/interacting-with-a-shared-screen#stream-resolution) and or [webcam resolution](/application-preferences/macos-preferences-webcam) to reduce the number of bits being sent and hopefully reduce local congestion.
2. Use a wired ethernet connection. This will reduce packet loss significantly which can really improve Tuple's performance. WiFi setups can be quite noisy and introduce a lot of local packet loss. If you can't use an ethernet connection, make sure you are as close as possible to the WiFi access point. If you're nearby other WiFi networks, you might be competing on the same channel which can lead to dropped packets. Depending on your router software, you may be able to manually change to a different channel which might not be as crowded.
3. Ensure all computers are plugged into a power supply. MacBooks sometimes throttle CPU usage when running on battery power. We're judicious about our CPU utilization, but doing a call while on battery can affect your latency.
4. Pick either screen sharing or webcam sharing instead of both at the same time to reduce bits being sent and avoid congestion.
5. Drop your system resolution before your call. This tip is particularly salient if your guest has a much smaller screen than you. If you're on a 5K iMac and they're on a 12" Macbook, not only will sending that many pixels cause higher latency, but the text on your guest's side will be near-unreadable.
**Eliminate competing bandwidth consumers**
Bandwidth drops can cause latency, and are usually caused by other programs or other people using the same network. For instance, an automated network backup that always causes available bandwidth to drop dramatically.
You can get an idea of what's using bandwidth on your computer with the Network tab of the built-in Activity Monitor app, and you should be able to get an idea of what's using your entire network bandwidth (if you have other people or devices on your network) by visiting your router's settings page.
**Using Tuple with a VPN**
Latency can also occur when you are pairing over a VPN, or through a particularly strict firewall. VPNs can introduce latency various ways, especially through how they route the calls. Read more about troubleshooting your VPN setup [here](/troubleshooting/networking-and-firewall-issues).
**But my internet speed test says my connection is ok?**
Many internet speed tests only test upload and download speed serially, instead of in parallel. While you are on a Tuple call, you are both uploading and downloading simultaneously. Some internet connections can be deeply affected by doing both at once. Please make sure to try out a test that simulates uploading and downloading in parallel for a more accurate result.
If you're on macOS Monterey or above, for example, you can check out the networkQuality command line tool:

**But it works on Zoom?**
Tuple uses peer-to-peer connections, instead of going through an intermediate server, so call quality can be affected by how the call is routed which is outside of Tuple's control. It's very likely the connection is going over a completely different network than Zoom.
# Supported platforms
Source: https://docs.tuple.app/troubleshooting/supported-platforms
### Currently supported
Tuple fully supports the two most recent versions of **macOS**. The third most recent version is considered "deprecated", which means that we do not fix bugs exclusively associated with this version. Any older versions are considered "unsupported", which means that they will not receive automatic updates, may break without notice, and may not be able to run Tuple at all.
Currently, our support for macOS is as follows:
* macOS 27 (Golden Gate): **Supported**
* macOS 26 (Tahoe): **Supported**
* macOS 15 (Sequoia): **Deprecated**
* macOS 14 and lower: **Unsupported**
Apple Silicon (MX chips) are fully supported. Details on getting started with macOS can be found [here](/getting-started).
### In beta
**Tuple for Windows** is currently in public beta. We support Windows 10 and 11 on `x86_64`.
**Note:** Windows builds on `Arm64` aren't officially supported, but our provided builds *might* work. Use at your own risk - certain things might not work as expected.
### In alpha
**Tuple for Linux** is currently in alpha and under active development. The Linux client has limited functionality today and is primarily command-line driven.
See [the Linux page](https://tuple.app/linux?utm_source=docs) for the latest install command and architecture details.
**The Tuple web client** is currently in alpha and enabled per team. It runs in a current version of Chrome, Edge, Safari, or Firefox on any desktop or mobile OS, and covers audio, webcam, and watching a shared screen. See [Joining a call from your browser](/pairing-with-tuple/joining-a-call-from-your-browser).
# Upgrading
Source: https://docs.tuple.app/troubleshooting/upgrading
If you start a call on an outdated version, you will be prompted to upgrade, which is a simple one-click process.
When upgrading, you have the option to upgrade automatically in the future, which will happen silently when updates are shipped.
You can trigger a manual upgrade by clicking on your avatar to bring up the menu and selecting "Check for updates":

The current version of your client will be displayed to the right of "Check for updates".
You can also view the current version for your Tuple client by selecting **About Tuple** from this menu. On macOS, this opens the **About** pane in Settings, which shows your version and has its own **Check for Updates** button.
If Tuple will not open and you need to check your installed version, you can right click on the Application icon in a finder window, select Get Info, and then look for the Version number.